(Warning: some post contents may be offensive to vegetarians (except me), PETA, tool lovers, and those who have no sense of humor).
A few years ago, my in-laws decorated their house for Christmas.
The Christmas Ladder!
Doug Deer!
Complete with red shiny nose.
And the rarely seen act of nature never before caught on video... the mating of the mechanical deer:
These were not allowed into the front yard, sadly, but have made appearances at several Christmas Parties.
Merry Christmas, everyone!
Friday, December 19, 2008
Thursday, December 18, 2008
A Look Back at Old Resolutions 2008
Last January, I posted my goals for the year. How have I done this year? There have been some sidetracks, some delayed projects, and some re-prioritizing. Discovering the brick under the siding was unexpected, and sucked up much of our remodeling money this year, putting other projects on the back burner. We've still accomplished quite a bit on our list, though!
1) Finish Bathroom- Not Yet!
Well... we've installed a light, hung the door, and scraped part of the wall (leading visitors to query us over our "interesting" wall covering). I'm not sure I like the light... but it's there for now!
2) Replace Front and Back Door- 1/2 Done
We've replaced the back door, and have stripped the new front door and bought a new storm. I really wanted to get it in before this winter, but it's too cold to paint outside now.
3) Finish Landscaping Backyard (and Plant) NO!
All we did in the back yard this summer was finish the firepit and build a hammock stand.
4) Finish Master Bedroom- Um... NO!
Didn't do a single thing except create a myriad of plans and dream of including a bathroom!
5) Finish Laundry Room- No
We did hang the kitchen cabinets... but that is all!
6) Wood Flooring No
We didn't lay the flooring we have... but I did discover tongue and groove flooring under our carpet.
7) Replace Trim No
We've looked at trim styles and talked about what we want... is that close?
8) Research and Plan Exterior Paint/Stucco/Re-Siding DONE!
We sure "resided" the house! No more asbestos siding for us... and it's DONE!
9) Dog Door No
Somehow this just didn't seem that important... and without a deck in the back yard, it didn't seem that possible yet.
10) Compost Piles Done!
Here's our compost piles!
As we face the next year, we will make a new list... some things left unaccomplished will remain, but new priorities have been made. And, of course, we will expect the unexpected!
Tuesday, December 16, 2008
BRRRR! (And Our Programmable Thermostat)
It is SO COLD here! BRRRRR! In honor of the cold, I'm reposting a very old post (that nobody probably saw before!). I've seen some discussion over whether lowering your heat really helps save money... these numbers prove it does (on a forced air heating system, at least).
One of the first things we did to our house was install a programmable thermostat. We chose this Honeywell 5-2 Day Programmable Thermostat. $30 later...
This is what we set the thermostat to:
Year 1: 62º (No programmable thermostat)
Year 2: 62º During the Day, 54º at Night and While Gone
Table 1, Monthly Therm Usage
Year 1, Year 2
October: 47 Therms, 30 Therms
November: 24 Therms, 19 Therms
December: 96 Therms, 75 Therms
January: 113 Therms, 63 Therms
February: 69 Therms, 71 Therms
March: 72 Therms, 50 Therms
October: 47 Therms, 30 Therms
November: 24 Therms, 19 Therms
December: 96 Therms, 75 Therms
January: 113 Therms, 63 Therms
February: 69 Therms, 71 Therms
March: 72 Therms, 50 Therms
Average: 70.16, 51.33
Total: 421 Therms, 308 Therms
Table 2, Monthly Outside Temperature
Year 1, Year 2
October: 53º, 56º
November: 44º, 46º
December: 32º, 29º
January: 29º, 38º
February: 37º, 29º
March: 39º, 36º
Average: 39º, 39º
We saved 19 therms a month, simply by installing a programmable thermostat! Installing the thermostat took about 20 minutes of our lives. WELL worth it! We have definitely saved our $30 many times over. Now that we have made the house more efficient in other ways, I'm looking for even more savings this year!
Thursday, December 11, 2008
I've Been Making Gifts...
and I'm not telling! You don't get to see, because certain someones read my blog and I hate ruining Christmas surprises. I've been spending the last week hard at work on Christmas presents for family, friends, and co-workers... so there are no house updates. I'll post the present ideas in January... they would be good for birthdays and such, or for filing for next year.
I'd encourage everyone to make something for a present this year. Putting a bit of yourself in a present makes it that much more special, and you can be sure it's exactly what you want to give. It can be as simple as homemade candy or as complex as a hand knitted scarf. Perhaps framed pictures of a loved one's favorite things. Use your imagination!
For those that don't have the time to create something by hand, be sure to check out Etsy. If you order in the next few days, it will still get here by Christmas!
Thursday, December 4, 2008
Door Swap
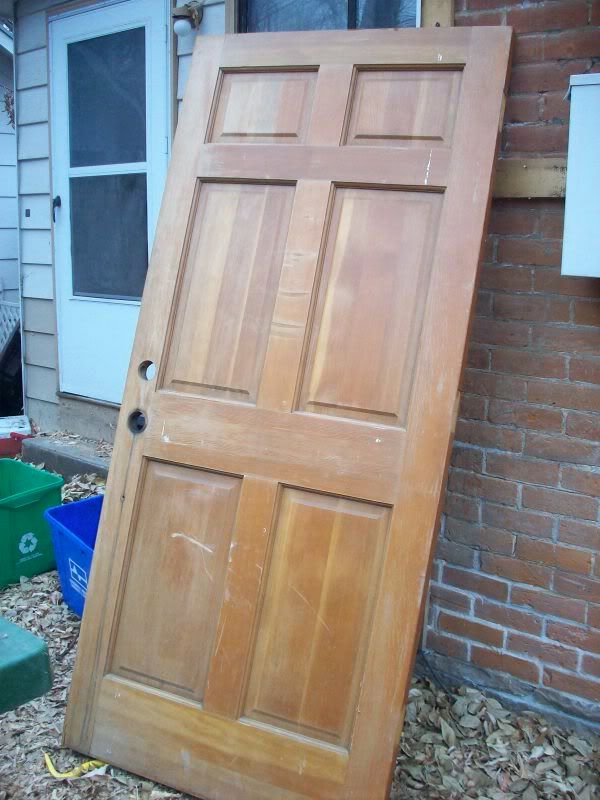
We realized last winter that our back door was a hollow core door masquerading as a back door. Not good for heat loss or efficiency! I took a trip to the Habitat ReStore and bought the cheapest solid door I could find as a replacement, as we intend on removing the doorway in the remodel (if it ever gets done).
It's not a bad little door... $30, and solid wood. Looks a lot better than the flat paneled hollow core door!
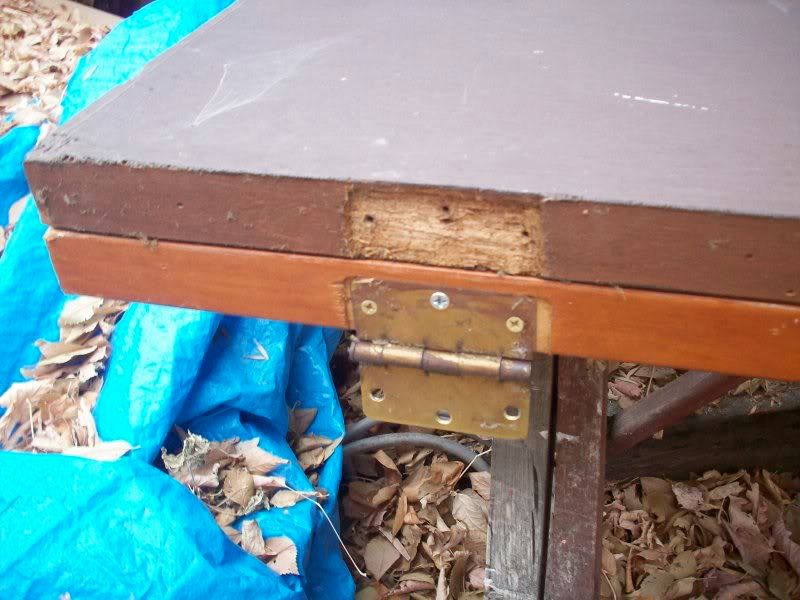
To match the hinges up, I stacked the doors on my "workbench" (picnic table). This allowed me to match the positioning exactly.
I reused the existing hinges, though they may not be beefy enough for this door (which is very heavy). The door is installed... and it does feel a little warmer in the laundry room now.
Tuesday, December 2, 2008
Christmas is Coming...
and the decorations are up!
On Saturday, we bought a 5 foot Noble Fir, made steaming mugs of hot cocoa (and Kahlua), and set to decorating the tree with our box of ornaments:
We had just enough tree for the ornaments!
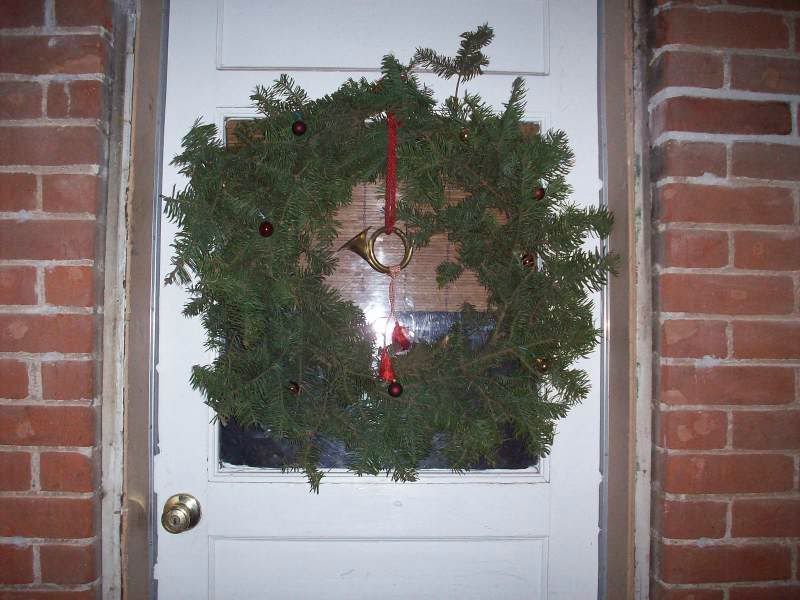
I created a wreath out of a few extra branches, a hunting horn, and some small glass balls:
The wreath looks especially nice on our brick house!
Our stockings...
... hung by the furnace with care.
Here's looking forward to a wonderful Christmas season, filled with love and care!
Tuesday, November 25, 2008
Window Trim Up...
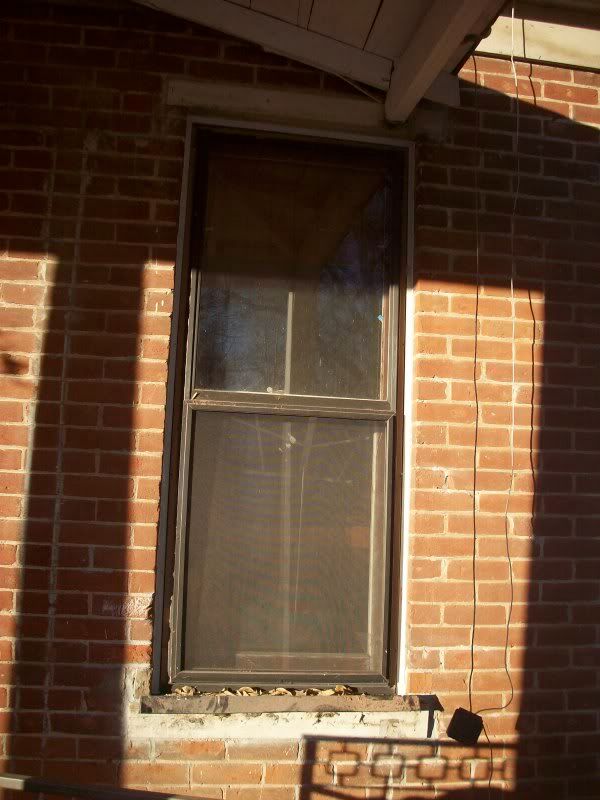
The window trim is up and caulked. It's amazing how much better it looks even painted white! Without the trim, the windows looked like sunken eye sockets.
It was harder than expected to nail the trim in. It would have been much easier with a nail gun, but we are cheap and muscled through with 20 ounce hammers and 6D finish nails. Also, I learned how much I hate caulk AND sticky fingers. The only way to tool the caulk against the very uneven brick was to use a finger; this felt like scraping down concrete with my fingertip all day. It's still raw.
Painting, and caulking between the trim and storm with temporary, removable caulk is next. I'll be painting the trim white, as next spring, we'll take down all the storms, rehab the windows, put decorative molding on top of the trim, replace the storms, and paint! Still no decision on paint colors, though that might be decided soon when we paint the new front door!
Monday, November 24, 2008
Window Gaps, or HOW DID I NOT SEE THIS?
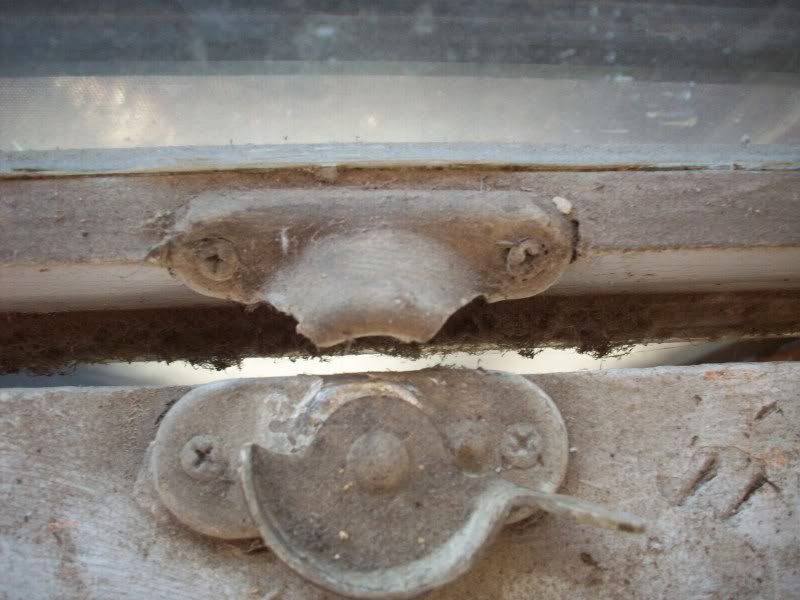
We've been installing the exterior window trim this week, and so have been paying a lot of up close and personal attention to the windows. While working on the kitchen window (a window that we have never opened and that is partially blocked by a kitchen cart), I noticed something peculiar:
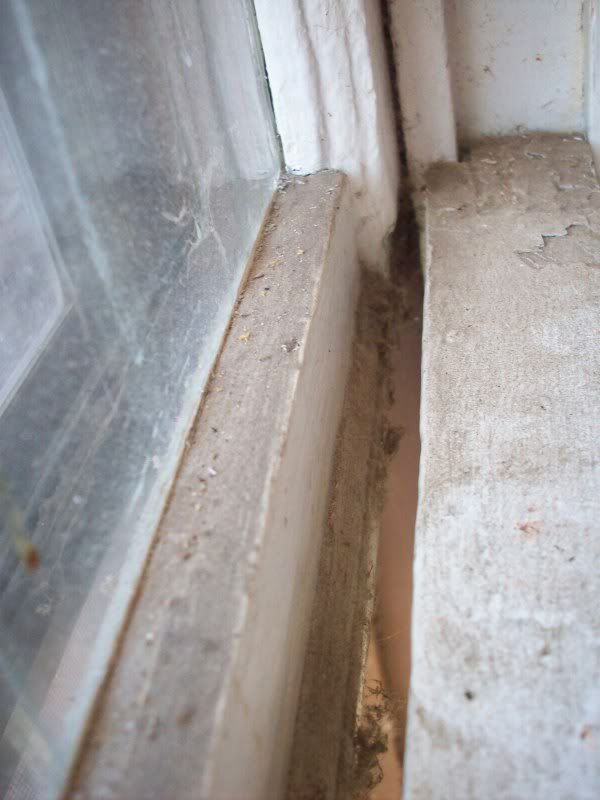
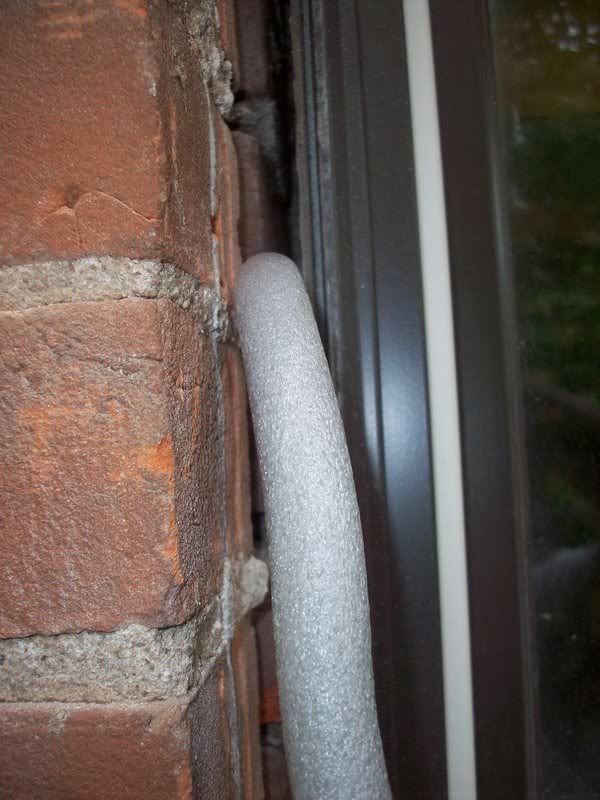
Yes, that IS a half inch wide gap between the sashes. And yes, it is there even when the lock is turned. And yes, I could feel the cold air rushing out of it into our kitchen, even on a 50 degree day! What in the world is it doing there?
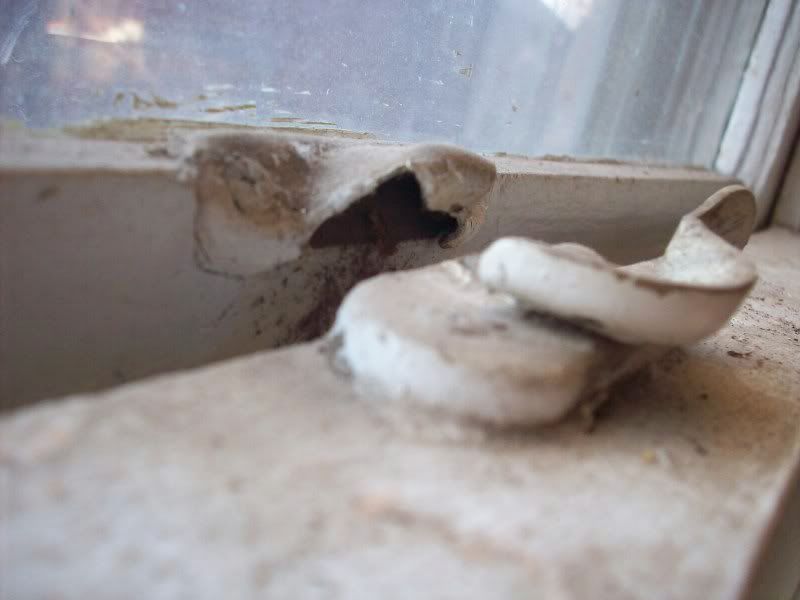
A better look at the sash lock:
The top part has been mortised into the top sash at a diagonal. How odd! It almost appears that the entire bottom of the top sash is a replacement in the wrong size... but why?
I stuffed some of that foam insulation tubing into the gap; any better ideas for winter? And.. what in the world should I do about that window in the long run? My goals are to rehab the windows... but this particular window is throwing quite a curve on many levels. (We discovered today that the frame is rotting in places; the bottom sash has metal squares bolted onto it for stability, so it is obviously a little unsound there; and no this!).
Friday, November 21, 2008
A New (Old) Storm Door
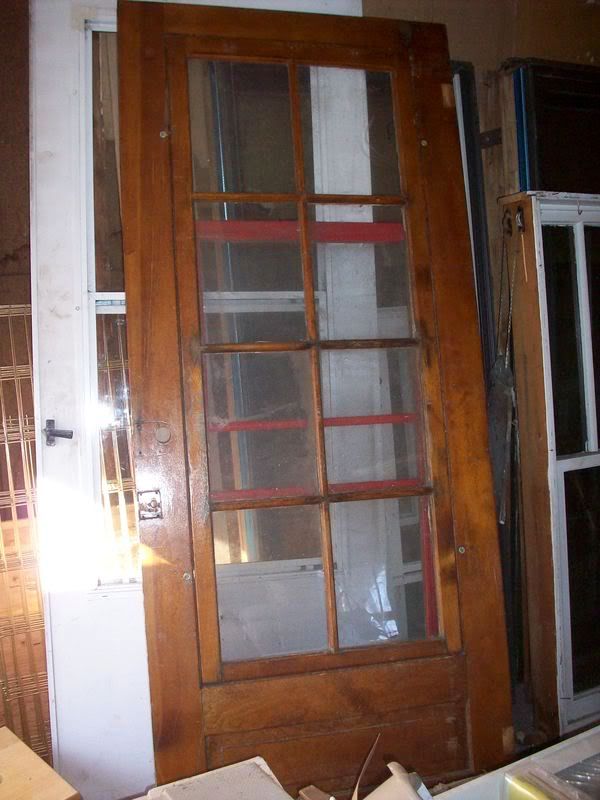
Picked up this storm door a few weeks ago; it needs a lot of work, but is just the right size for our odd opening.
It came with a glass storm insert AND a screen insert (the red behind the glass). One pane of glass is broken, and all of the panes need re-glazed. Part of the door needs re-glued, and the exterior side needs repainted, as the red paint is peeling and chipping. We'll leave the interior side natural. I'm excited; this should be the perfect small scale practice for reglazing our windows.
Thursday, November 20, 2008
A Gift from a Colleague
At a recent rehearsal at a fellow musician's house, I found myself admiring the doorknobs and plates in his 50's style split level. They were all different types and vintages... Victorian, Art Deco, etc. Upon inquiring, I learned that they came from some of the 90 old houses torn down by the town's hospital during expansion over the years. He works with the maintenance department, and so was part of the demo. He saved all of the lighting and hardware that he could, and used much of it in his house.
He offered me the remaining doorplates and knobs, as every door in his house had a new old knob and plate.
I'm excited... there are enough plates to do all of the doors in our house! And, the brass knobs coupled with the black jet clay knobs I have should finish our doorknobs out, too!
It looks like I will be spending some time with a crock pot removing the paint; otherwise, they seem in excellent condition. Character is re-entering our house!
Wednesday, November 19, 2008
My Little Box of Memories (A Christmas Preview)
This is my box of Christmas memories- past, present, and future. A satin Hallmark ornament from a first Christmas at 2 months old. A three year old's thumbprint mouse on a canning lid. A painstakingly painted ceramic donkey, with brushstrokes as steady as a seven year old can manage. Reindeer, angles, Santas, bells... and so much more.
It was started by my mother, who carefully saved every ornament I made, and contributed a new one every year. Each ornament is marked by the year. I can remember placing each one for the first time on the tree, carefully choosing a spot on Christmas Eve or Day. These days, both my husband and I add to the box with ornament gifts from students and each other. The box is full of love.
This box starts every Christmas season for me. In a week, we will make steaming mugs of hot chocolate, and carefully unwrap each treasured ornament. We'll reminisce about each ornament as we place it on our tree with a strand of white lights. Then we will flip the switch, sit in the glow of the twinkling tree, and celebrate the love and memories of the Christmas season.
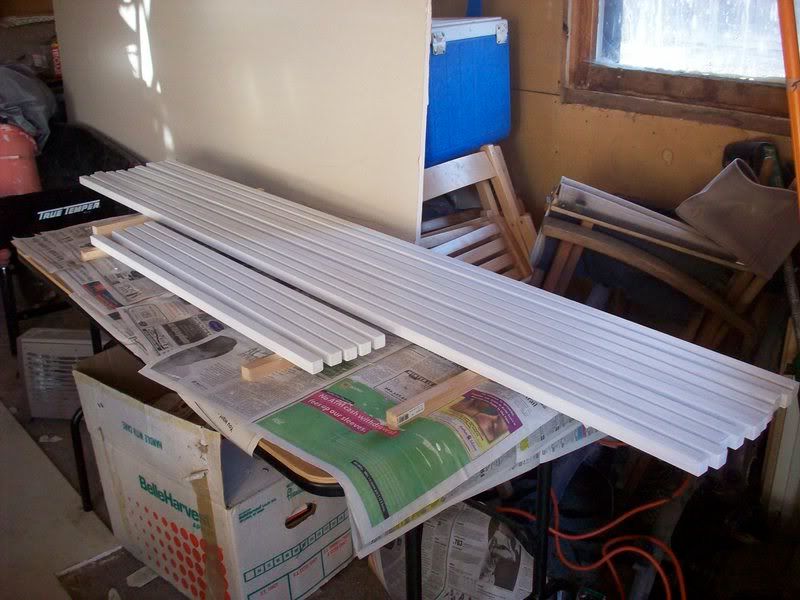
Window Trim
The plan was to have the exterior window trim finished this weekend; a nasty cold said otherwise! I still can't talk, but am feeling better.
Here's what I accomplished before falling ill:
All of the wood is cut and primed on all sides, and is ready to be installed! It is 3/4" square pine molding; we are going to "build out" the molding in a more decorative style when we paint in the spring.
We are looking at beautiful weather (for November) this weekend, so we should have it up, caulked, and painted soon!
Friday, November 14, 2008
The First Snowfall of Winter...
fell last night. It's just a light dusting on the ground and on my windshield... but it's the promise of more to come. I love snow!
Time for me to finish the window trims and get them installed and caulked! I spent a few hours cutting the wood yesterday and began priming... I'll finish priming them today (and maybe even paint them).
Thursday, November 13, 2008
Mason's Reply and the End of All This
I received a reply back; selected passages below with my comments in red:
I think the part that hurts the most is that I conciously paid MORE money to have it done in a way that would protect the house... $1000 more, in fact. I could have had the same job done for $800 using the mortar they used the second time.
Hard Life Lesson #1: Don't assume that anyone you hire to do the work won't try to cut every corner to save time and money. Don't assume they will talk with you about their choices, even if you are home while the work is going on and make yourself available several times a day. Don't assume they won't LIE to your face when cornered on their choices.
Hard Life Lesson #2: Do it yourself, or spend the same amount of time WATCHING the worker constantly.
Hard Life Lesson #3: When needing brick work redone, spend the extra money to hire the man from Denver who teaches about historic restoration in addition to DOING historic preservation only as a job. It's probably worth it, even after you pay the travel fees.
(In response to comments about our brick and mortar, we are sure that the brick is the soft oven fired variety... it is soft enough that a light scrubbing with a toothbrush removes brick. One could easily scratch it with a nail. Our mortar is white, sandy, and appears to be solely lime and sand; this is from a few different masons, and from practical experience.)
When we started this project using the sand and lime type mortar (very soft) we were lead to believe that the structure of the house was sound (NO such thing. We called HIM in to let us know what the condition of the house was).We do not have a contract that I can find anywhere; my bad. And, essentially we have no legal leg to stand on. Even though he lied to my face three times, and again in writing. We're taking the warranty and will use this as a life lesson hard won. I requested a written and signed copy of the warranty, and have filed it away. I will likely start REpointing the spots affected when we are done with the rest of the house... the warranty should hold us until then.
...on returning to complete the tuck pointing I could not in good faith use the soft mortar. You knew that we were using the mason mix product diluted with mortar color. (NO! I did NOT know you were using Mason Mix with portland cement in it. You asked me on day one if the color you had used in July was right. I told you it matched almost perfectly with the old stuff. When I asked about the difference in look on Thursday, you assured me it was a "prepackaged version of the same thing", even after I said that I had seen a portland cement type mortar bag lying around. You told me that there was no portland cement in it, and pointed to a patch on a neighboring house to show me what that would look like. )
This mortar will NOT adversely affect the brick. Also, the original estimate did not include repairing the holes created by the heli ties. At 27+ man hours I feel that we have gone above and beyond the original scope of work.
(True... I was surprised that he didn't charge us more, as I had told him to add the extra work to the estimate)
If you find that our methods are causing damage to your brick we will warranty and remedy it then. I do not feel that this will ever happen. I have have worked on other similar projects using the same methods and have never had any issues. I hope that this eases your worries.
(I am NOT eased of worries, but I will take your warranty)
I think the part that hurts the most is that I conciously paid MORE money to have it done in a way that would protect the house... $1000 more, in fact. I could have had the same job done for $800 using the mortar they used the second time.
Hard Life Lesson #1: Don't assume that anyone you hire to do the work won't try to cut every corner to save time and money. Don't assume they will talk with you about their choices, even if you are home while the work is going on and make yourself available several times a day. Don't assume they won't LIE to your face when cornered on their choices.
Hard Life Lesson #2: Do it yourself, or spend the same amount of time WATCHING the worker constantly.
Hard Life Lesson #3: When needing brick work redone, spend the extra money to hire the man from Denver who teaches about historic restoration in addition to DOING historic preservation only as a job. It's probably worth it, even after you pay the travel fees.
(In response to comments about our brick and mortar, we are sure that the brick is the soft oven fired variety... it is soft enough that a light scrubbing with a toothbrush removes brick. One could easily scratch it with a nail. Our mortar is white, sandy, and appears to be solely lime and sand; this is from a few different masons, and from practical experience.)
Monday, November 3, 2008
Dear Mr Mason
I looked up the ingredients in the Quikrete Mason Mix Type S mortar you used; it's 3-1/2 to 4-1/2 parts masonry sand, 1/2 part hydrated lime, 1 part Portland cement (by volume). There is not nearly enough lime. It's also the second hardest mortar you can buy. I've found examples of Type S mortar dried and cured, and it is grey, not white.
I'm concerned about the effect that this hard mortar will have on my brick. I'm also disappointed; I had several bids done on the house, including one by a man who wanted to use a modern mortar (such as you finished the job with). His price for the house was $600 to $800. We decided that paying the extra money was worth it to us to have the integrity of the brick ensured. Of course, that price didn't include the patching of the bricks, which does look beautiful and I could see took work to look as good as it does. I'm not seriously concerned about the chemical composition of the patches, either, as they will simply pop off if it is unsuitable.
I'm wondering what we should do about this. As it stands, I'm looking at spending next spring chipping out all of the Type S mortar and replacing it with proper mortar (and hoping that the freezing/thawing over the winter doesn't hurt my bricks first).
Thank you for your concern on this issue; I'll wait to hear from you before I send payment.
Sincerely,
Tiny Old House
Saturday, November 1, 2008
It's My Birthday!
I'm a shameless birthday promoter. I love birthdays. There is something magical about a holiday that is just for you and you alone. A celebration of life and love!
I'm another year older, perhaps another year wiser. What will happen this year? Only time will tell, and I do love a good surprise.
Happy Birthday to all November 1st babies!
I'm another year older, perhaps another year wiser. What will happen this year? Only time will tell, and I do love a good surprise.
Happy Birthday to all November 1st babies!
Friday, October 31, 2008
Darn! More Frugality and Trash Prevention
I've learned a new skill this week- darning socks! It's been on my list of things to learn, and a drawer full of holey socks coupled with the price of new ones and my desire to keep things from becoming trash forced my hand.
To darn a sock, you need a darning needle, a darning egg or other smooth round object, and darning cotton or embroidery thread. I was pleasantly surprised to discover that my grandmother's sewing kit included 4 balls of darning cotton. It's apparently not made anymore. I found this ceramic egg at the Habitat ReStore for $.50.
I've been carting a bag of socks around with me all week, darning when I have 1o minutes to wait here or there. It goes quite quickly once you get the hang of it. Here is a video on how to darn socks. It shows darning wool socks with wool, but the technique is the same for cotton and silk socks. Just use a matching thread, and a needle about as big as your threads.
Anyone else darn their socks?
Thursday, October 23, 2008
I WAS RIGHT! GRRRRRR!
It IS portland cement mortar. I just couldn't shake the feeling that the mortar "tinkled" when it dropped, that it looked smooth like modern mortar. I looked up the mortar he used: Quickrete Type S Mortar Mix. It's 3-1/2 to 4-1/2 parts masonry sand, 1/2 part hydrated lime, 1 part Portland cement (by volume). GRRRRRR!!
Now, it doesn't say portland cement anywhere on the bag... I had to do some internet sleuthing to figure out it was the wrong mortar.
I am BEYOND frustrated. BEYOND. Either the mason LIED to my face, OR he doesn't know what he's talking about.
I'm never hiring out work again.
Now, it doesn't say portland cement anywhere on the bag... I had to do some internet sleuthing to figure out it was the wrong mortar.
I am BEYOND frustrated. BEYOND. Either the mason LIED to my face, OR he doesn't know what he's talking about.
I'm never hiring out work again.
The Right Mortar and Brick Patches
I was wrong! I'll always admit when I am wrong, and wrong I am. I'm VERY happy that I am wrong this morning.
The new mortar is NOT cement based mortar. It IS a premixed lime and sand mortar, so it does look slightly different. It SHOULD cure to the same color... funny how 1 day of curing in 100 degree weather ages it faster than 3 days of 40 and 50 degree weather. Our mason was very nice and walked me through their whole process again.
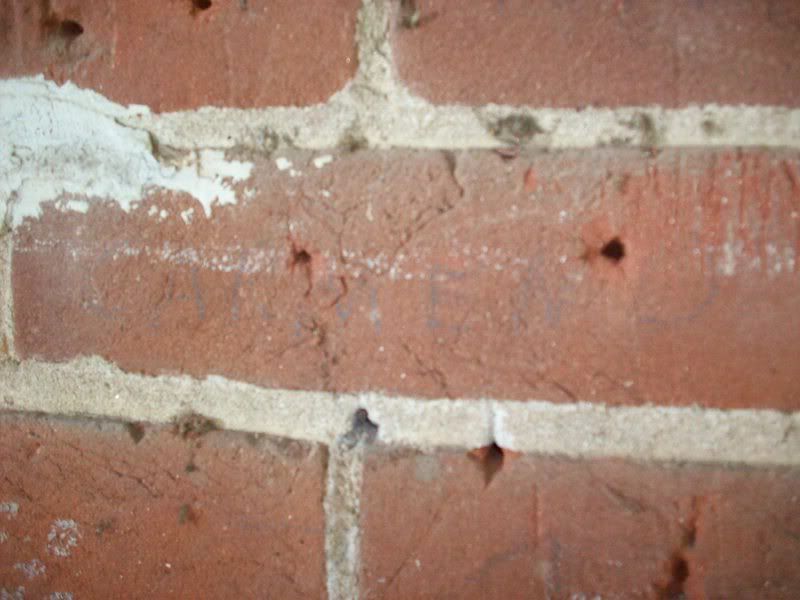
I wanted to show off the brick patches he's done on the house. Remember all of the nail holes?
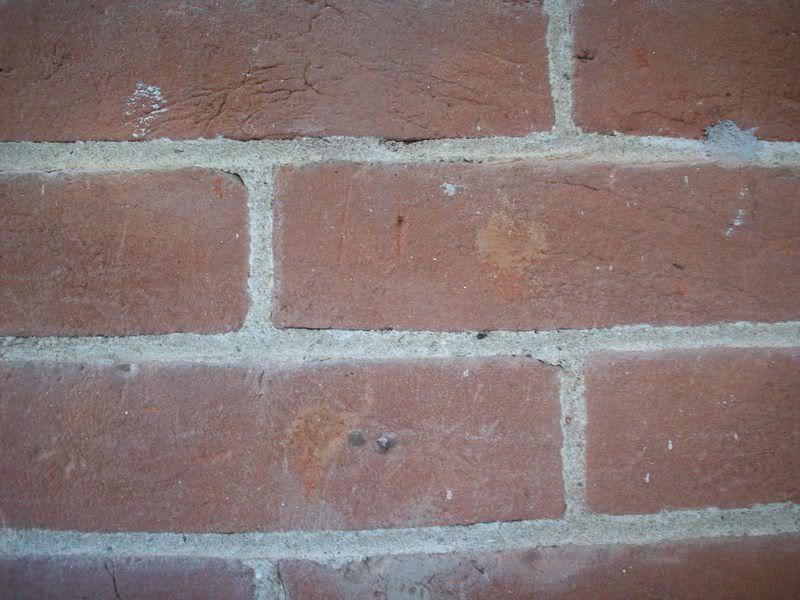
We tried many different patches, and settled on a patch made by mixing the mortar with brick dust, patching, and dusting the patch with brick dust. There are two patches in the picture below:
I'm quite happy with them. From more than 2 feet away, you can't see them at all, and from the street it looks like a different house!
Wednesday, October 22, 2008
The WRONG Mortar?
A few weeks ago we realized that there was NO way we were going to get the house sealed up for winter unless we found the money to fix the bricks around the window so that we could seal up these holes:
A few weeks ago, I called the mason whom we started the work with (and who did a FABULOUS job on the first part!). Luckily, he was able to work us in this week.
They restarted yesterday. Yesterday I came home and thought something was a "bit off" about the mortar. It didn't look quite right... it seemed way too grey and smooth. It was dark out, and the mortar was still wet, so I decided to give a better look at it in daylight:
It looks like cement based mortar. A piece of it dropped on the ground "tinkles" like cement based mortar. And, there is an empty bag of cement based mortar in the pile of things they left overnight.
I'm just sick! Not only does it look like crap up close... it will DESTROY my bricks in the long term. What kills me is that he asked me if the mortar he used last time was looking the way we wanted it! I showed him the pile of sand they used last time, and he said they would use new sand. The owner hasn't personally worked on our house... but it's the same man working on it now that worked on it in July.
I have a call into him, but don't expect to hear back until tomorrow. I don't even know what to do. I HATE confrontation, but I can't let them leave the cement mortar up there. I also can't afford to pay more to fix their mistake. I feel bad... it's two full days of labor wasted, but I need to have it taken care of. Any words of advice?
One last thing... I am NEVER hiring out ANYTHING that I care about how it's done ever again!
Sunday, October 19, 2008
Stripping Paint in the Afternoon...
We worked a bit more on the new front door today. I'd like to have it done this week, as our current front door is cracked, and in need of serious weatherstripping to make it through this next winter. You can see daylight around the edges on almost all sides. Instead of spending time with the old one, I'd rather install the new (old) one!
We worked on the exterior side today... the side with the weird paint/chalk. We used a citrus based stripper (covered with saran wrap to keep it moist) to strip the top layers of paint off of the mouldings and around the lites.
The ash tree above our "workbench" (old picnic table) decided to add some leaves for visual interest.
After we scraped the paint off with various dental tools, the head of a large nail, and a brass stripping brush, we cleaned it with mineral spirits. No picture, because it looks exactly the same in a picture; the stripper had seemingly no or little effect on the chalky bottom paint. My hunch is that it is a plaster or drywall compound spread on to smooth defects and ensure a "perfect" paint job.
That's what we did to seal up our house this weekend. It's round about and not immediate, but it should help out in the long run.
Saturday, October 18, 2008
Houseblogs.net is back up!
I'm a big nerd, but I'm very excited that houseblogs.net is back up. I hadn't realized how many blogs I read only through their service until they went down. Now I can completely fulfill my house addiction!
Monday, October 13, 2008
Finishing Our New Window- Inside
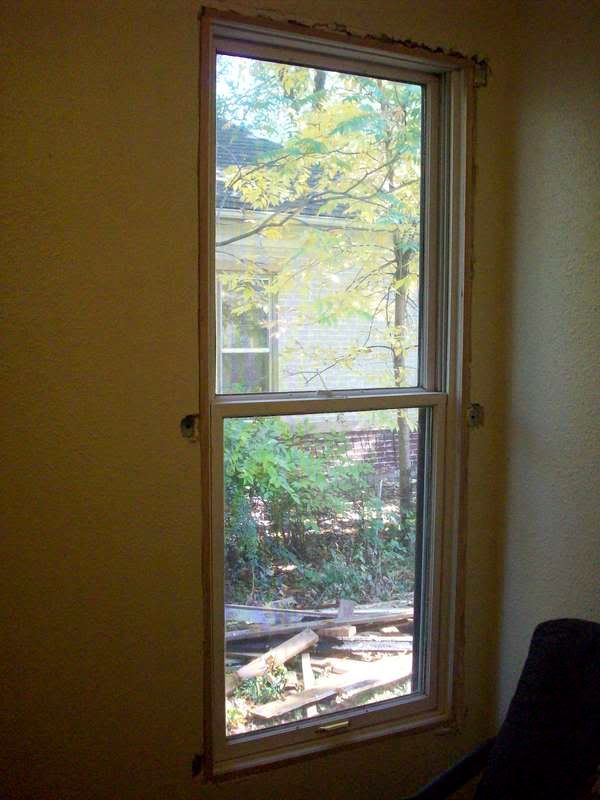
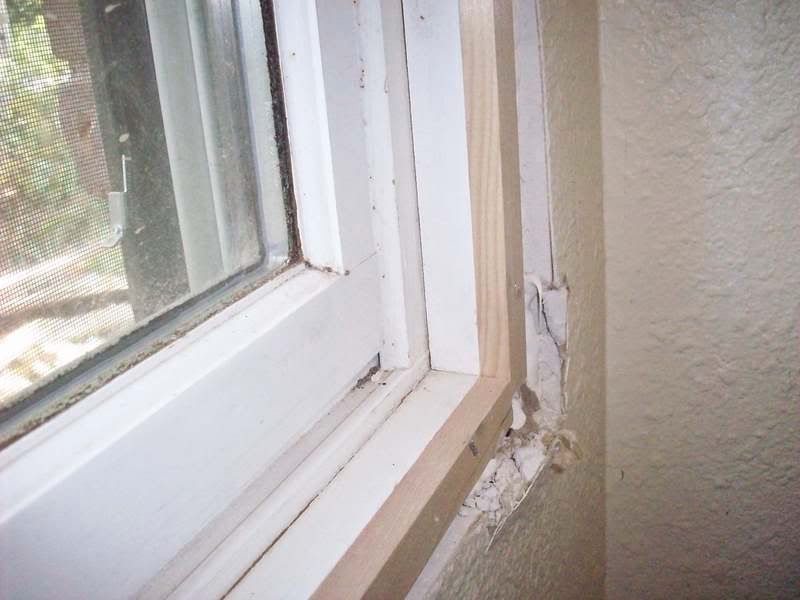
I've been working on the new window in my study. First, I needed to add wood to extend the window frame to the drywall. Theoretically, this involves a table saw to rip trim down to the exact dimensions of the gap. We don't own a table saw. Luckily, my local big box hardware store carries 1/2"x 3/4" trim... just perfect for what I needed to do.
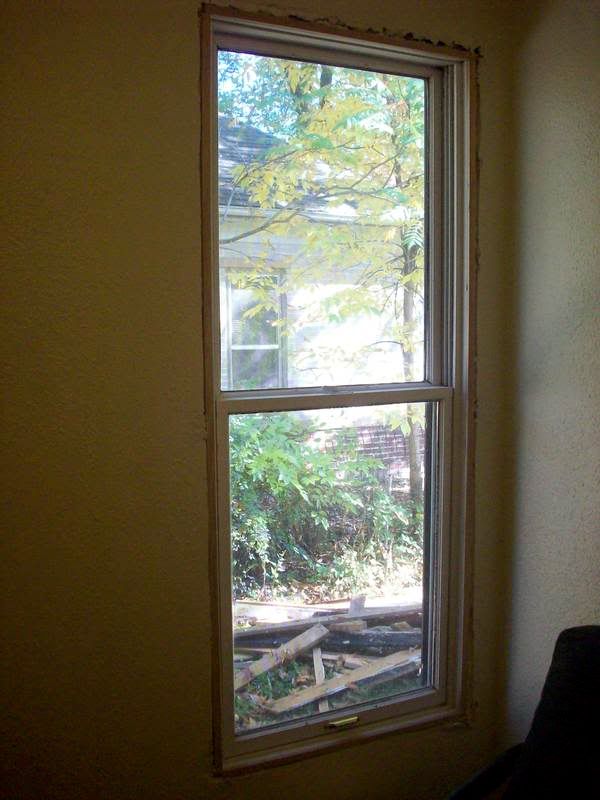
Here's the window with it's new frame extensions... they are the unpainted wood:
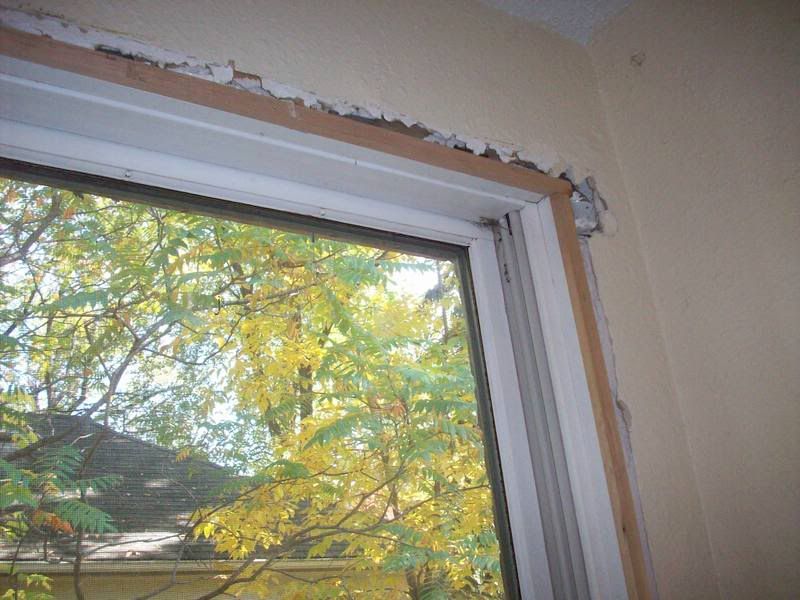
And, a close up:
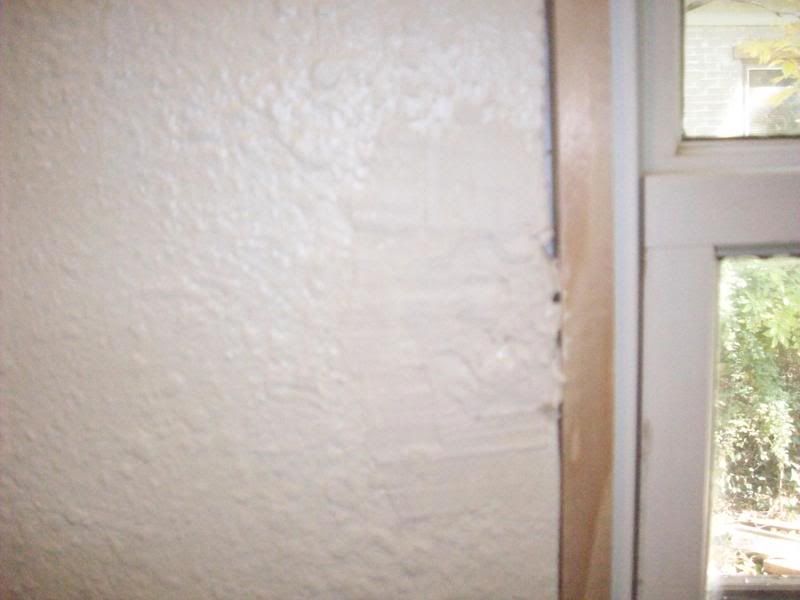
I attached the wood strips with finishing nails flush with the drywall. Well, I TRIED to install the wood strips flush with the drywall:
Unfortunately, the drywall bows out considerably in both lower corners. The window is plumb and level, and 80% of the drywall is right where it should be. These corners are about 1/2" off. Any suggestions for how to install the window trim so it looks right? I'm thinking I might have to cut out the offending drywall, level behind it, and replace.
After I added the frame extensions, I went over the nailing fins with drywall compound to bring those areas flush with the drywall. When we installed the new construction window, we decided to use the nailing fins and simply cut out chunks of drywall, as the holes and patches would eventually be covered by window trim:
Here's the window as it looks now... after the drywall compound dries I'll caulk around the window again and call it done!
Saturday, October 11, 2008
More Finds- The Casper, WY, Edition
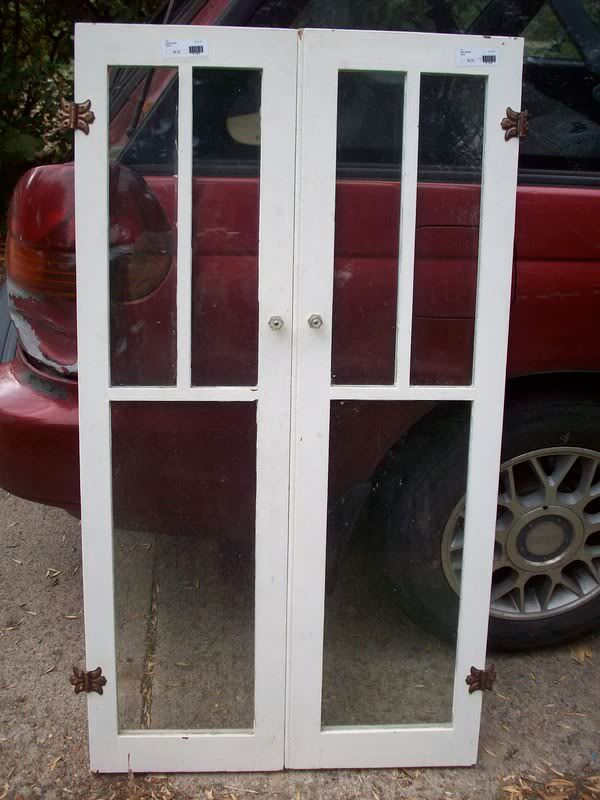
While I was in Casper, Wyoming, last week, I stopped by the Habitat ReStore. I picked up a few things:
Two sets of these windows/cabinet doors, with hinges and glass knobs. One of the doors is missing a pane of glass. I think one set will be perfect for creating a built in cabinet out of a window we are taking out between the two bedrooms. I'm not sure what to use the other set for, but at $20 for all four, I couldn't resist.
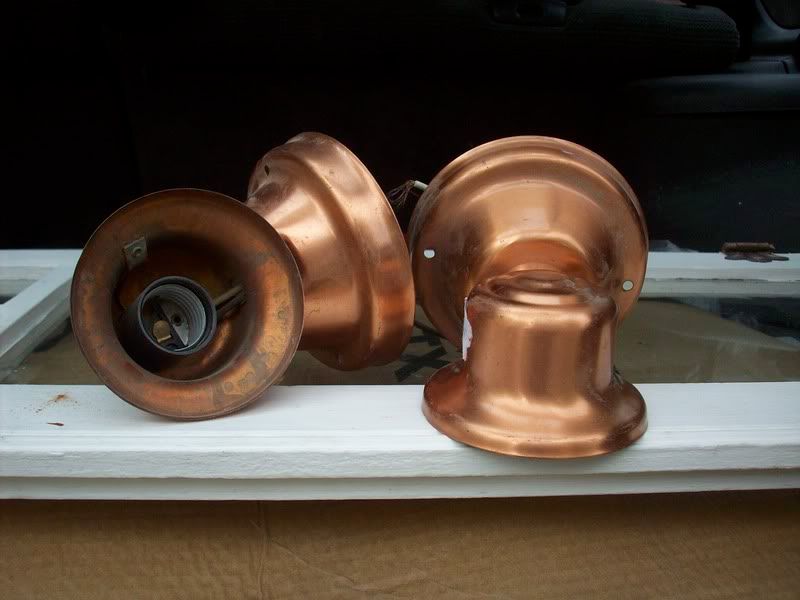
I also found these copper outdoor lights:
They will look cute outside our back doors. I'll have to keep my eyes out for the right covers.
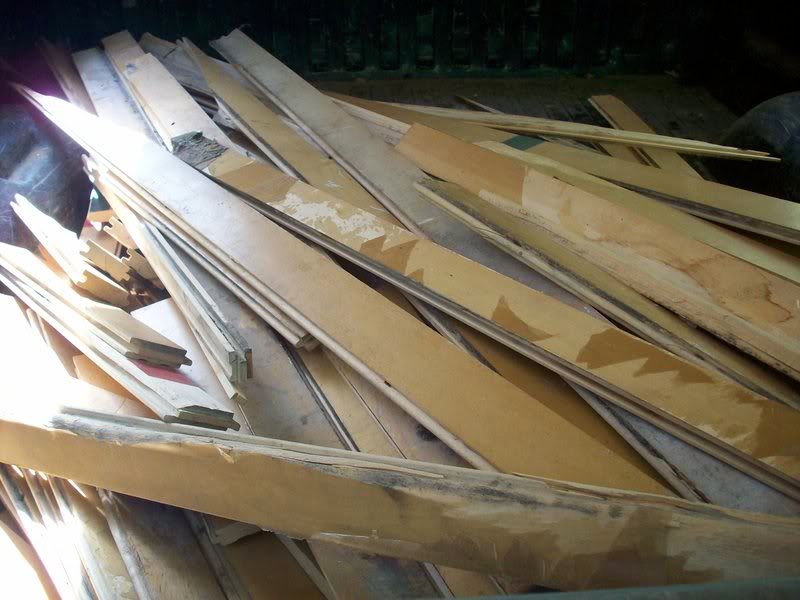
A few weeks ago I picked up 100 sf of maple flooring for $10:
It's from an old gym floor. If the original floors in either of the studies turn out to be unusable, I can put this down instead! They are both smaller than 100 sf.
Has anyone noticed I seem to be buying 1940's and 50's things for my 1911 house? Someone slap me! It's hard when there is NOTHING left to go on in the house as far as style and you try to buy everything used. Ah, well.
Friday, October 10, 2008
Homemade Birthday Presents and Decorating with Photos
My husband's birthday was yesterday. Happy Birthday! I'm so glad you were born!
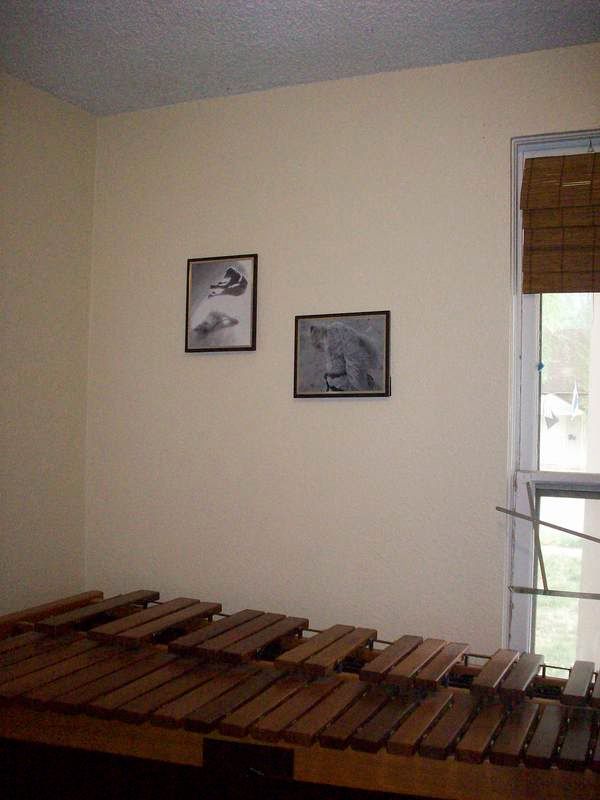
For his present this year, I decided to go home made and thoughtful. I framed two pictures of our puppies that he has always loved; the first is titled "Disappearing Dog" and was taken by his aunt. (The other one, of the white dog in the wind was taken by me). I found the perfect frames at Goodwill, and used my home inkjet printer to print them on photo paper.
It's amazing how putting art from and about the people and things you love can really warm up a room!
Sunday, September 28, 2008
Stop The Leaks! Last Week for September
How did everyone do this week? It's getting colder here at night... a nice push to getting things sealed up.
This past week, we worked on plugging the huge hole in our house with a window; while the new, bigger window will likely leak more heat than the former sided wall, once we removed the siding there was no going back. We wedged foam backing around the entire window on both the inside and outside to reduce drafts, and caulked very well on the inside.
Our brick repair around the outside windows won't be finished for a couple weeks, so I'm going to concentrate on our new front door this week. Once the brick is done, it will be a mad dash to seal up the outside of the windows before the snow flies.
I'm going to continue "Stopping the Leaks" at my house in October... I'll leave the banner up (and if I get around to it, change the month), and leave everyone up who wants to continue in October. Feel free to add yourself!
Tuesday, September 23, 2008
Dealing With Windows- The Energy Efficiency Edition
The windows on our house are in need of SOMETHING to make them more energy efficient. But what? There are so many options...
Here's a picture of one of the worst offenses...
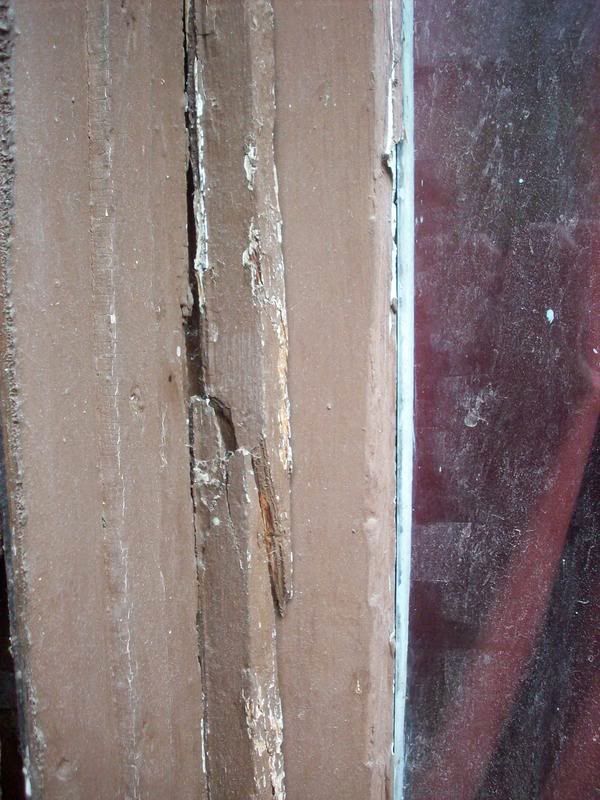
You can see that the parting bead is cracked, and the glazing is in less than desired (virtually non-existent) condition.
Replacement Windows- VINYL
There is lots of information out there about how wonderful vinyl replacement windows are. Unfortunately, most of it is from the vinyl window trade. (I have yet to find an independent study). I am not convinced.
For starters, vinyl windows have an industry stated life of 10 to 15 years... 2 years before the special Argon gas escapes and you are left with air, 10 years before moisture makes its way into the space and starts to fog the window. My wood windows have lasted for 100 years... and I would expect nothing less of any other window.
Second, vinyl windows are full of lead. The lead plus other chemicals off-gassing into the house can't be good. I will take my lead painted windows, carefully encapsulated in fresh paint or safely stripped of all lead paint, over a window that will release lead no matter what.
Third, the manufacturing process for vinyl windows can't be environmentally friendly, and the energy required to make them is certainly more than I will expend restoring old windows.
More information:
Blue Vinyl is a wonderful documentary about vinyl siding and its effects on people and the environment. Most of the information applies directly to windows. It's worth a look.
Jeanie at House in Progress has created a fabulous essay on the (de)merits of vinyl windows. There quite a lot of interesting information there. Be sure to click on the links and read the tables/charts.
Replacement Windows- WOOD
Replacement wood windows sound like a comparable option to your existing wood windows. However...
Newly harvested wood is not comparable to old wood. New wood is from quick growth forests and farmed trees... harvest young after only 30 years or so. It is much less dense than old growth wood, and rots/dents/breaks much easier. I have heard of new wood windows rotting out in 15 years. Also, the softer wood does not provide the same level of insulation as heavy, dense wood does from wind.
Wood windows are also much more expensive, are often clad with vinyl or have vinyl tracks, and still require a significant amount of energy to create. (Plus, your old windows end up in the landfill).
New wood windows are the best option, however, if it comes to replacement.... as long as you pick woods like cedar and mahogany, and make sure there is no vinyl or aluminum cladding or sliders.
Restoration
This leaves us with restoration. Your 100 year old wood windows have lasted this long; properly restored, they will last another 100 years or more. Restoration also keeps wood and glass out of the landfill.
By simply adding a properly fitted storm window to a properly functioning single paned, double hung window, you will increase the r value by more than 2, and bring it up to the r value of all but the beefiest replacement windows. Adding drapes or blinds will decrease this difference.
Our plan is to reglaze our windows and make sure they are working properly. They have aluminum triple track storms right now... eventually I want to make period appropriate storms out of wood instead. I hope to be able to compare our new wood/aluminum clad double paned Pella window with our original windows for some real life data... I promise to share it no matter how it turns out.
I'll leave the nitty gritty details on window restoration as I figure them out... stay tuned!
The Numbers
In the September, 2007, issue of Old House Journal there are some numbers crunched on monetary savings. I will leave you with them.
Estimates made with 3'x5' window; gas heat @ $1.09/therm.
Single-pane Original Wood Window with Storm Window
Cost for storm = $50*
Annual energy savings = 722,218Btu
Annual savings per window = $13.20
Simple payback = 4.5 years
*This cost is way too low for most storms. The numbers still work out in the favor of this option with a cost of $150 per storm, however
Double-Pane Thermal Replacement of Single Pane Window (No Storm)
Cost $450.00
Annual Energy savings = 625,922 Btu
Annual Savings per window = $11.07
Simple payback = 40.5 years
Double-Pane Thermal Replacement (Low E Glass) of Single-Pane Window (No Storm)
Cost = $550.00
Annual Energy Savings = 902,722 Btu
Annual Savings per window = $16.10
Simple payback = 34 years
Double-Pane Thermal Replacement (Low E Glass) of Single-Pane Window WITH Storm
Cost = $550.00
Annual Energy Savings = 132,407 Btu
Annual Savings per window = $2.29
Simple payback = 240 years
Source: http://www.oldhouseweb.com/forums/viewtopic.php?f=2&t=14583&st=0&sk=t&sd=a&hilit=window+ratings


Monday, September 22, 2008
Replacing My Too-Small Window
This weekend we sealed a very LARGE leak... the leak around our too small window. Here's the before shot (sorry about the ladder):
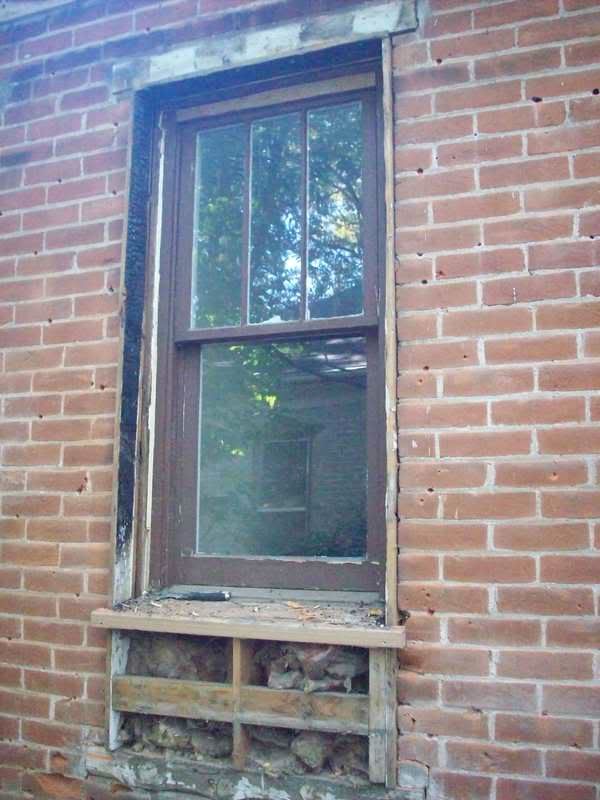
At some point in the house's history, the full sized window was removed, and replaced with a nice, but way too small window. You can see the framing below and to the sides of the window if you look hard... it's the window on the right. The original frame was left in place; only the sashes are missing.
As we deconstructed, we discovered WHY it was replaced... take a look at these pictures:
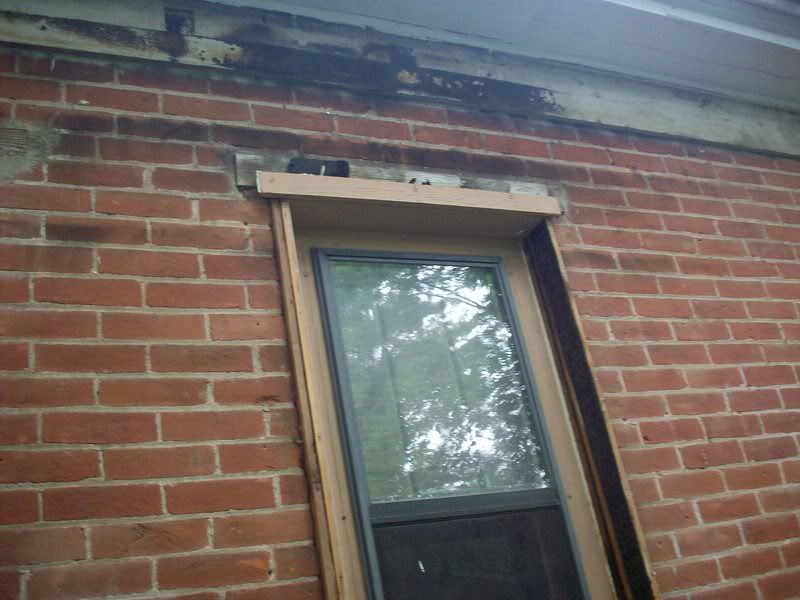
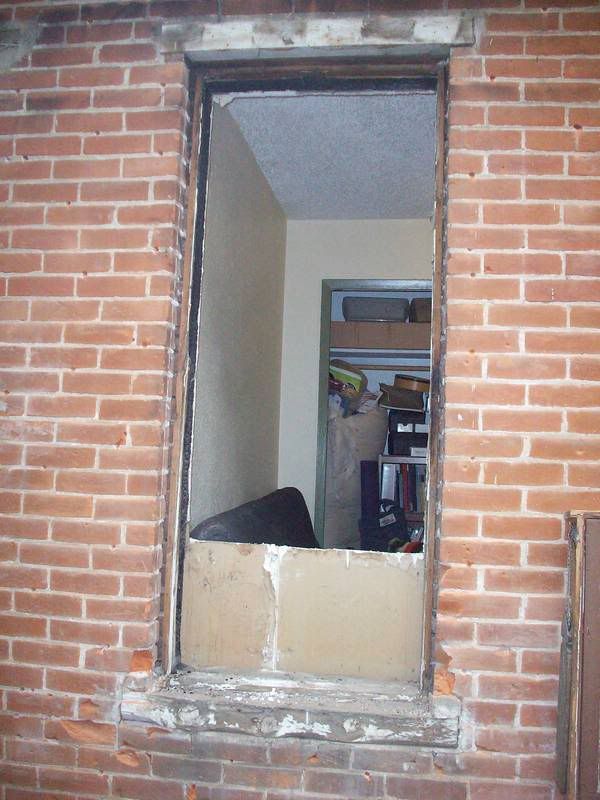
Notice the significant charring on the original window frame, and the soot staining on the brick and upper wood? There was a house fire in this room at some point! We knew when we bought that there had been a house fire... the rafters are slightly charred and have been sistered to new rafters. We didn't know WHERE the fire had been, though. My guess is that it was in this bedroom, and the window burned in the fire.
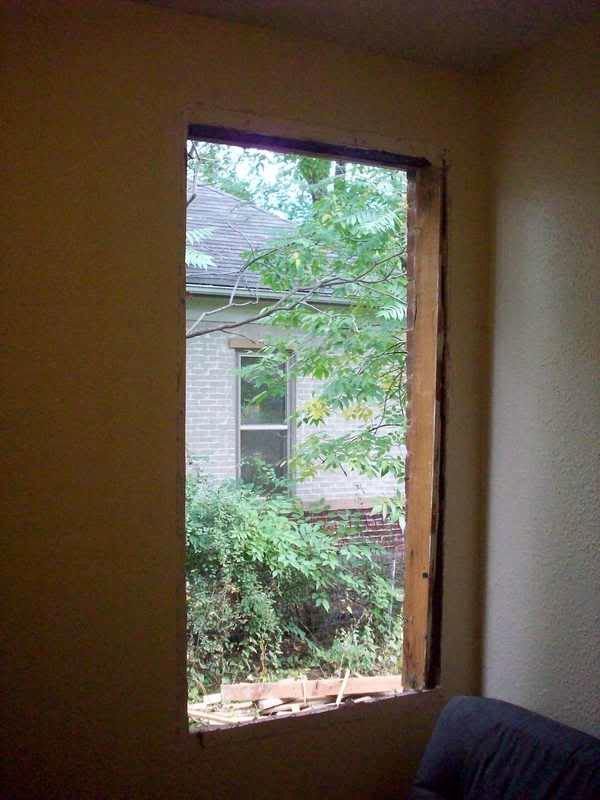
Here's the hole in my study:
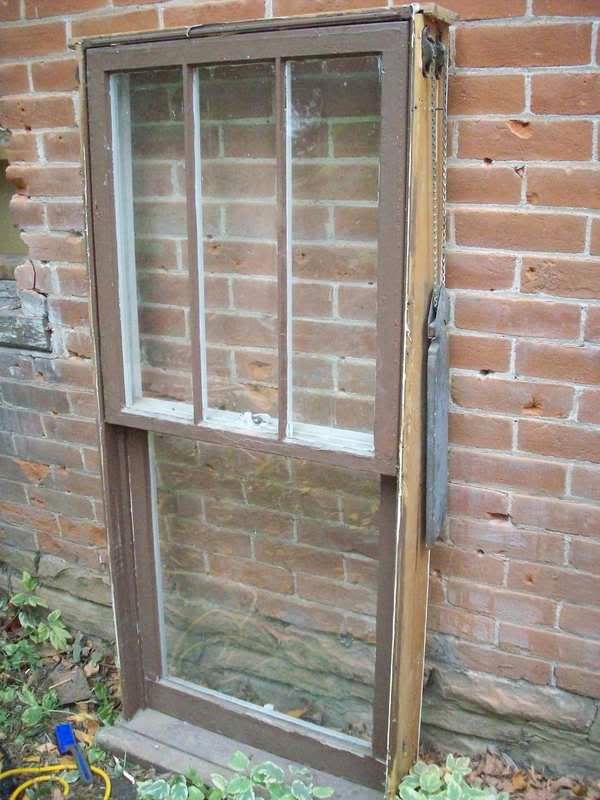
And, the very nice window we removed:
We are saving it for use on the back addition. The sash weights work perfectly, and it only needs a little reglazing!
We bought a $10 reciprocating saw at the local pawn shop; this was worth its weight in gold for removing the old window intact. I can't believe we have done so much without it; the kitchen cabinets would have been much easier with it!
Here is the newer window we used:
It's a wood, aluminum clad Pella window. It happens to be double paned/glazed. We are using it because it was $60 at the Habitat ReStore, and was the only window we could find used in our dimensions. As a bonus, it happens to have the same trim profiles on the interior.
(An aside... I may do a "test" to compare this double paned window with an original window to compare heat loss, as I have an original on the same wall. Should be interesting!)
Though this is a new construction window, we installed it into our existing hole. We removed the sides and top of the existing (charred) frame, and secured the new window through a combination of masonry screws and nails into the wood header and footer.
We applied foam backer around the window:
We also caulked around the entire inside of the window. We will finish the outside once our brick work is done around that window.
Afters:
The room is already much nicer with such a large window in it! Now to pick out trim for the whole house.
Sunday, September 14, 2008
Stop the Leaks Check-In
Sorry for the late post; I'm really sick and had family in town this weekend. What have you all been up to?
Despite the nagging cough, fever, and sniffles, I have double/tripled paned some back windows with plastic, and laid plans for sealing around the windows on the exterior, thanks to your wonderful suggestions about foam and caulk. I'm also gathering fabric for thick curtains and window insulators, and digging out the old draft dodgers. I've also dusted off the programmable thermostat we installed a few years ago, and made sure that the batteries were fresh, and that the program was sufficient for this year's schedule.
Friday, September 12, 2008
Shrink Wrapping Windows
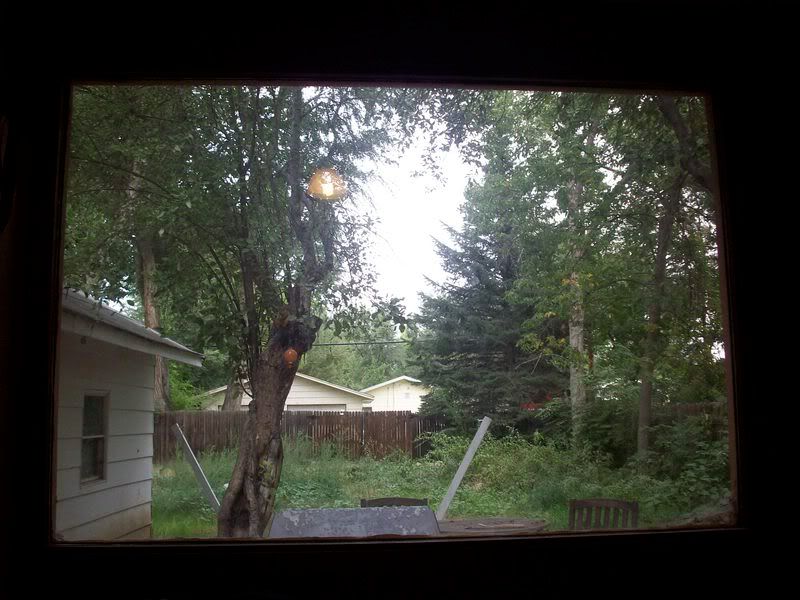
To help Stop the Leaks at our house, I shrink wrapped the huge windows in the back addition. They are HUGE double paned windows that take up most of the back wall, and create our biggest heat loss each winter; there have been ice crystals on the inside at times.
Here's a picture of the smaller of the two monstrous windows:
Notice the small forest growing in the back yard? We've neglected it in the name of keeping the house from falling down and winterizing.
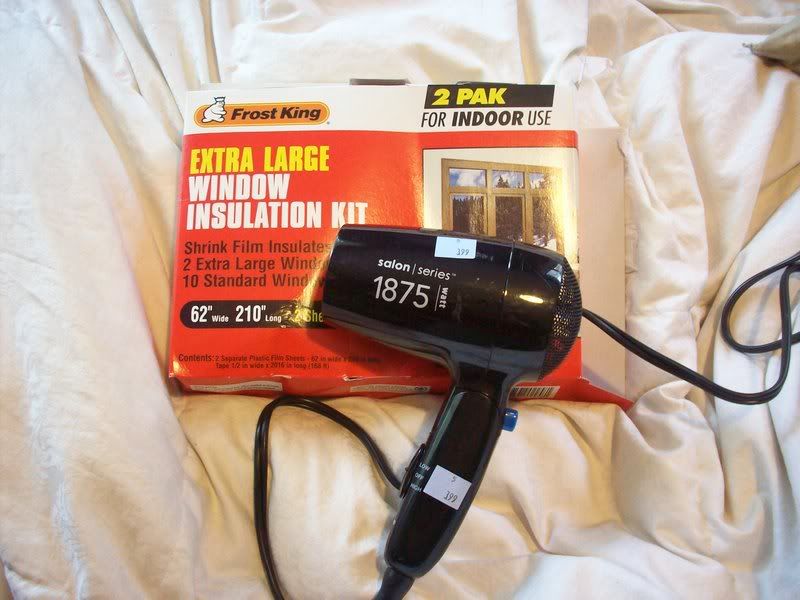
We used a store bought Window Insulation Kit and a hairdryer (bought at Goodwill for $3.99):
To shrink wrap your windows, you will need to first clean your windows. You can use a commercial product, or a mixture of vinegar and water.
Carefully apply the double sided tape to all sides of the window, following the instructions on the package. Cut your shrink wrap to the desired size (leaving an inch or two on all sides), and then apply it to the top of the window. Pull it taut to both sides and press firmly to seal. Seal the bottom last.
Take your hairdryer, turn it on, and carefully move it back and forth over the window, staying about 1 inch away from the plastic. Dry until all wrinkles are smoothed out.
If you need more visual help, Robj98168 posted a helpful video on his blog; it's for exterior shrink wrap, but it's pretty much the same.
This is the best option for windows that you won't open ever; I don't plan on taking it down until we remove those windows from the house!
Tuesday, September 9, 2008
Exterior Window Moldings...
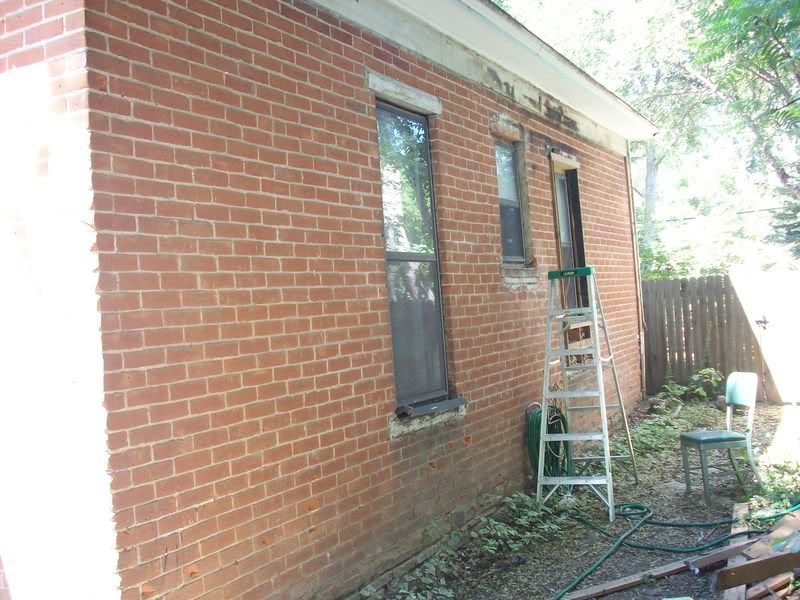
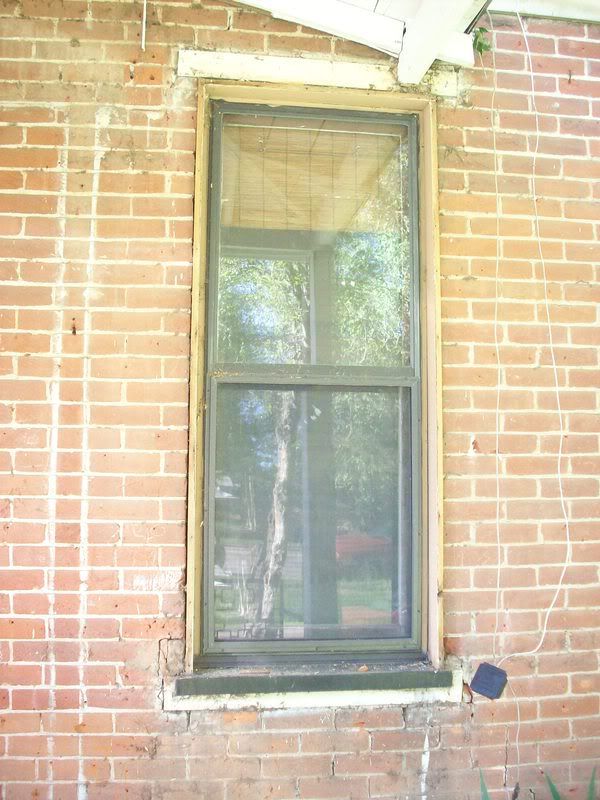
When we removed the siding, we were left with ugly window trim:
All of the tan trim surrounding the window is not original; much of it is rotting, and it sticks out beyond the brick. It is also not sealed against the brick. The original windows (as seen from neighboring homes) were trimmed out inside the brick opening. We want to remove the tan trim and replace it with something much more suitable.
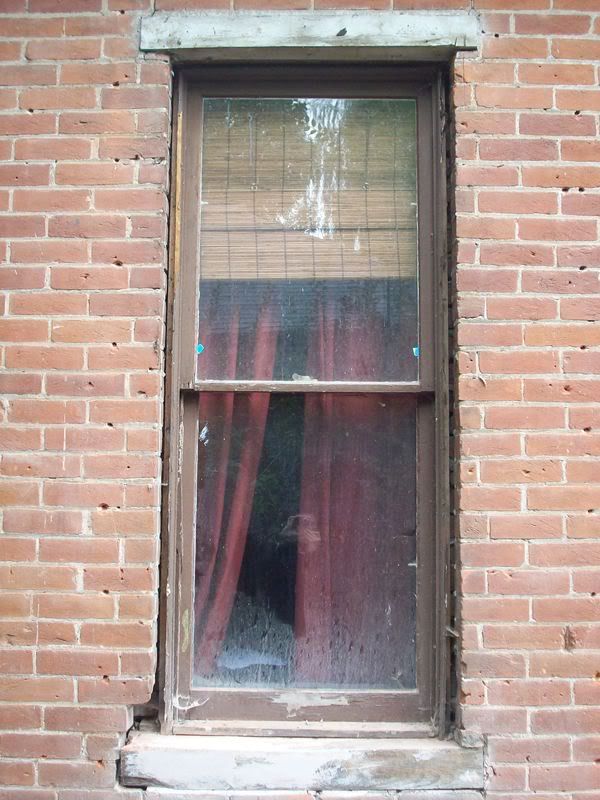
Here is a window without the tan trim:
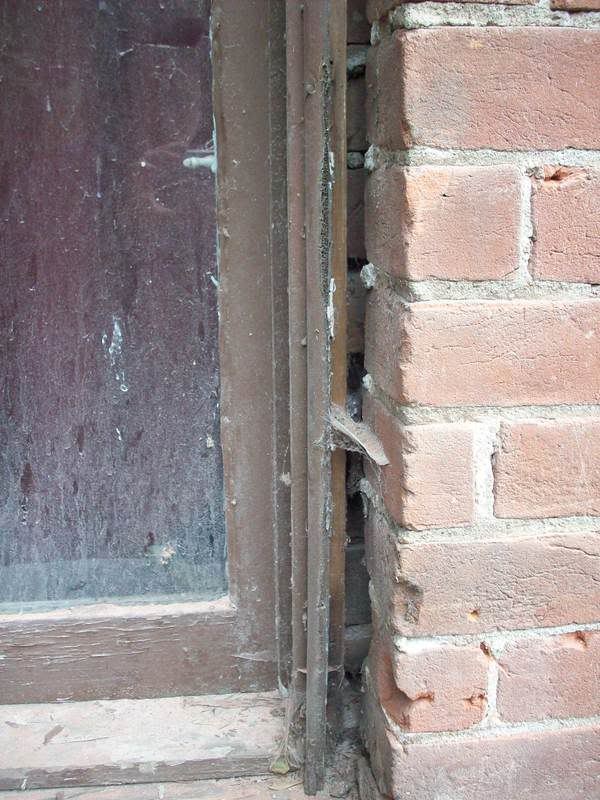
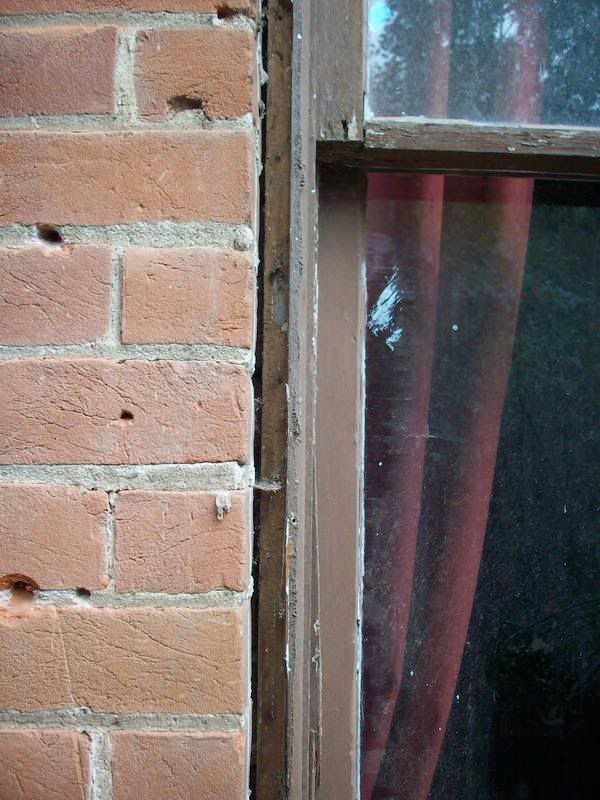
This looks much better, and is more historically accurate (again, given surrounding houses). The problem is the gaps:
The quarter round molding currently on the outside of the window frame appears to be newer (it is missing the first layer of paint); it's broken in places and needs replaced anyway. My thought is to pry it off, and replace with a 1 inch deep block molding that will reach from the brick to where the storm windows will start.
Issues that need solving: Do I caulk between this wood molding and the brick? If not, how to I seal between the brick and wood?
Subscribe to:
Posts (Atom)