Showing posts with label Salvage. Show all posts

Friday, November 21, 2008

A New (Old) Storm Door

Picked up this storm door a few weeks ago; it needs a lot of work, but is just the right size for our odd opening.

Photobucket

It came with a glass storm insert AND a screen insert (the red behind the glass). One pane of glass is broken, and all of the panes need re-glazed. Part of the door needs re-glued, and the exterior side needs repainted, as the red paint is peeling and chipping. We'll leave the interior side natural. I'm excited; this should be the perfect small scale practice for reglazing our windows.

Saturday, October 11, 2008

More Finds- The Casper, WY, Edition

While I was in Casper, Wyoming, last week, I stopped by the Habitat ReStore. I picked up a few things:

Photobucket
Two sets of these windows/cabinet doors, with hinges and glass knobs. One of the doors is missing a pane of glass. I think one set will be perfect for creating a built in cabinet out of a window we are taking out between the two bedrooms. I'm not sure what to use the other set for, but at $20 for all four, I couldn't resist.

I also found these copper outdoor lights:
Photobucket
They will look cute outside our back doors. I'll have to keep my eyes out for the right covers.

A few weeks ago I picked up 100 sf of maple flooring for $10:
Photobucket
It's from an old gym floor. If the original floors in either of the studies turn out to be unusable, I can put this down instead! They are both smaller than 100 sf.

Has anyone noticed I seem to be buying 1940's and 50's things for my 1911 house? Someone slap me! It's hard when there is NOTHING left to go on in the house as far as style and you try to buy everything used. Ah, well.

Monday, June 9, 2008

Waste- The Environmental Impact of Siding Removal

Our project this past week was not without its environmental impact. We ripped close to 800 sf of siding off of our house, most of which is a hazardous waste. On paper, the option with the least impact to the environment would have been to leave the siding on the house. This would have prevented 1.6 cubic yards of asbestos siding and tar paper from entering the landfill.

One must consider, however, the impact of improving and renovating older homes. A nice looking home helps the entire community. It helps to create a sense of place, a sense that the neighborhood is a "good" neighborhood that should be preserved and promoted. One of the best ways to lessen the impact of homeownership on the environment is to buy a used house in an urban area close to things like a grocery store, restaurants, bookstores, etc... a downtown area. By making these homes MORE attractive, we can hopefully "stem" the tide of mass construction spreading across the farmlands.

The Waste:
~1.6 Cubic Yards of Asbestos Siding (~546 sf) and Tar paper (wrapped in 16 heavy duty plastic bags and duct tape)
~1/2 Gallon of Nails and Screws
~A VERY Large Pile of 1x3 Wood Boards
~200 sf of Steel Siding

How We Lessened the Impact:
1) I posted an ad on Craigslist and Freecycle offering asbestos shingles free to anyone needing to patch up their house. Sadly, no one took me up on this offer (which did surprise me, as I have seen people asking for them).

2) We carefully saved all of the nails and screws, and will hopefully be able to either reuse them for other projects or recycle them as scrap metal.

3) Our wood pile is full, so we plan on offering the wood as firewood or taking it to the city recycling center to be mulched.

4) We carefully removed the steel siding so that it could be reused, either on our backroom renovation or on someone else's house or shed. At the very worst, we can recycle it as scrap metal.

5) Finally, we bought as many of the needed tools used as we could. We couldn't find respirators used, but did find an old chipped chisel (perfect for chipping out the nail heads) and a set of vice grips that were perfect for my tiny hands.

Friday, April 25, 2008

Is Your Loveland, CO, Home 50 Years or Older?

The City of Loveland, Colorado, is hosting two workshops in the next few weeks for old house owners. If you are in the area, it might be worth stopping by... it looks like they will supply some great information! Sadly I can't attend the first...

Researching the History of Your Old House
City staff and a genealogist help you learn about your old home and the people who lived there.

Monday, May 5th, 2008
6:30 to 8:00 pm

Your Old House Workshop: Finding and Using Architectural Salvage
The city's third annual Your Old House workshop will focus on how to find, reclaim and use architectural salvage in your old house. Find out how to locate historic hardwood floors, hardware, stained glass or front porch pillars; how to recondition old wood windows; or how to hand a salvaged door. Bring your questions!

Thursday, May 22, 2008
6:30 to 8:00 pm


Both events are at the Loveland Museum/Gallery at 503 N. Lincoln and are free and open to the public.

Friday, April 4, 2008

Roadside Finds

I'm sick at home with strep today. I want to rip out my tonsils and throat and chuck them across the room... the antibiotics better kick in soon! Luckily the ibuprofen has dealt with the fever already...

But, all of that is just the set up to my story:

My doctor's office is located in the middle of the Historic District in my city. I was driving away from the office in pure feverish misery when I saw a pile of old lights, a sink, and a mailbox sitting by a dumpster. I swung back around and knocked on the front door; the woman who answered said "Take it all away!".

An old ceiling light:
Photobucket

An old mailbox:
Photobucket

A street light/porch light (missing one globe and sans post):
Photobucket

An old wall mounted sink:
Photobucket

I'm going to keep the sink for our possible second bathroom; the rest I am going to give away (with the possible exception of the first lamp; it MIGHT work well in our bedroom on our odd sloped ceiling). Hopefully they will find homes where they can be reused and loved. If you are in Colorado and would love one of these, just drop me a line.

Used Building Supplies?

A few weeks ago I created a poll on my sidebar collecting data about people's use of used and salvaged building materials.

Here are the results:

How Much of Your House Remodel or Decoration is from Used or Salvaged Materials?
0% - All... I wouldn't set a foot inside a big box store.
12% - Most... I still buy things like nails, etc. new.
50% - Some... I buy used when it's cheaper and easier.
37% - Some... it's hard for me to find salvaged or used materials in my area, so I buy used when I can.
0% - None... why would I put other people's junk in my house?

I was glad to notice that no one chose the last option; of course, it could have been my heavily weighted wording. Personal opinion, of course, but buying used or salvaged material is a great way to save money and keep something out of the landfill.

I was surprised to see that no one chose the first option; we have a family friend who built his entire house out of used materials. He used mahogany shipping crates for much of it, and pulled, straightened, and reused both nails and lumber. Of course, he does not have the internet, and so wouldn't be voting on any poll...

A full 37% of you indicated that it is hard for you to find used and salvaged goods; it makes me feel very lucky to live where I do. There are lots of options around here for finding used building supplies.

Since you all indicated that you use used materials, the next question is WHY?

Tuesday, March 11, 2008

Camera! Action! Lights!

I stressed about the lights in the study all week. Then, I walked into ReSource, a local salvage and used building supply purveyor on my way home from picking up the pillars.

I saw these shades and bases:

PhotobucketPhotobucket

Three of each, to be exact. They aren't from the same light... in fact, they probably aren't even from the same decade, though I am bad at that (anyone have any guesses for the true age of either?). They look really cute together, though!

Can't beat the price: $5 for each complete light fixture
Can't beat the environmental impact: Three light fixtures reused

Here's what it looks like on the ceiling:

Photobucket

I took the light from the study and moved it into the living room; quite an improvement over the nipple lamp.

I discovered some scary looking wiring in the lightbox of my study:
Photobucket

Here are some before and after shots, including a picture of the never before seen "smallest room in the house" (it's 8'x10' minus a closet, and my studio).

Front Study (my husband's)

Before: (with huge light)

Photobucket

After:

Photobucket

Back Study (Mine)

(This room is the only one with those neat windows, and this is the ONLY shot I can get of the room and the light at the same time, since it's so small)

Photobucket

Living Room

Before:

Photobucket

After:

(Complete with two sleeping puppies)

Photobucket

I would love any ideas you have about the scariness of the electrical wires in my ceiling or the age of the light fixtures!

Monday, March 10, 2008

A Porch Post

Craigslist strikes again! Despite not having the time to do anything productive on the house, I glanced through my local Craigslist listings. I noticed a post offering 12-8' posts for $120... and I bit, as porch posts (even in poor to fair condition) can cost $60 or more a piece around here.

The posts are redwood, and in fair condition (though much better condition than the rotting and broken posts on our porch currently).

Due to some unfortunate removal processes, the bottoms of most are broken; luckily I only need 4 for my porch, and there are four in good condition up and down the entire 8 feet.

I'm thinking of making a backyard gazebo out of the rest (I can cut the bottoms off for that purpose), or possibly using them to construct the deck we want to build off of the back. It might be neat if the back porch mimics the front! Then again, I can always sell off the rest of them and make most of my money back.

Three cheers for the man who sold them to me; he was working a job site and saw the workers hacking them up and tossing them in a demolition. He was able to convince them to save the last 12 from the landfill. Here's to re-use!

Monday, February 4, 2008

Sparkly Door Hinges and Steel Wool

This is a hinge from my mahogany doors:
Photobucket
It has a small amount of white paint on it, and is lightly rusted on the exposed parts due to its brief stay out in the elements at the salvage store.

These are the hinges after chipping the paint off with a screwdriver and thoroughly polishing them with WD-40 and 00 steel wool:
Photobucket

The WD-40 and steel wool did a marvelous job of gently removing the surface rust. It took about 5 minutes of careful polishing and scrubbing on each hinge to remove the rust.

Next up: An attempted door installation

Monday, January 21, 2008

On Door Jambs and Frugality

We installed the door jamb in the bathroom yesterday (and today).

First, we measured the door opening from top to the floor. We cut each side of the jamb to exactly that height, using our new miter saw.

Photobucket

Then, we placed the jamb sides in the door frame, measured the distance between, and cut a piece of jamb that was that size for the header.

After we cut our header, we nailed the jamb together for installation.

Photobucket

We used our square to keep the corners squared as we tapped wire brads into the wood to hold the jamb together.

We reused the old nails from the previous door jamb by carefully tapping them back into shape.

Photobucket

Miserly, miserly people we are.

We used these nails (plus a few more- remember, the old jamb was held up by 5 nails) to attach the jamb to the studs.

Photobucket

But WAIT... what is THAT? That huge GAP between the header and the side?
We can't have that.

Back to the saw with a fresh set of measurements taken with the sides pressed firmly against the studs.

Photobucket

After putting FOUR nails in each board, our jamb seems secure.

We used solid pine instead of MDF to increase the permanence and solidity of our jamb and door installation.

Where:
Door Jamb: Home Depot
Nails: Salvage and Lowe's

Cost:
Door Jamb: $18
Nails: Free and $2 for a box

Tuesday, November 20, 2007

Refinishing Mahogany Doors

A while ago, we went to Raven Architectural Artifacts in LaSalle. The owners showed us some mahogany veneered solid doors they had accidentally left outside... the finish was peeling, and there was some weather damage to the veneer. They offered them to us for $25 each, so we bought all three. The color is beautiful, and they had original hardware and crystal doorknobs. The finish is very thin, too, and came off quite easy!

These doors were all from the university's 1930's faculty apartments... the apartments were turned into dorms around 2001, and so were gutted of anything nice.

****************************************************************

This door is back in business, as it is going to be the bathroom door in just a few days. It was a closet door in a former life, and so has a full length mirror (in excellent condition) inbedded into it on one side.

We originally stripped this door with a "gentle finish remover". A couple hours, 2 eye masks, 4 pieces of 00 steel wool, and 2 pairs of rubber gloves later, the finish was stripped. We plan to use a random orbit sander to complete the next two.
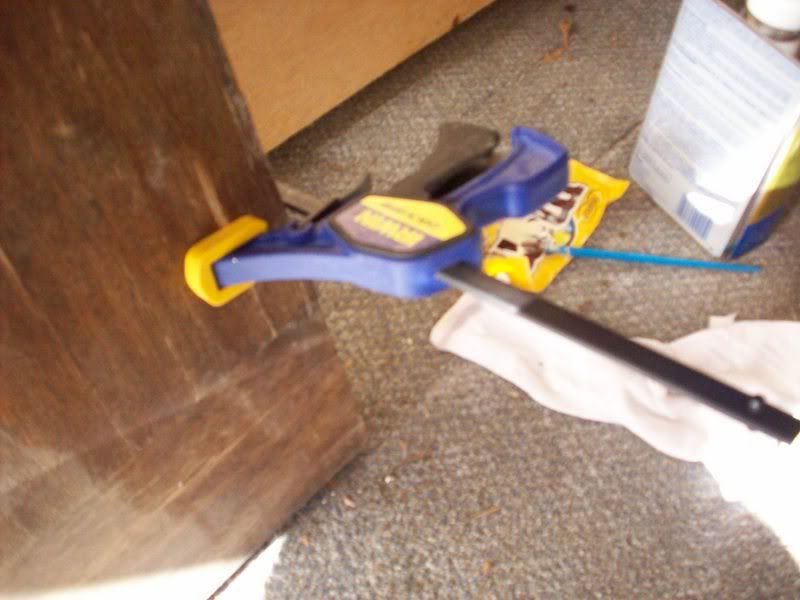
Yesterday, I spent the day gluing some peeling veneer back into place. I used rubber tipped clamps to hold the wood in place while gluing.
Photo Sharing and Video Hosting at Photobucket

I also used #18 5/8 inch brads to reattach the molding that was holding the mirror into the other side. I need to go buy a small finishing hammer to complete the job, as whacking at the tiny nails beside a mirror was a bit like being an elephant in a china shop.
Today, I may refinish. I may not. The door is incredibly heavy, and I can't lift it myself. But, I may try!

Wednesday, November 14, 2007

Sealing the Slate

Our bathroom is getting new floors! Goodbye, peeling and cracking blue vinyl... HELLO SLATE! I have been gathering slate for this project for a few months. It's nice... blues, beiges, and greys. But, before I can install it I need to seal it with sealer so that the grout will not stick to it. I am NOT a good grouter, so this is a preventative measure.

Photo Sharing and Video Hosting at Photobucket

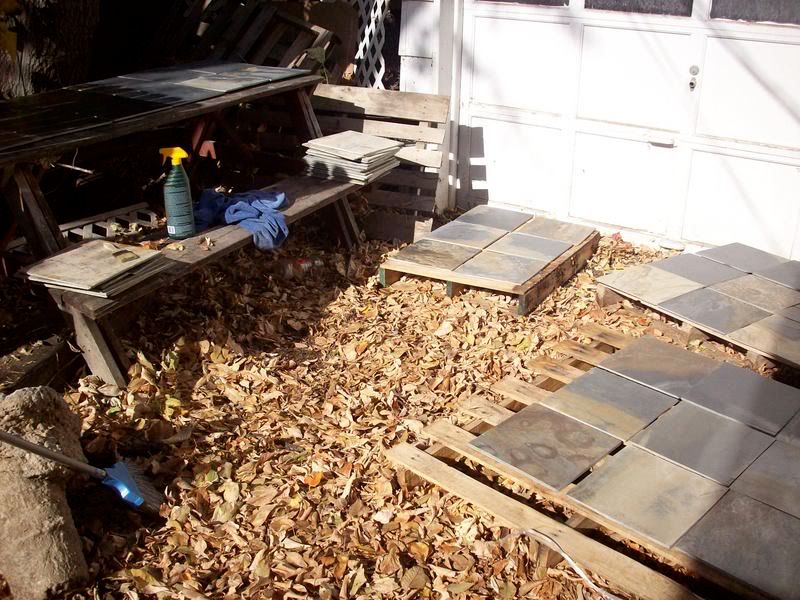
Notice the nifty picnic table workbench... it is incredibly useful! The pallets I have gathered to make compost piles (what a slacker) were useful, too. And, maybe when I'm done I can compost all of those LEAVES in them!

Photo Sharing and Video Hosting at Photobucket

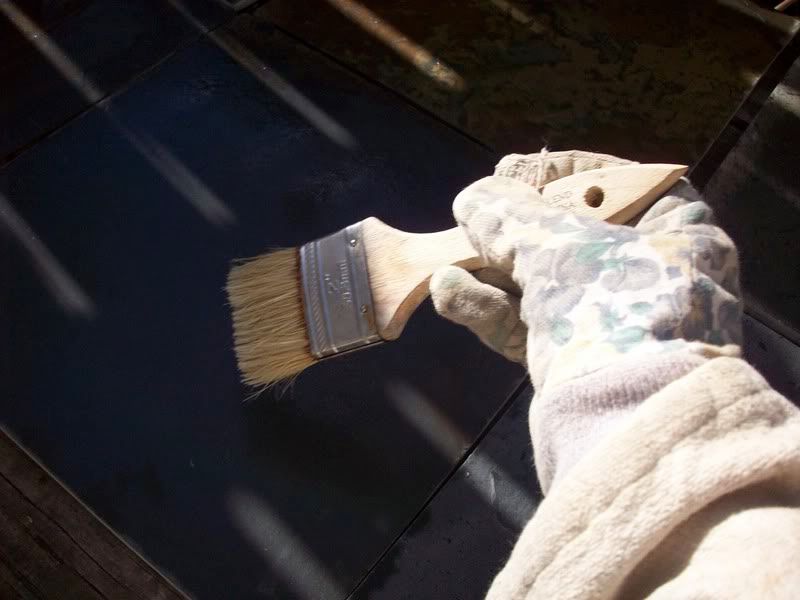
To seal the slate, I used a penetrating sealer, brushed on with an old paint brush. I have put two coats on. It's pretty hard to keep the sealer off of the edges of the tiles... I am hoping that a little sandpaper on the edges before installing will help prevent any problems!

I found the sealer... TileLab SurfaceGard Penetrating Sealer at the Habitat for Humanity ReStore for $2 yesterday. It was full, and looks hardly used. There are so many jars, bottles, and cans of such things there, from people who buy it for the 1 tablespoon they need and then donate it.

Where is it from?
Cost:
  • Slate $30
  • Sealer $2

Thursday, November 8, 2007

Deconstruction: Reusing Building Materials (and Keeping Them OUT of the Landfill)

From the ReSource website:
Deconstruction involves carefully dismantling a building and salvaging the parts that can be re-used. Material coming from deconstruction often includes, but is not limited to, lumber, doors, windows, cabinetry and hardwood flooring. By choosing deconstruction, homeowners and builders can save precious natural resources and help divert material from the landfill.
Since we are renovating an older house, it is particularly easy to find a suitable salvaged replacement from a "scrape" or remodel. Our original front door from 1911 may be rotted and cracked, but a similar door may be in excellent shape and need only a coat of paint.

Where to Look:
ReSource (Boulder and Fort Collins, CO)
Habitat for Humanity ReStores (Nationwide)
Freecycle (Nationwide)
Craigslist (Nationwide)
The ReUse People of America (CO, WA, CA)