Friday, June 27, 2008

Crisis Averted!

The structural engineer came out and didn't seem TOO worried. He said he's seen worse. And... the fix doesn't seem too expensive (and it sounds like we can do it ourselves if needed)...

We are going to drive 8 inch stainless steel corkscrews into the mortar to bring the two walls together. They shouldn't cost more than $5 each, are driven in with a hammer drill (which we have), and are needed every 16 inches or so sideways and up and down. We'll countersink them, and then fill in with a dab of mortar to patch. We will need to move the wall back into position using 4x4's and a masonry jack, as well.

We are going to have our mason bid on the new work, too... if it's reasonable, we'll let him do it. If it's a little much, we'll drive them in ourselves. Unfortunately, he is headed out on vacation this weekend, and won't be back until next week.

Crisis averted!


Thursday, June 26, 2008

The Walls are Falling! The Walls are Falling!

I WISH I was Chicken Little.

The mason we chose to do the brickwork (Mason #2) came over to start work today. Since we hadn't yet replaced the too-small window or removed the excess wood from the windows, they started on the corners... they are doing a beautiful job so far! The mortar and bricks are matching almost seamlessly.

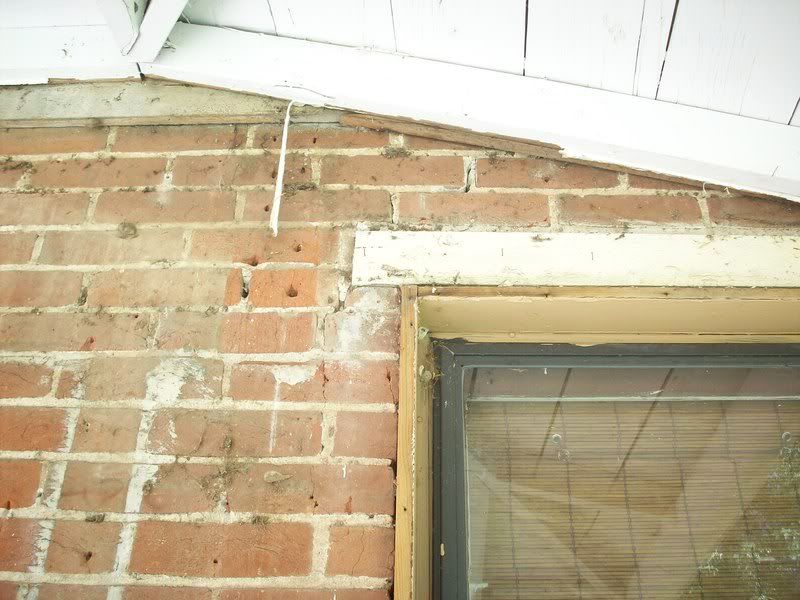
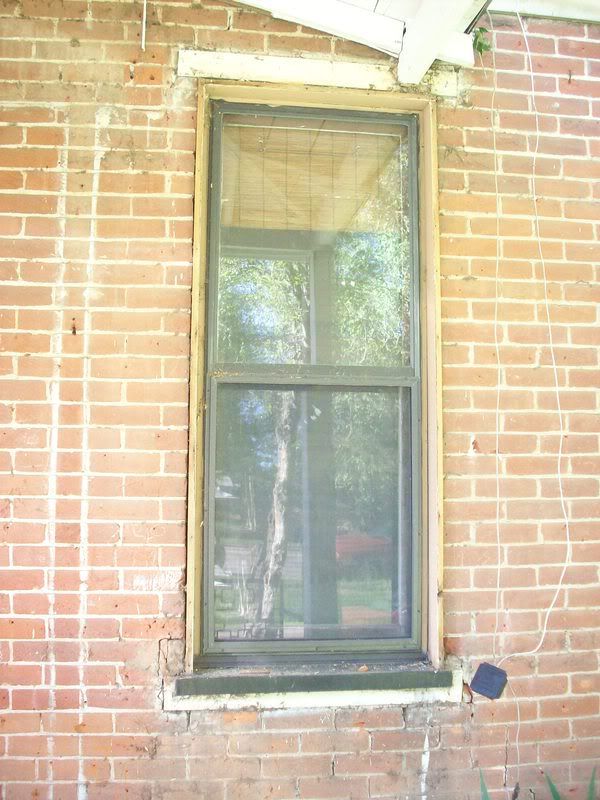
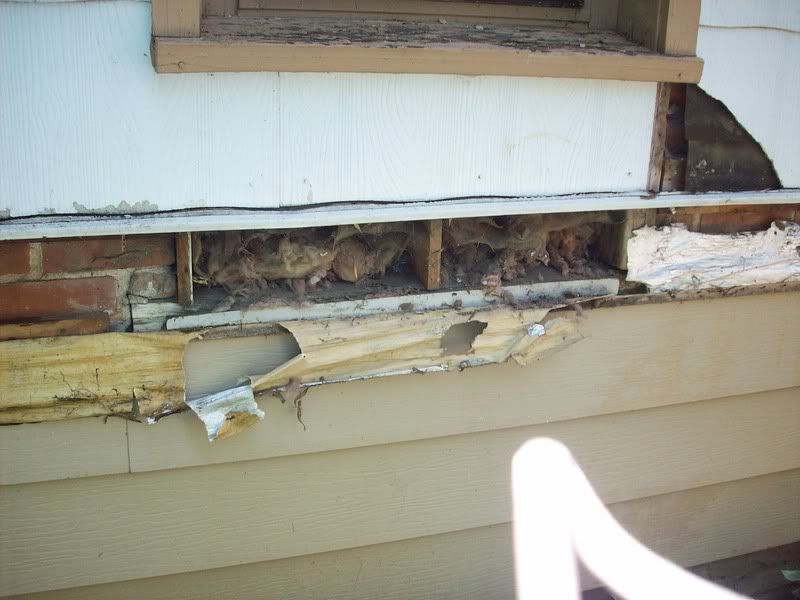
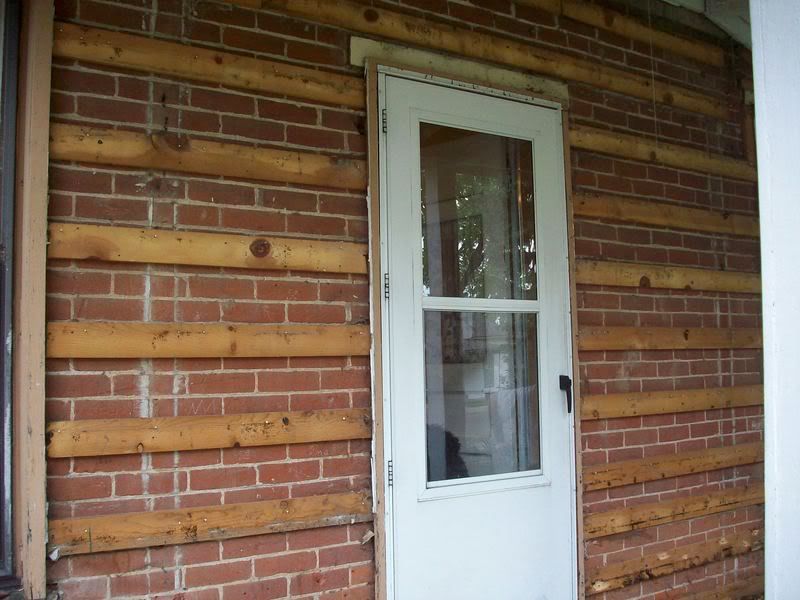
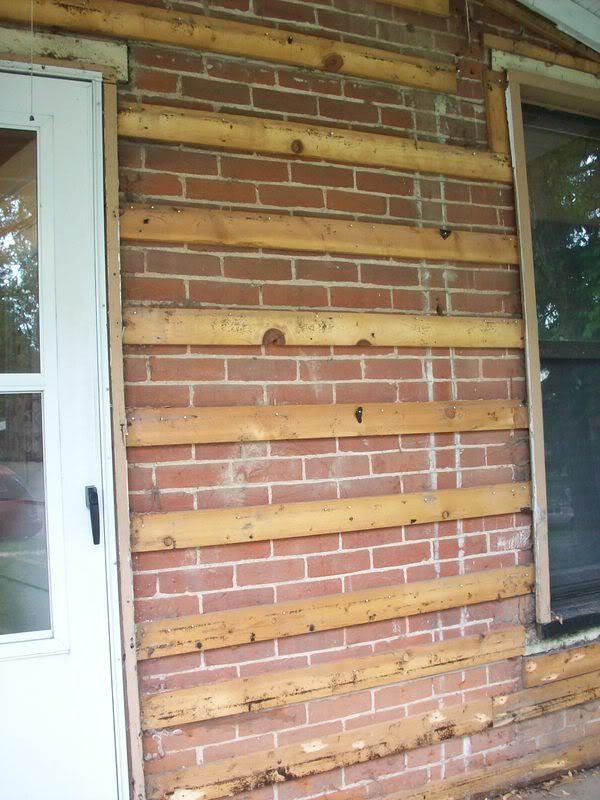
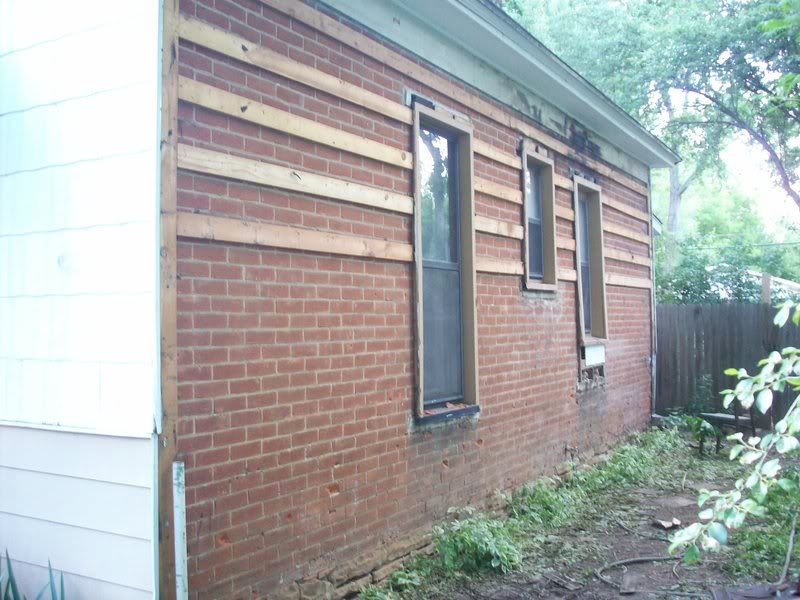
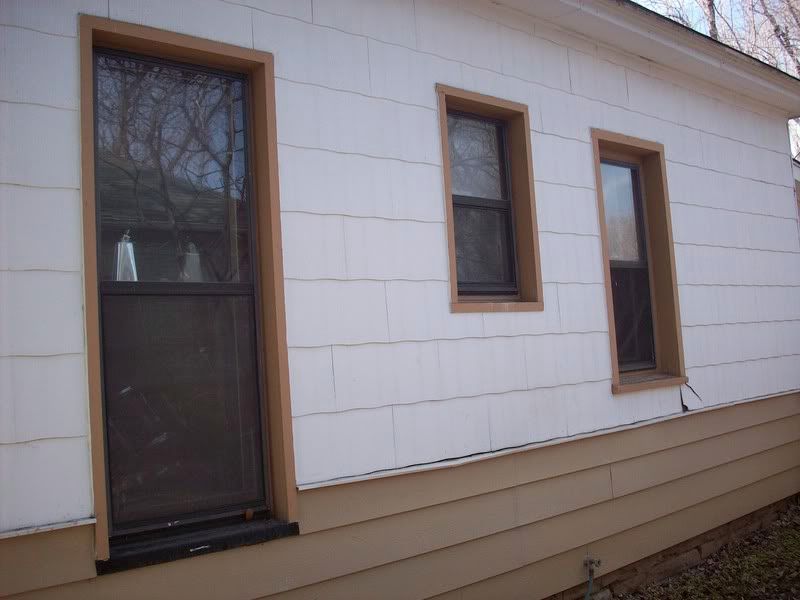
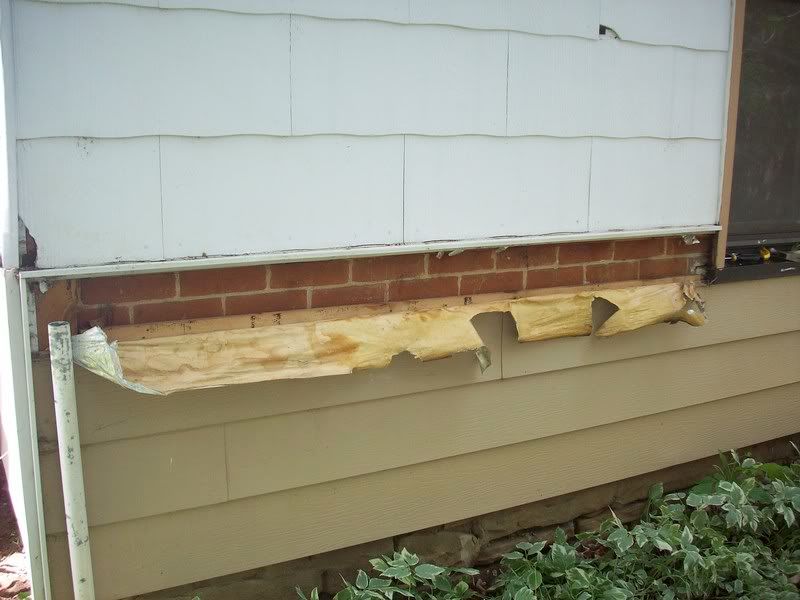
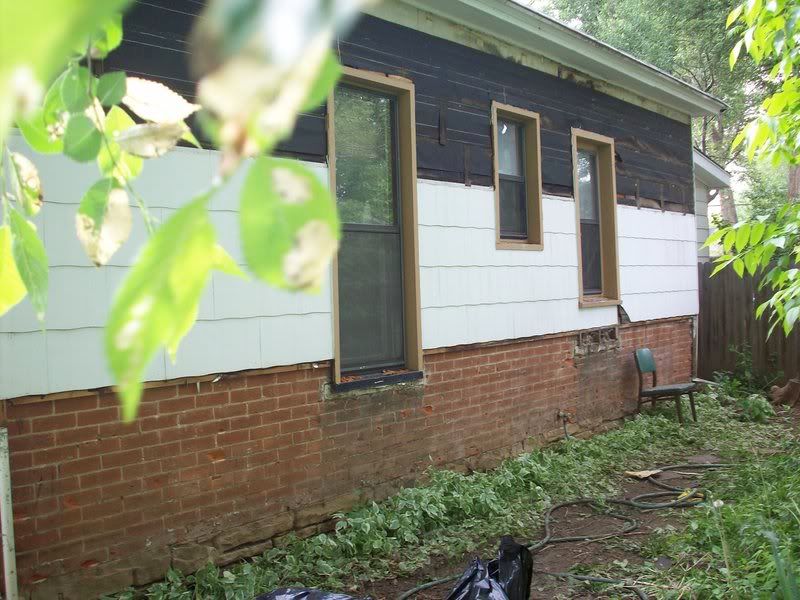
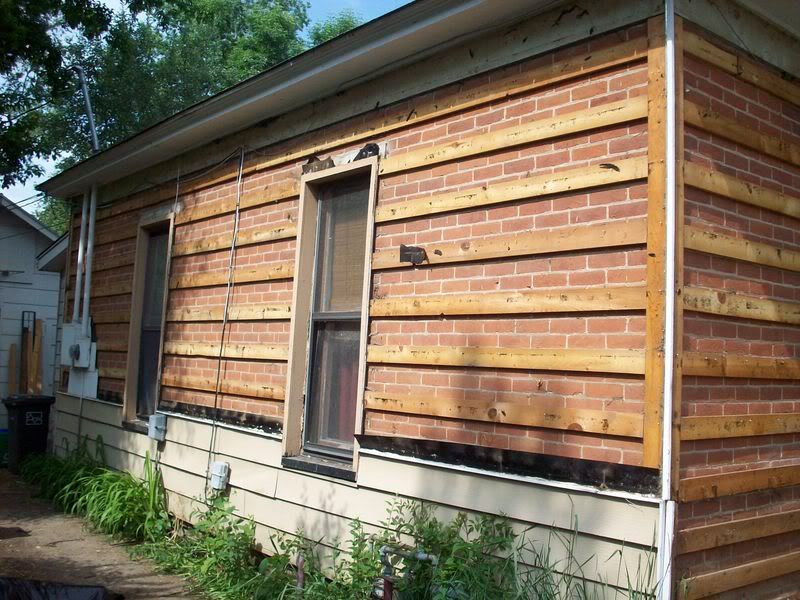
We removed the excess wood from the windows while they worked on the brick. It's the light tan wood in this picture, and was used to bring the window trim out beyond the siding:

Photobucket

It was obscuring some of the repairs needed.

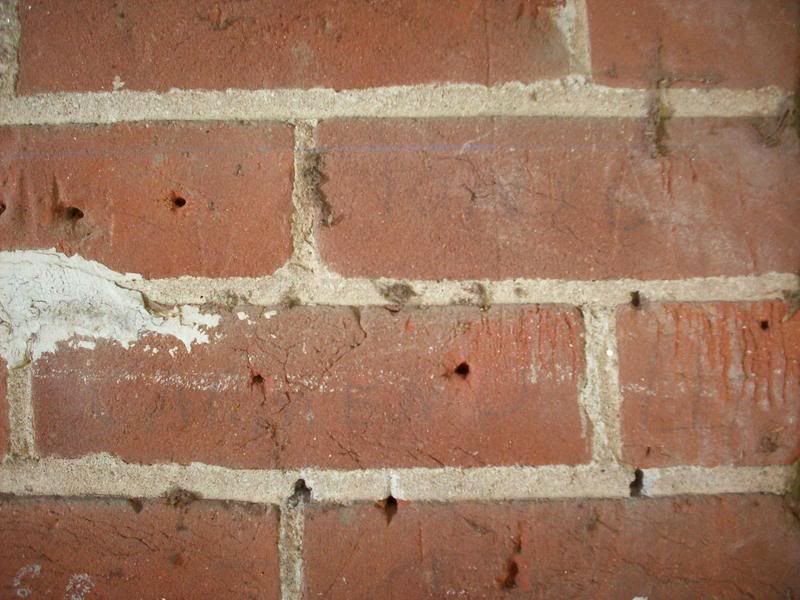
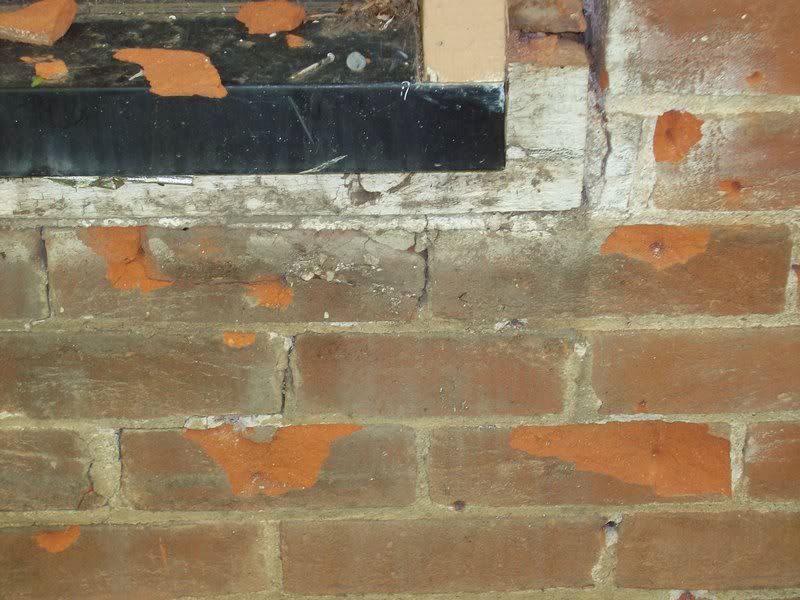
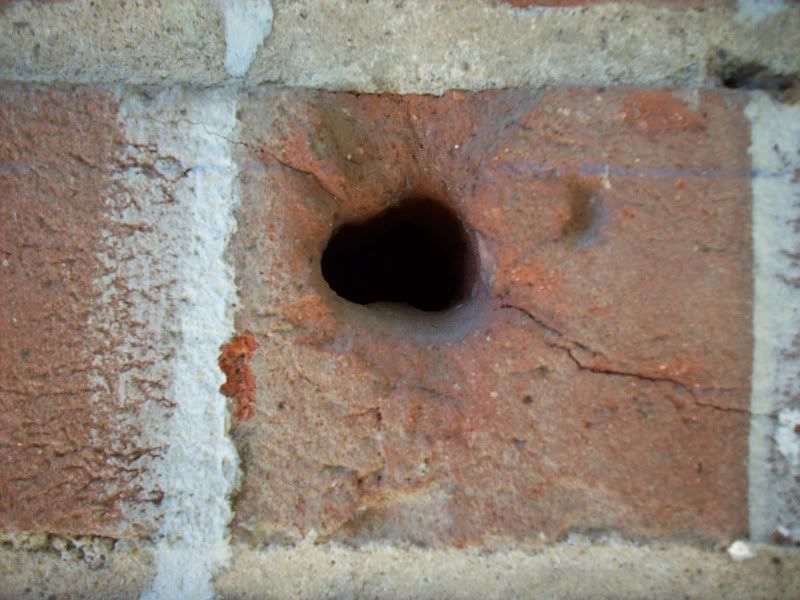
Then the mason called us over to look at a couple sample patches for the nail holes. We decided that a particular mix of clay might work the best. As we watched, he pushed the clay into the nail hole... AND THE WHOLE WALL MOVED INWARDS.

The window frames were keeping the walls from moving.

We know what is happening... the two wyeths of brick that form the cavity wall are separating. They should have been laid with a Flemish course (using bricks laid the short way to tie the wyeths together) when it was built. Now we will have to find a way to tie these wyeths together 100 years later.

We have a structural engineer coming out at 9 am tomorrow... please send us your good thoughts. I have no idea how much this is going to cost. It sure sounds expensive. Wish us luck.

Tuesday, June 24, 2008

I'm Famous... again!

Go check out our interview on Green Plan(t) this week! Amy writes a fabulous blog based around evironmental and simple living issues, and is running a weekly special on tiny houses and the people who live in them. Be sure to check out the other "tiny-lifers" she's interviewed so far!

Thanks again Amy, for letting us spout off about our tiny old house!

Monday, June 23, 2008

Reading the Writing on the Walls...

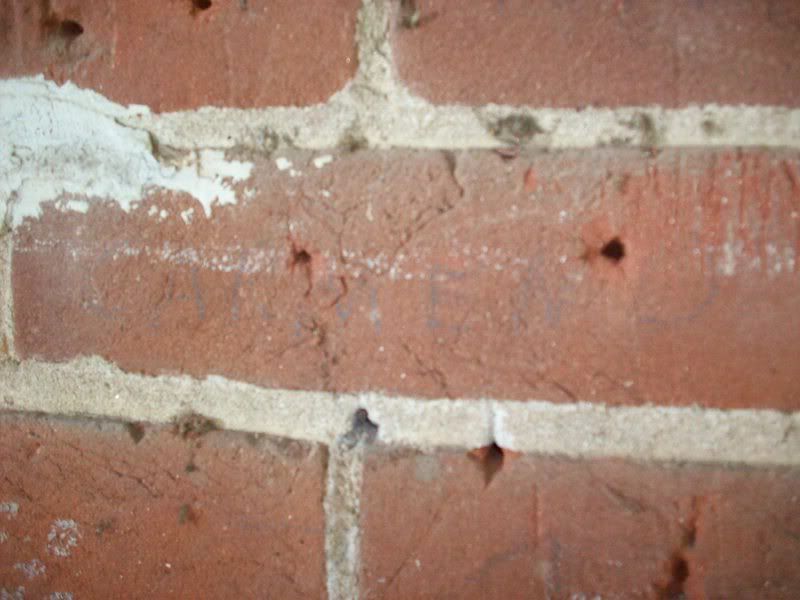
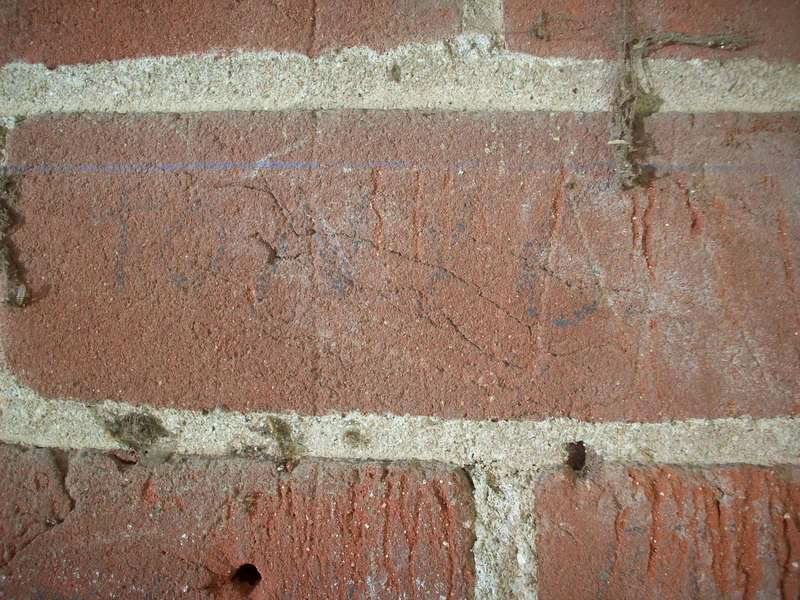
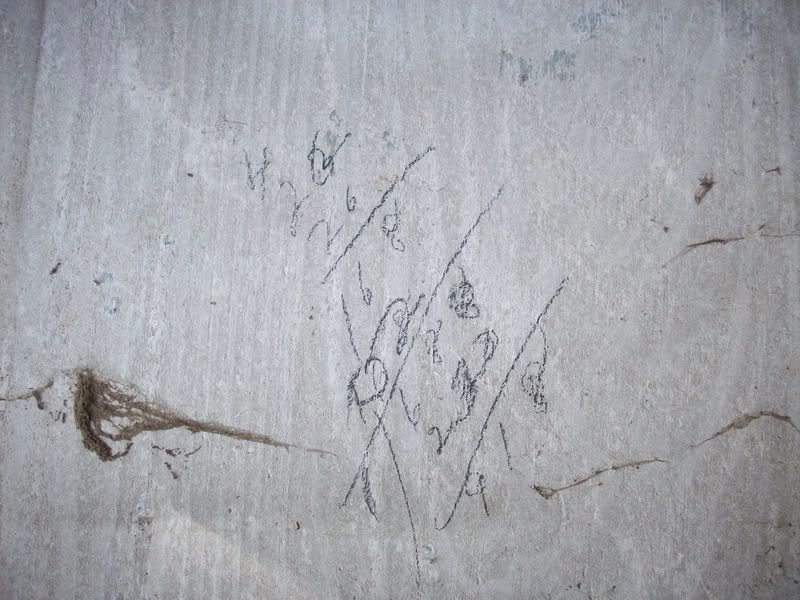
In preparation for keeping the brick NATURAL (yes, we've decided to scrape up the money to keep it natural... thanks for your comments to assure us it was worth it!), I've been scrubbing down the brick. There are spiderwebs and crayon names and drawings to remove before work is started!
It's a veritable "who's who" of the house's former child residents!

Photobucket
"CARMEN O" and "TONY C"

Photobucket
"CARMEN O"

Photobucket
"TONY C"

Photobucket
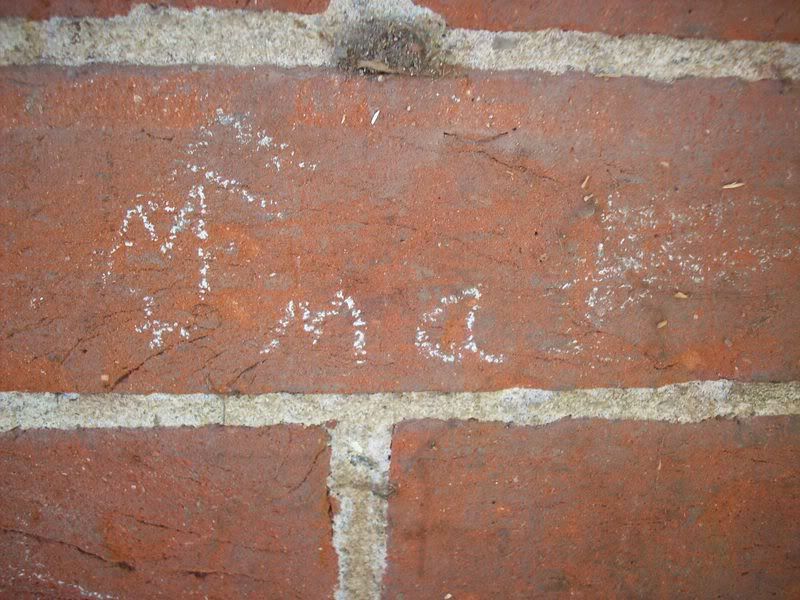
"Mma" ?

Photobucket
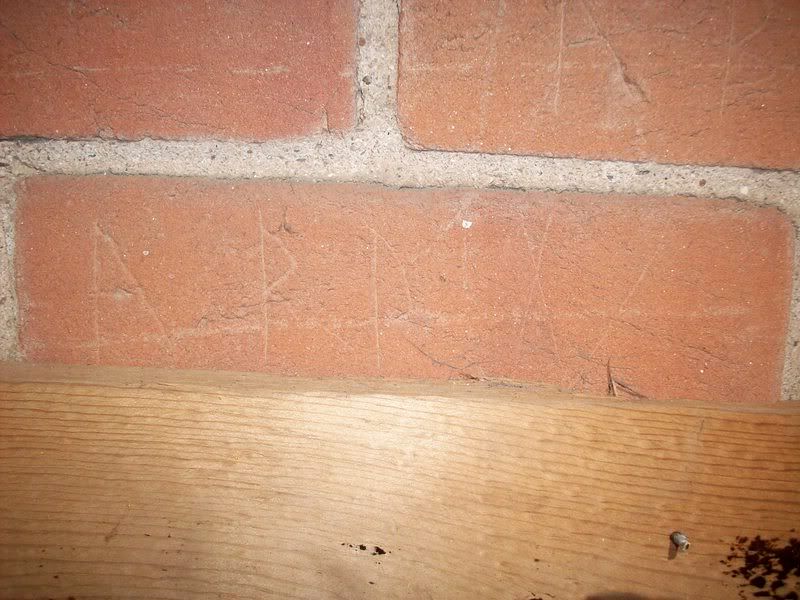
"HABMN" ?

Photobucket
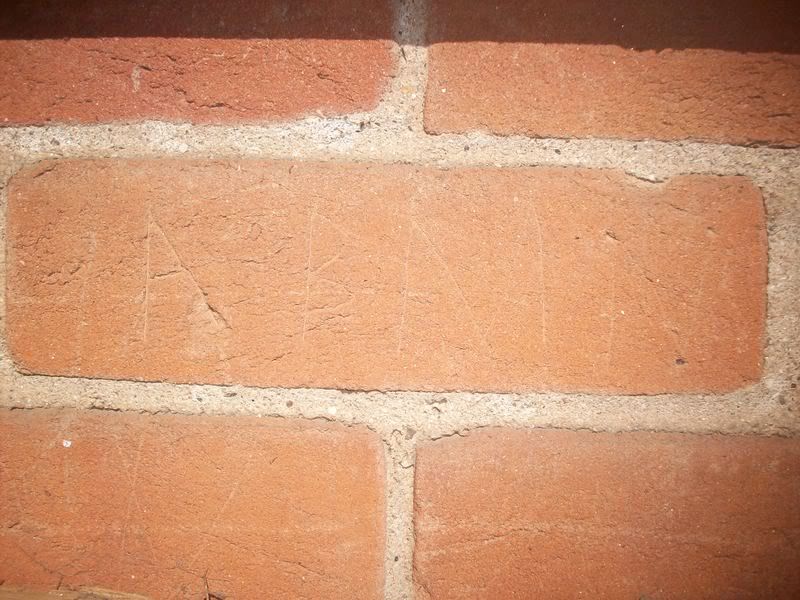
"ARRX" ?

Photobucket
"MURRAY"

... and many more that are no longer legible or were obscene in some way.

I've been using a soft, natural bristle roofing brush to clean the brick. I cleaned the cobwebs and dust off first, using the bristle brush dry, and now am dipping the brush in water to help remove the snap chalk lines from the siding installation.

The crayon and chalk names are the hardest to remove... they are right by the front door, though, so I want them gone. I found using a SOFT toothbrush gives just the right amount of abrasion for removing the writing but not the brick. I've scrubbed just about every brick on the front of the house by hand with a toothbrush...

Friday, June 20, 2008

The Second Brick Estimate... and a Quandary

A second mason made his appearance at our house today; I must say I am impressed. He pronounced our house to be in excellent condition for its age and need in only minor repairs. (Just like the first mason).

Brownie Points:
  • He mentioned that he used to live a couple blocks away in an old house, and how neat these old houses are.
  • He mentioned that the old mortar was just lime and sand, which would need replicated to avoid damaging brick BEFORE I asked about what mortars he would use. (The other mason danced around this question, and mentioned something about white mortar)
  • He was appalled that we might paint, and said he could make it look good enough to not need paint. (The other mason said we couldn't NOT paint)
  • He has enough bricks of the right size, age, and approximate color in his yard RIGHT NOW to do the job. (The other mason wasn't sure where to get them)

Did I mention he doesn't want us to paint?

We had him give us two estimates; one for just structural work so we could paint and one for making it "pretty" with matching brick and mortar.

Structural Work: $600
"Pretty" Work: $1800
(In comparison, the first mason was $400 to $800 for essentially structural work)

I must say... the "pretty" work was much less than I feared it could be. It doesn't include filling the nail holes, as he said that anything he could do would look like filled nail holes, and the holes themselves would be less notice-able.


Now the quandary... perhaps we should not have started this project this summer, but money is tight around here. Due to grad school, less work than usual this summer for me, and the rising cost of fuel and food, we will really have to scrape $1800 up (and credit of any sort is NOT an option). Unfortunately, I don't think we can do the $600 structural fix, and then "go back" and have them do the "pretty" fix. We really do want the natural brick, and I think it will have higher resale value overall...

Vote: Paint or Natural?

Our Rede

Rede... Brazilian for hammock. It's pronounced "hedgie".

We acquired this rede from a family member who traveled to Brazil on business; they brought it back for us in their luggage. Despite 17 (wait... 16 now) trees, we had no where to hang it.

We discussed the options...
1) Dig holes, fill with cement and fence posts. Hang rede. This one had no instant gratification factor, though... plus the cost of cement and fence posts.
2) Buy commercial stand... at $150+. Not an option!
3) Build a hammock stand from scratch. This one seemed financially prohibitive, too... until we remembered the city recycling center with its scrap wood pile!

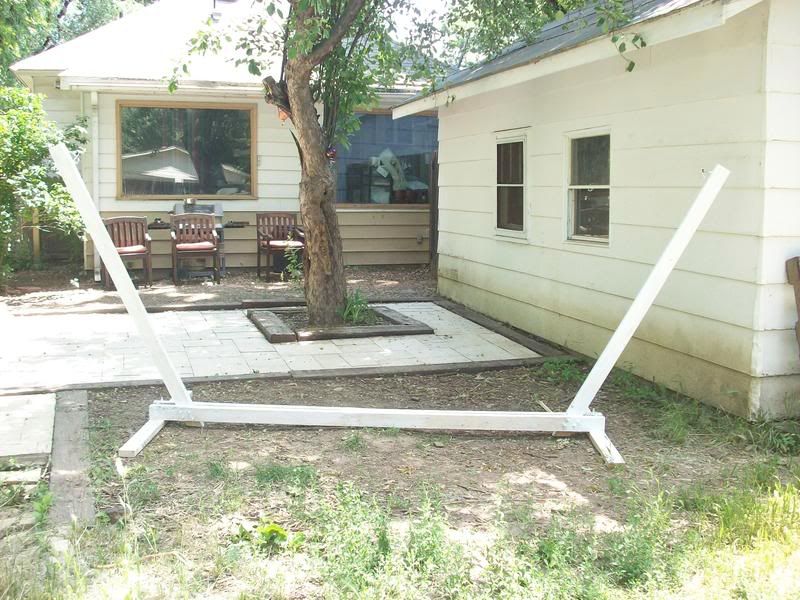
We found a plan for a hammock stand online. With a few modifications for our much longer than standard size rede, we created THIS:
Photobucket
It's covered in one coat of primer here... and you can see my newly pressure-washed patio in the background. Nice and clean!

We found all of the wood we needed at the city recycling center, waiting to be mulched. We simply pried out a few nails and cut them to length. We did spend $25 at the hardware store on bolts, nuts, and washers... but got at least $25 of entertainment trying to put it together.

What did we change?
We moved the diagonal "arms" of the stand outward about 10 inches to each side, giving us a bigger spread for the rede. We also hung the eye bolts a little higher on the arms to keep our back ends from hitting the ground... sadly, both of these changes happened AFTER we had drilled and completely set up the rede stand once. If we were to make another one, we would try using 4x4's for the uprights and 2x6's for the long horizontals for greater stability. It's not unstable, but one does get the feeling that there shouldn't be much more than 200 lbs in it at any one time.

It's a good stand all in all... we plan on painting it dark blue. I'll post pictures of the completed stand AND rede in a few days. Here's to a summer of relaxing!

Tuesday, June 17, 2008

We Finally got a Brick Estimate!

We FINALLY got a mason to come over and look at our house! It only took about 10 days of calling every mason in the phone book. Isn't there a housing crisis and a downturn in house building right now? You'd think they'd need work!

The mason was very hard to read... in fact, we thought our house might be falling down from the looks on his face for about 5 silent minutes.

Luckily, he was very positive! He said it looks structurally fine, and that there was about a day's work in repointing various spots and rebuilding some of the areas under windows. He didn't want to give an actual estimate until we had scrubbed the brick down... but did give us a ball park of $400 a day, with no more than 2 days of work. Definitely in our price range...

He WASN'T so positive about being able to keep it natural OR our ability to find matching bricks... he said we will probably need to paint due to this.

So here's the question... how bad WILL a missmatched brick or three look every once in a while? Is it preferable to painted brick? And finally... if we are going to end up painting it, will we be better off just doing the work ourselves (since it won't have to look perfect if it is to be covered in paint)?

(For pictures of the work to be done, see this post)

Monday, June 16, 2008

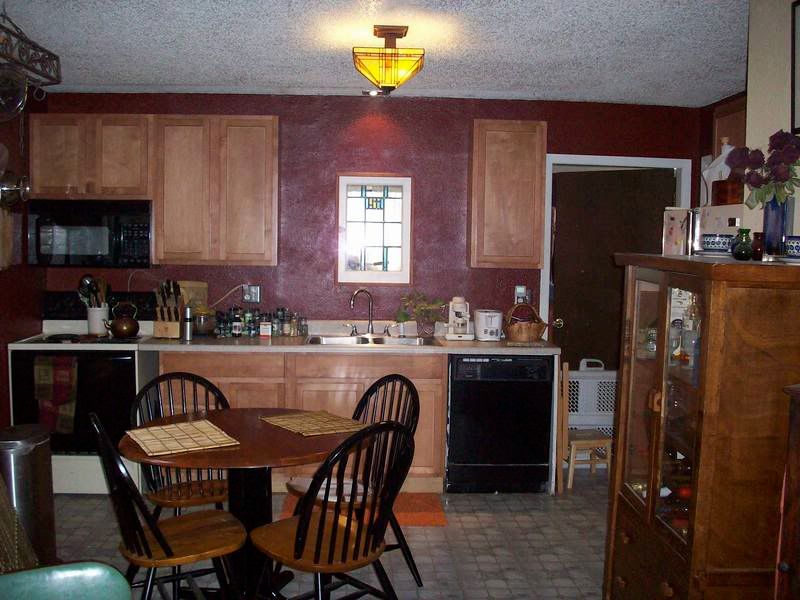
Our New Countertops

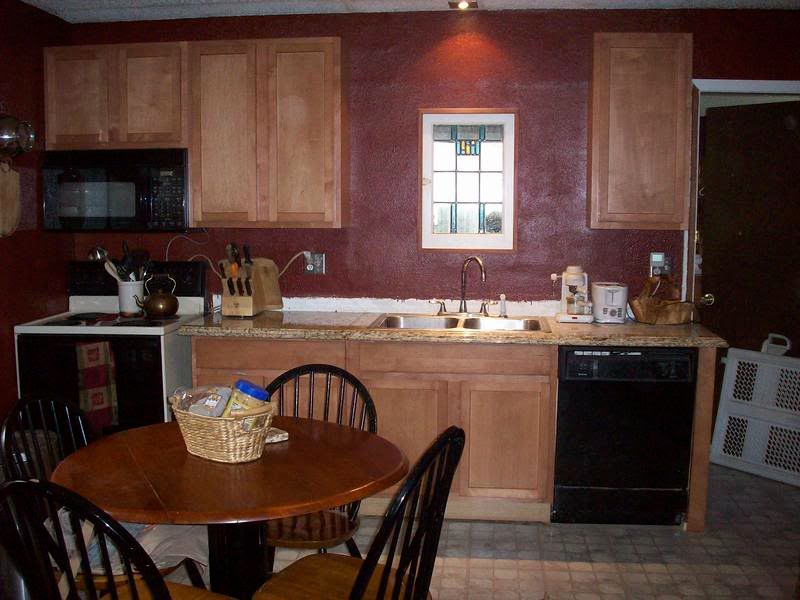
My father-in-law graciously spent his Father's Day installing our granite countertop. (The one he created for us out of salvaged granite). I was away most of the day for a concert, so I apologize for lack of play-by-play.

Here's the workbench...
Photobucket

When We Bought... After Cabinets...
PhotobucketPhotobucket

With Granite!
Photobucket

Notice the super fancy edge... I'm sure it was expensive when new.

We aren't finished yet... as you can see, there is still a gap between the stove and the counter/cabinets and no backsplash. The gap we intend on filling with a piece of butcher block counter with knife slots and a small door to hide our baking pans...

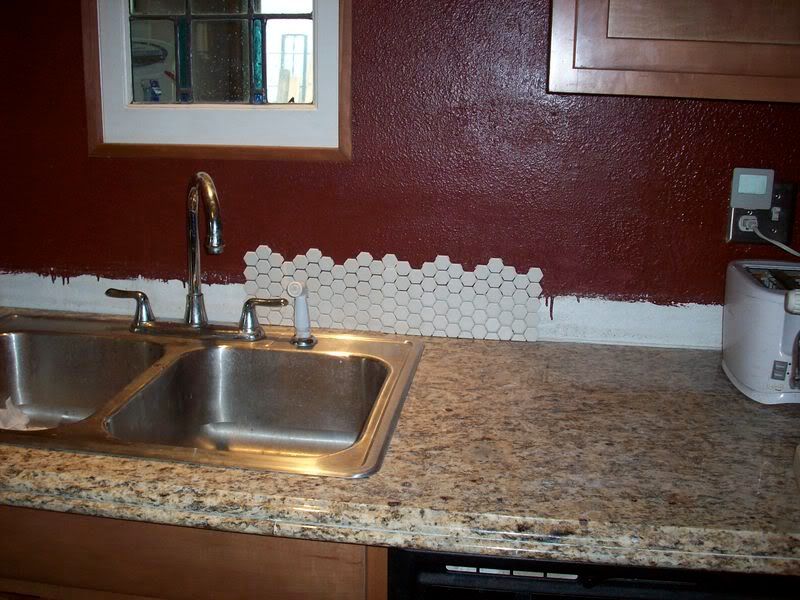
and here is one idea for the backsplash. The GREAT part about this backsplash is that we already have all of the materials, so it would be free.

Photobucket

The hexagonal tiles I picked up at Habitat a few months ago for cheap!
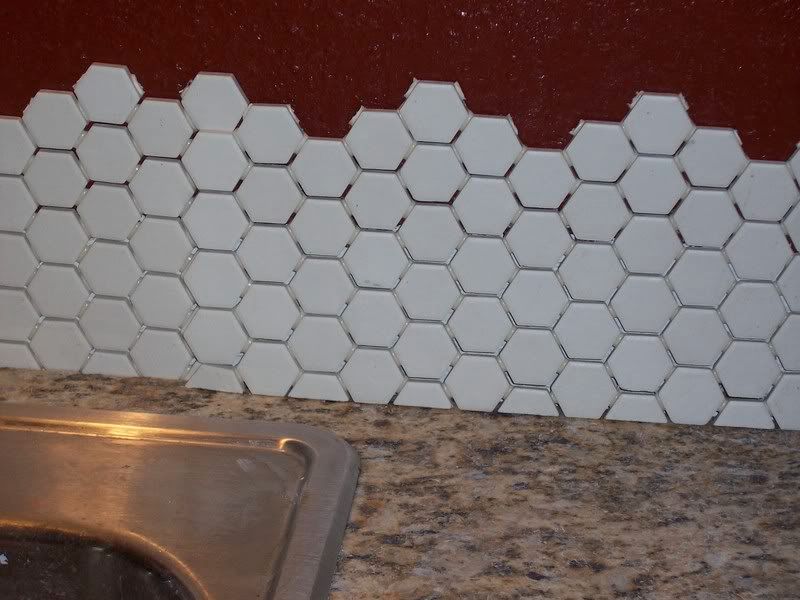
Here's an "up-close"...

Photobucket

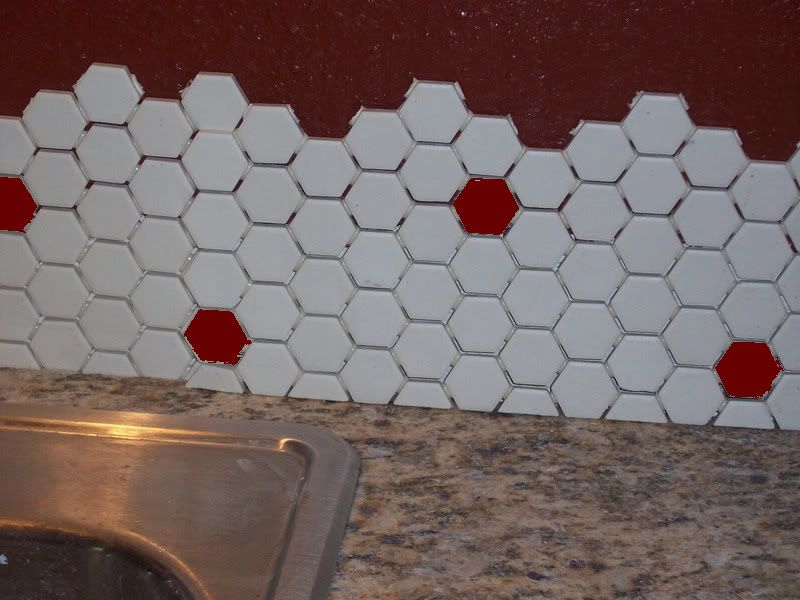
I can't decide whether it looks REALLY good or REALLY bad. I also thought that replacing a few of the tiles with a color would look nice... I tried red below:

Photobucket

Any thoughts? I think cream subway tiles would look good, too... and so would white/torquiose/red glass mosaic tiles... but both of those options cost money, so it would be at least 4 months before we could start the backsplash.

In Other News...

...the baby downy woodpeckers are alive, well, and QUITE loud. One more week until we can chop the tree up. Hopefully our neighbors don't mind too much!

...the fine folks at One Project Closer are pledging money to Habitat for Humanity this summer. I am a HUGE fan of Habitat for Humanity... and not only for their resale stores. Habitat does a fabulous job of getting homes into the hands of those who need them. OPC's contest sounds like a fun way to show off your progress AND benefit HfH.

... I STILL can't get a mason to commit to an estimate. They call me back, we chat about the house, and then they tell me they will call in a few days to set up an appointment. We are 0 for 4 right now.

... it's been a very busy week/end, and I have LOTS of projects to show off!

Wednesday, June 11, 2008

Death of a Tree

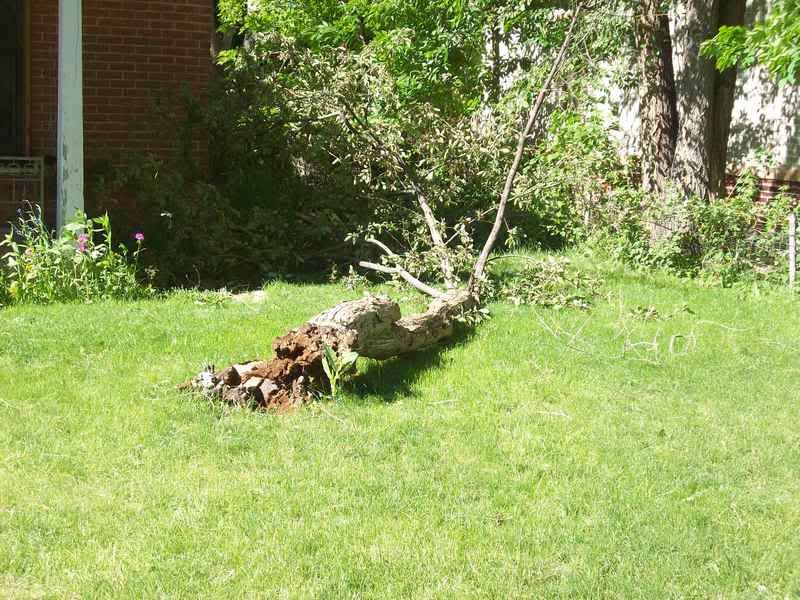
Just a few short months ago, I posted a beautiful picture of crap apple blossoms; I mentioned that it might be the last time the tree ever bloomed. How right I was.

It was VERY windy this afternoon. The wind blew and blew, with gust in the 50 mph's. The wind was so strong and loud that we never heard it fall. I stepped outside to get the mail, and the tree was lying on the ground.

Photobucket

Poor tree. I'm not surprised it fell; I'm surprised it held on this long. You can see that the trunk is completely rotted around the base, save for one small bit of live wood that was feeding the current blooms.

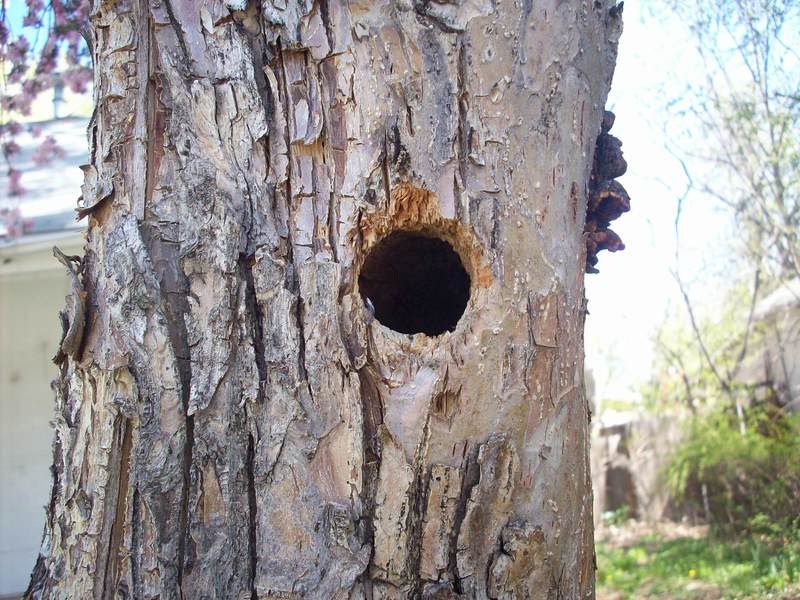
Hopefully the downy woodpeckers babies living in the woodpecker hole are fully fledged...
Photobucket
and have already flown away. This is the second year they have made a home in our crabapple; it's been quite a few weeks since we first noticed them this year, so I have some hope. They drilled this nest last year, about the time we noticed that half of the tree had died (and they were the reason we didn't remove the entire tree when we had our trees trimmed).

I didn't hear their soft cheeping when I tried to listen; but the wind was very loud.

Monday, June 9, 2008

Waste- The Environmental Impact of Siding Removal

Our project this past week was not without its environmental impact. We ripped close to 800 sf of siding off of our house, most of which is a hazardous waste. On paper, the option with the least impact to the environment would have been to leave the siding on the house. This would have prevented 1.6 cubic yards of asbestos siding and tar paper from entering the landfill.

One must consider, however, the impact of improving and renovating older homes. A nice looking home helps the entire community. It helps to create a sense of place, a sense that the neighborhood is a "good" neighborhood that should be preserved and promoted. One of the best ways to lessen the impact of homeownership on the environment is to buy a used house in an urban area close to things like a grocery store, restaurants, bookstores, etc... a downtown area. By making these homes MORE attractive, we can hopefully "stem" the tide of mass construction spreading across the farmlands.

The Waste:
~1.6 Cubic Yards of Asbestos Siding (~546 sf) and Tar paper (wrapped in 16 heavy duty plastic bags and duct tape)
~1/2 Gallon of Nails and Screws
~A VERY Large Pile of 1x3 Wood Boards
~200 sf of Steel Siding

How We Lessened the Impact:
1) I posted an ad on Craigslist and Freecycle offering asbestos shingles free to anyone needing to patch up their house. Sadly, no one took me up on this offer (which did surprise me, as I have seen people asking for them).

2) We carefully saved all of the nails and screws, and will hopefully be able to either reuse them for other projects or recycle them as scrap metal.

3) Our wood pile is full, so we plan on offering the wood as firewood or taking it to the city recycling center to be mulched.

4) We carefully removed the steel siding so that it could be reused, either on our backroom renovation or on someone else's house or shed. At the very worst, we can recycle it as scrap metal.

5) Finally, we bought as many of the needed tools used as we could. We couldn't find respirators used, but did find an old chipped chisel (perfect for chipping out the nail heads) and a set of vice grips that were perfect for my tiny hands.

Sunday, June 8, 2008

The Good, The Bad, and The Ugly

We have most of the house cleared of siding and wood now; it's been a slow, steady, and hot process.

The Good
Photobucket
Original Sills and Headers Intact


Photobucket
NOT Covered in Asbestos Siding

The Bad
Whoever re-sided the house took the brick off of the back of the house entirely, and framed that wall and the addition in instead. (I have my theories that I will explain in a future post, hopefully with historic backup.) That leaves us with about 3 feet of original house on each side of the addition that is NOT brick anymore. We've left the steel siding up for now.

Photobucket
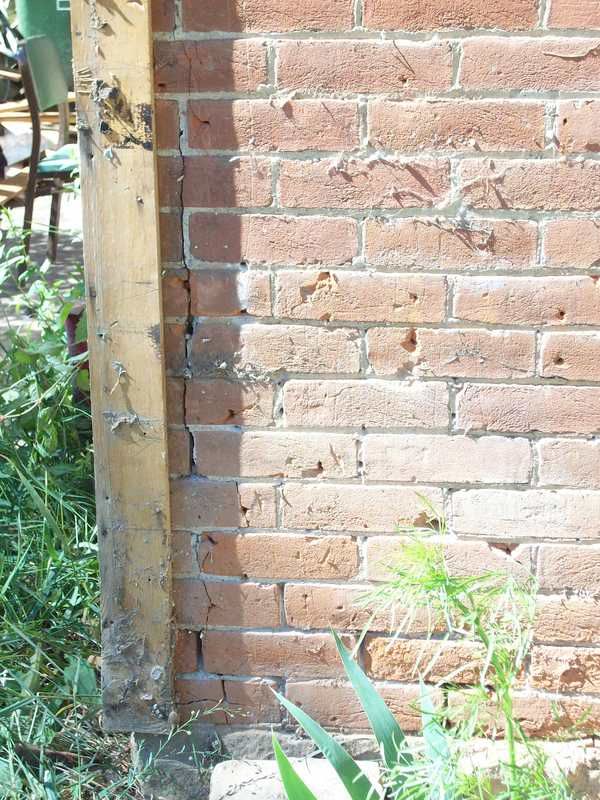
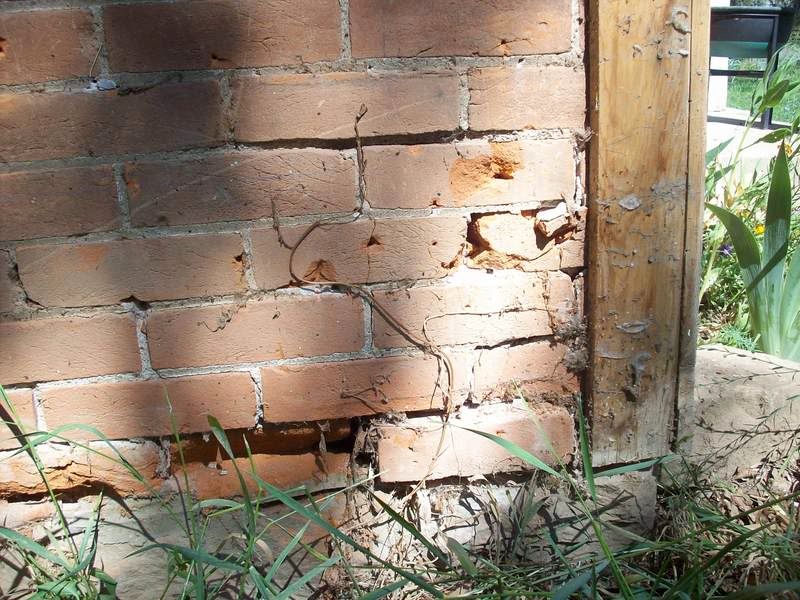
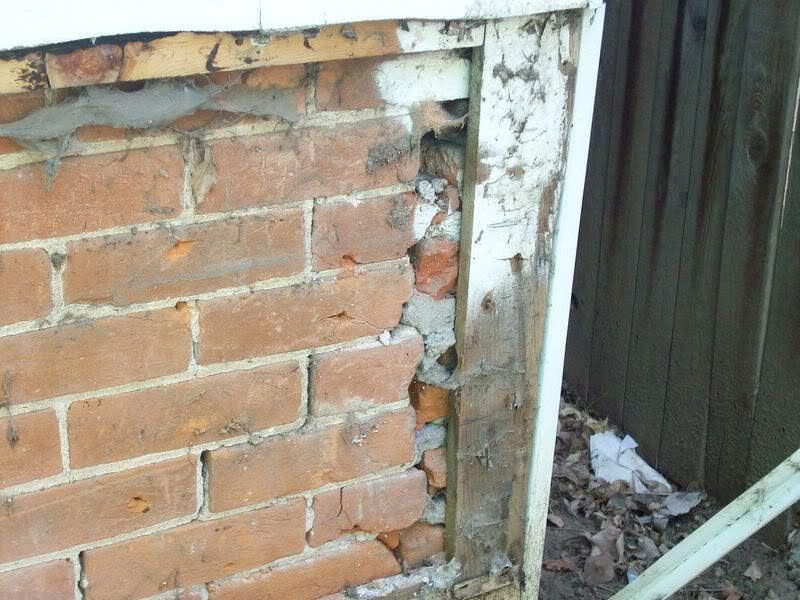
Corner A, crumbling with a large stairstep crack working up from the bottom to join it. This corner ajoins the "new" frame construction of the house, and we are a little afraid to take off the wood that is currently over part of it.

Photobucket
Photobucket
Corner B: Vertical cracks, mostly missing bricks, and stairstep cracks, OH MY!

Photobucket
Photobucket
Photobucket
Photobucket
Photobucket
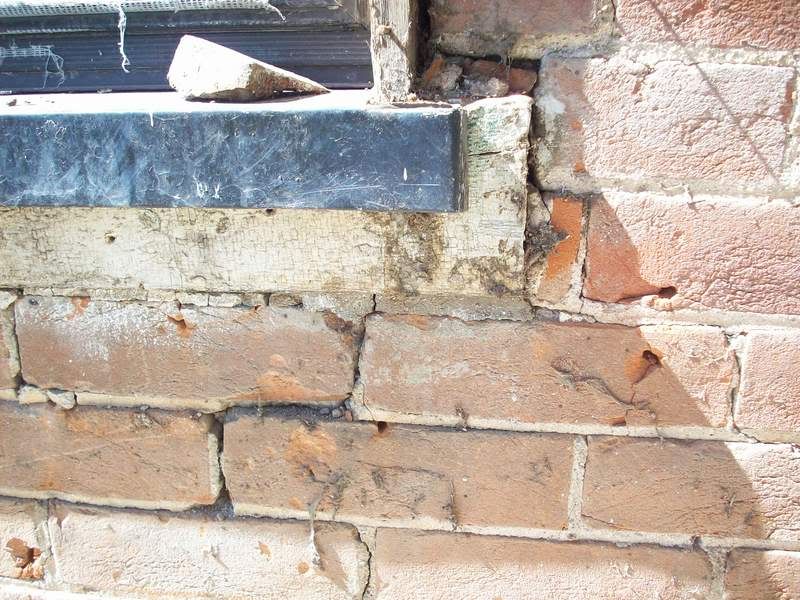
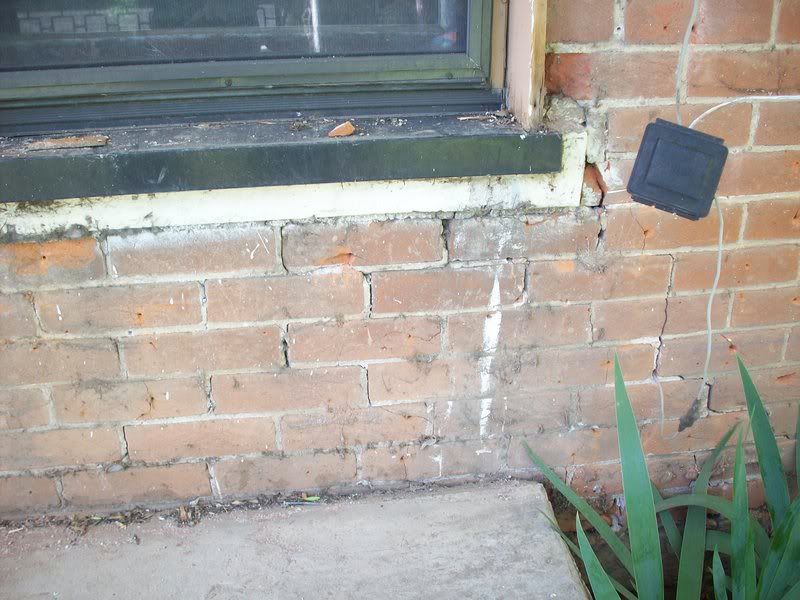
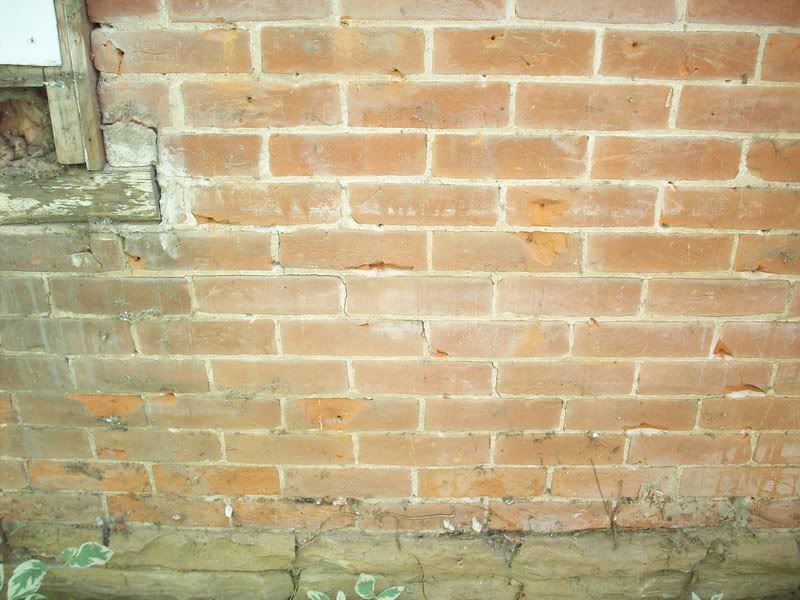
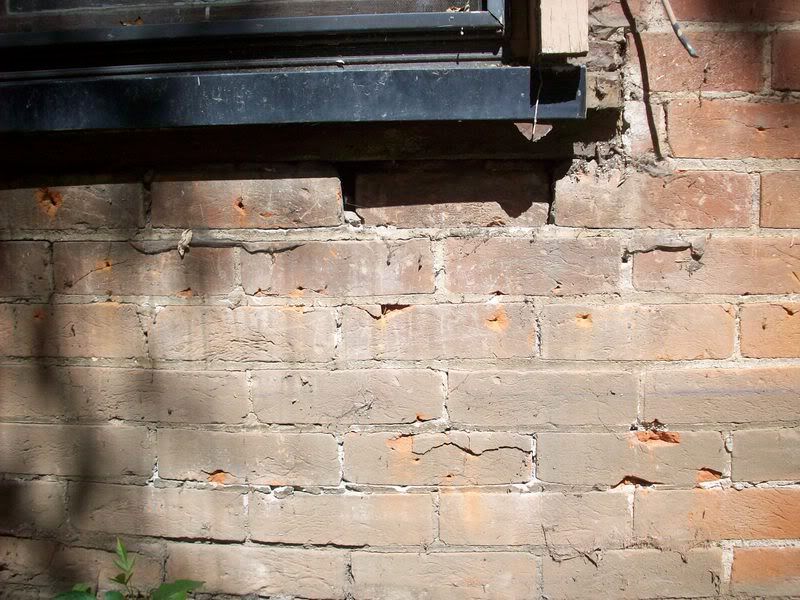
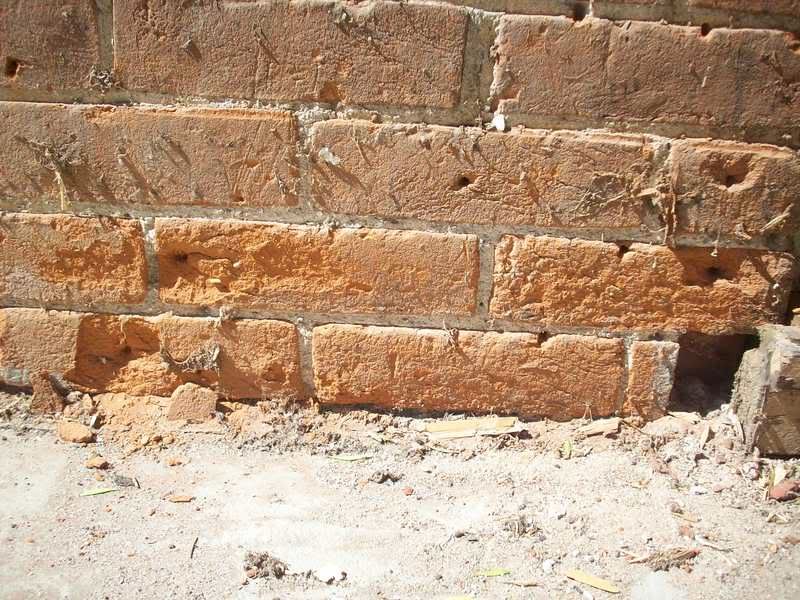
Cracks, cracks, and more cracks...

Photobucket
And loose bricks everywhere.


The Ugly
Photobucket
Photobucket
There are chips out of many of the bricks on the lower quarter of the house from where the previous owners carelessly ripped off the wood strips and tacked them up a little closer together for the steel siding skirt.

Photobucket
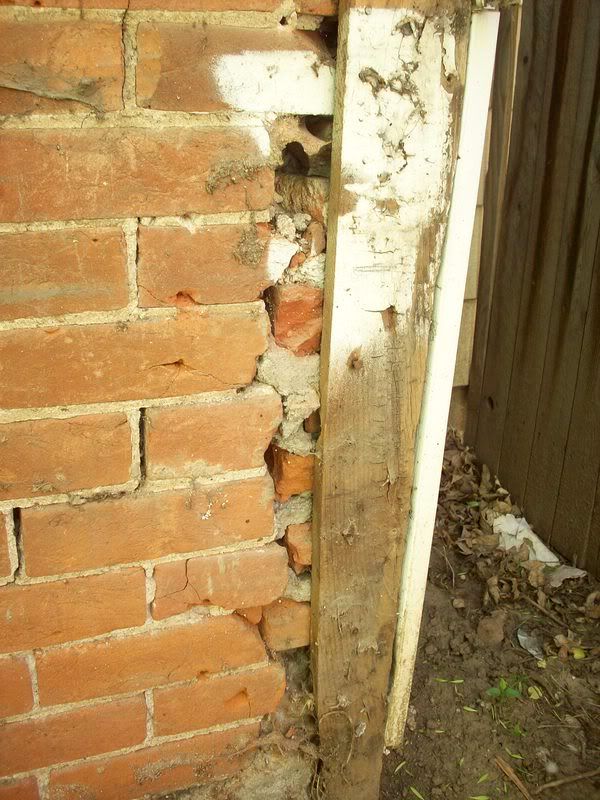
A big hole in the wall, where the previous porch columns were attached to the house.

The Plan
The plan of action is to call in a historic brick specialist and have an inspection done. Hopefully we can find some one who can do this for us, as we don't feel we have the expertise to determine the causes and fixes for all of these problems.

Friday, June 6, 2008

What A Change! (Siding Update)

One Week Ago:
Photobucket

Today:
Photobucket

We removed ALL of the wood from the front and east side of the house today (except the corners)!

Photobucket

I pried wood from the fronts of the windows:

Photobucket

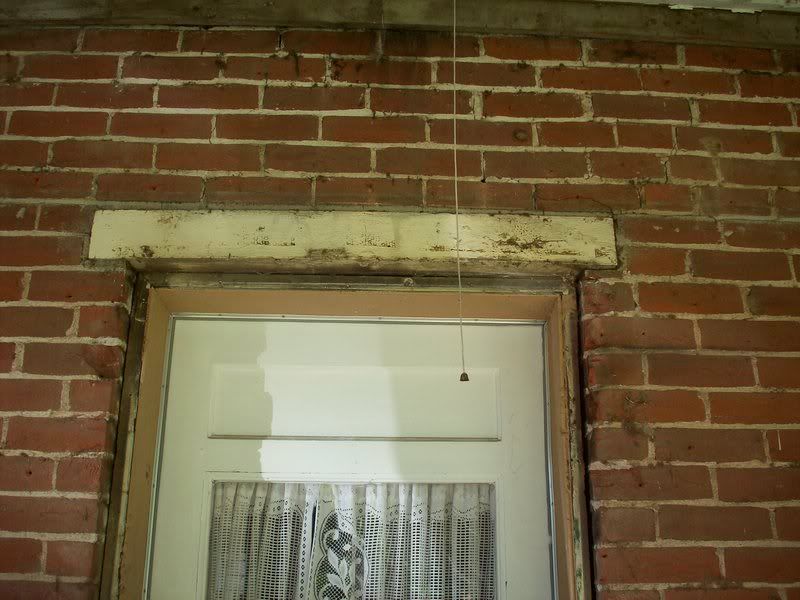
Those white things are the original headers and sills. They seem to be in excellent condition... a little sanding and paint, and they'll be good as new! Now you can REALLY see why getting the exact size of window MIGHT be non-negotiable.

Here's a view of the door's header... it's in the same vein, though much thicker:

Photobucket

Tomorrow: Wood and steel siding come down off of the west side!

Thursday, June 5, 2008

It's Raining, It's Pouring... So We Looked for New Windows

It rained ALL day. Steady, hard rain. My garden LOVES it. The siding removal project? Not so much!

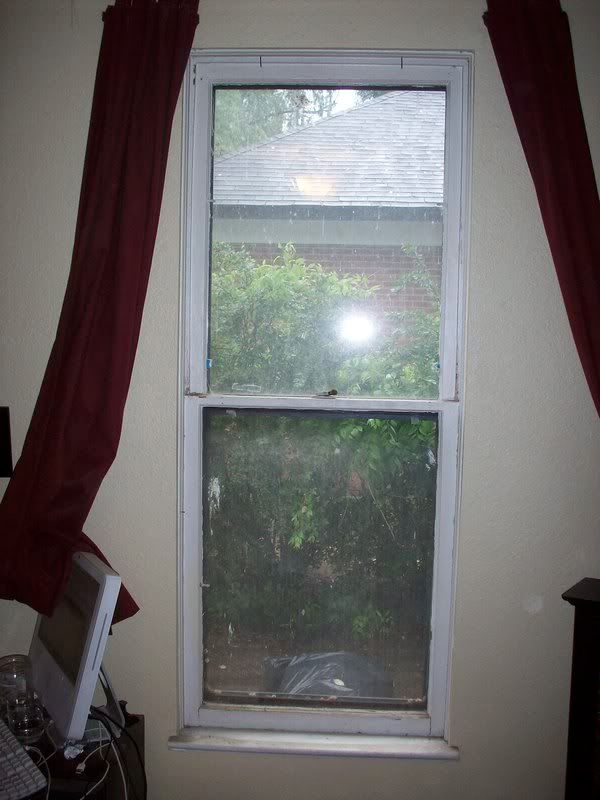
It was the perfect excuse to run to the local salvage outlets looking for a window to replace this one:
Photobucket

The current window is about 4 inches too narrow and about a foot too short for the window hole in the brick. Since we are removing the siding, we need to find a replacement in the original size.

Our house has five of these windows...
Photobucket

All of them 28 inches wide and 70 inches tall, and in various stages of disrepair... some are possibly beyond repair and held together by metal brackets. We need to find at least one more.

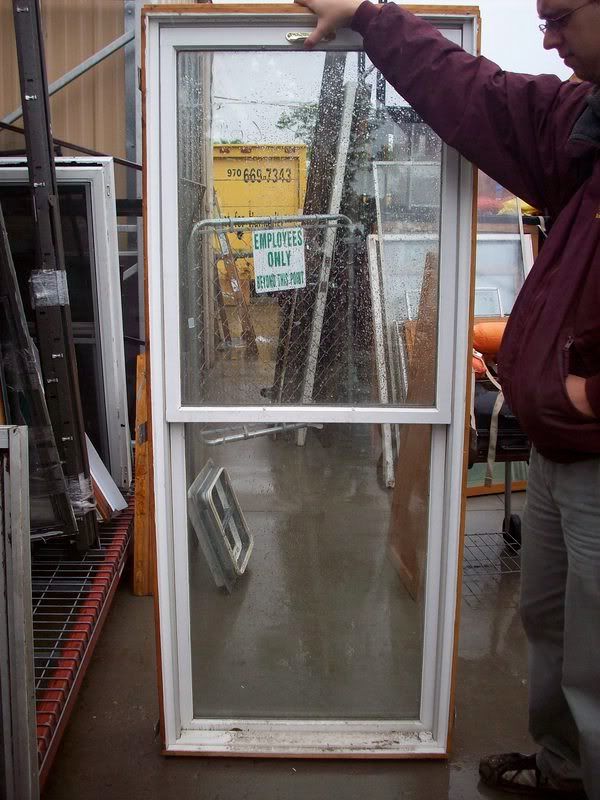
We struck out three times until we got to the Habitat ReStore, where we found THIS window (and three others just like it):
Photobucket

It's 28 inches wide and 69 inches tall (and yes, upside down). UGH! It's also a solid wood, double paned modern window... with almost the exact same detail around the glass panes... very tempting. They have almost enough to do our whole house. But I doubt we can get away with using a window ONE INCH too short in a brick house...

Wednesday, June 4, 2008

Tiny Old House vs Asbestos Siding, Day 4

Today was hard. It rained. We were in no mood to work; grumpy, irritable, cantankerous. Here's today's work:

Photobucket

ALL the asbestos is gone except THIS:
Photobucket
"This" is few panels under and around our electrical box. The City is coming out sometime this week to disconnect our service so we can safely remove and reattach it. They came out this morning to do this for us, but couldn't figure out how it was attached with the siding up. They asked us to call them when we had the siding down.

In answer to a few queries in the comments, we don't yet know what we will do with the house yet. Our dream is to salvage the brick; if we can do it ourselves AND it will cost the same or less than siding or stucco, we will DEFINITELY do it. Otherwise, we will likely paint it. A travesty... but there is a lot of damage. We're crossing our fingers here!

Tuesday, June 3, 2008

The Patio Ghost (The Great Siding Tear-Down Continues)

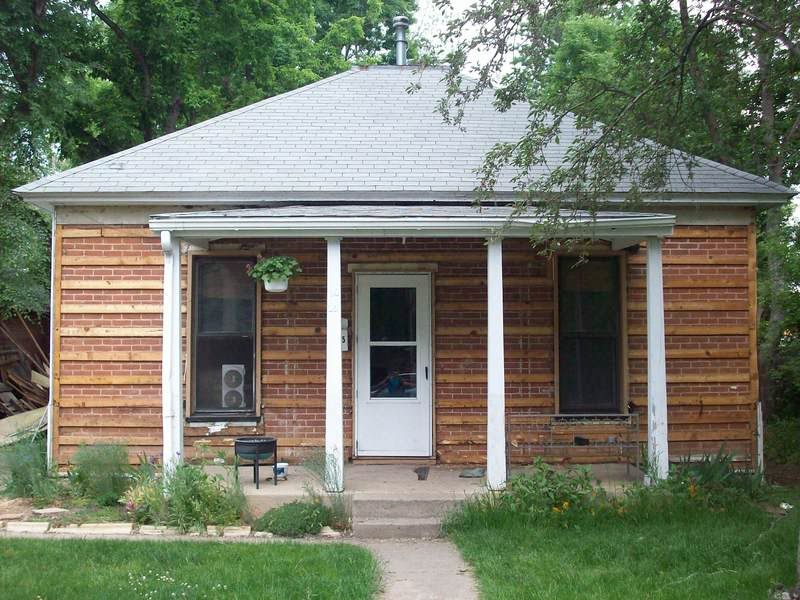
We removed the siding from the front of the house today:
Photobucket

We noticed two curious pairs of white lines running down the house vertically, a few feet from the door on each side:
Photobucket

Here's a close up:
Photobucket

We puzzled over them for a while before we realized that they are the "ghosts" of the original porch! The house next to us (which is identical in almost every way) has a porch that is exactly that size, covering just the front door. It also has two turned columns in the front, and two "half" columns against the house in exactly those spots. The current porch on our house must not be original to the house; I am guessing it was poured and roofed at the same time as the house was clad in siding.

Monday, June 2, 2008

A Little Math Problem (and an Update)

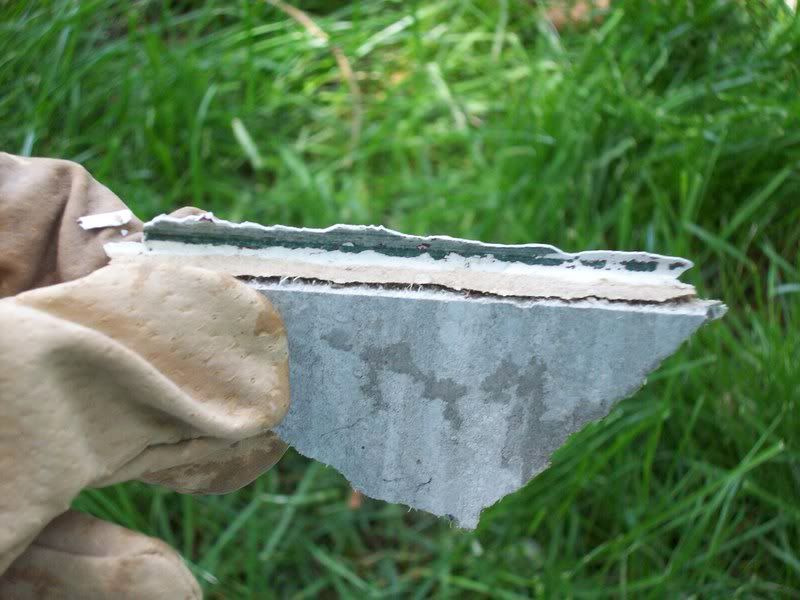
Found this written on the back of a shingle:
Photobucket
Who says you don't need math in the "real" world?

•••••••••••••••••••••••••••••••••••••••••••••••••••••••••••••••••••••••

Here's the daily update:
Photobucket

It is VERY hard to get the nails out of the 2x4's without damaging the brick behind. The nails are masonry nails (threaded) and so they grip the brick. If you try to pull them straight out, they pull the brick out with it, leaving a huge chunk.

We discovered that "unscrewing" them from the wall was the best option, using our vise-grips and a LOT of elbow grease. First, you must "free" the head of the nail... an old chisel worked well to chip away the wood around the nail head. Then, grip the nail in the tip of the vise grips, as tight as you can get. Slowly twist and pull the nail straight out. This only leaves a small hole.

•••••••••••••••••••••••••••••••••••••••••••••••••••••••••••••••••••••

Disclaimer: I am NOT a professional! Don't take my word on anything related to asbestos. Do NOT attempt to remove asbestos siding without consulting with the proper state licensing/permit agency. Do NOT attempt it without the proper safety precautions. And PLEASE do your research!

Sunday, June 1, 2008

Inch by Inch, Row by Row...

Going to get this siding off!

We started on this side:
Photobucket

Inch by inch...
Photobucket

Row by row...
Photobucket
the asbestos siding came off from the top.

As a short person, I started on the bottom with the steel siding:
Photobucket

••••••••••••••••••••••••••••••••••••••••••••••••••••••••••••••••••••

Discoveries!
Here you can see how long the far right window is "supposed" to be:
Photobucket
Going to have to get a replacement in the original size!

We discovered that the original trim around the soffits was green:
Photobucket
This is one of the colors we have been debating for the trim if we can salvage the brick... I think it is confirmed!
Someone named Murray lived in our house:
Photobucket
Must find time to dig through the historical records at the library to confirm.

Finally... something SCARY. This is the corner of the wall:
Photobucket
SCARY. We have no idea if it is salvageable or not... or even if it is structurally sound. We took a risk taking the siding off... hopefully we didn't open a bigger can of worms. I suppose it is better for us to find and fix it than to live in ignorance.

••••••••••••••••••••••••••••••••••••••••••••••••••••••••••••••••••••

HOW?
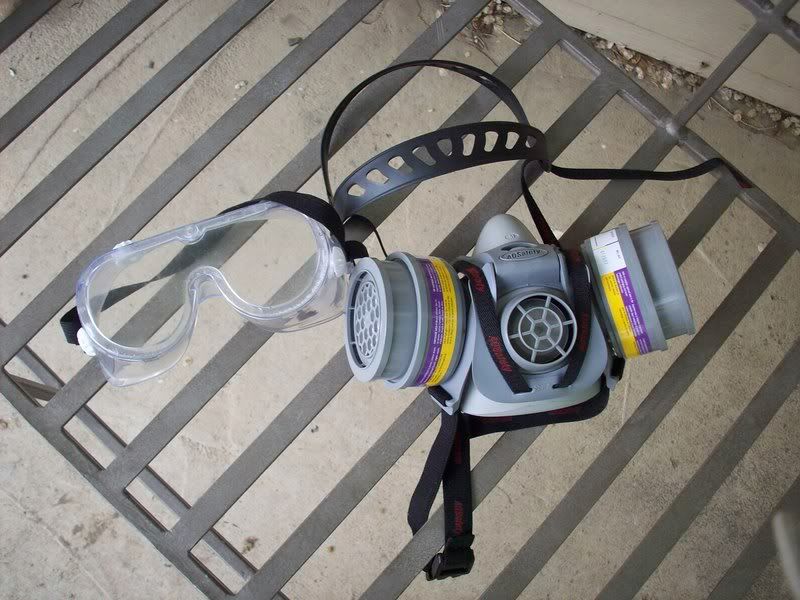
How did we take the siding off? I thought you might ask. First, we donned special protective gear...
Photobucket
being a petite person, I had to try on several respirators to find one that would actually seal around my face. Most of them went past my eyelids when properly tightened!
Once we were fully geared up, we soaked the wall with water and dish-soap using a garden sprayer. We used nail snips to remove the heads off of the nails, allowing us to pull the shingles off intact with little to no breakage. We sprayed down the backs of the shingles and deposited them carefully in a heavy plastic bag. This is all that is required in my state... yours might be different.

It is very difficult to get the wood strips off of the brick without dislodging chunks of weaker brick... luckily most nails were in mortar. There are quite a few gouges that need patched, now...

••••••••••••••••••••••••••••••••••••••••••••••••••••••••••••••••••••

Here is what we accomplished today:
Photobucket

Back in the saddle tomorrow, and all this week... we will be trying to decide the best course of action as we uncover more and more. Do we salvage? Do we patch and paint? Do we just stucco over it? Tough decisions... but at least the ugly siding is gone!
•••••••••••••••••••••••••••••••••••••••••••••••••••••••••••••••••••••••

Disclaimer: I am NOT a professional. This is in no way a condonement of DIY asbestos containment or removal. Do NOT attempt to remove asbestos siding without consulting with the proper state licensing/permit agency. Do NOT attempt it without the proper safety precautions. And PLEASE do your research!