I've been very busy over here at the Tiny Old House this week with the things that keep my home improving funded... so busy that I didn't see Paul at the Homeowner's Blog had mentioned us as a favorite read. Thanks Paul! It's nice to feel I'm not blathering away in cyberspace to no one.
I thought I would pass on the favor by listing a few of the blogs I read in detail. Please check these out, as well as those in my blogroll on the side of my blog.
Chile Chews
Battles with Colossal Cauliflower, life changing challenges, and recipes for chocolate truffles... what more could one want? Throw in insightful musings and advice on sustainable and simple living and a great sense of humor, mix with a hand cranked blender, and drink with breakfast every morning.
Green Bean Dreams
What could be better than dreams of fresh crunchy green beans out of the garden? Planting them. Or at least reading about it and dreaming! Green Bean writes great essays and contemplations on things that affect our everyday lives, from the wonderful benefits of silence to the world of Elmo.
Our Tiny Oak Park Bungalow
A morning dose of bungalow glory! Complete with furniture making adventures, picture rails (drool), and some great ideas on simple living!
This Old (Crack) House
Frankenstein lights, cement sinks, and doors that didn't close- oh my! What a fabulous house (and blog).
One Project Closer
Check out One Project Closer. Reviews of all sorts of home improvement tools and materials, from CFL's to quality paints and used tools.
819 Ohio
Come for the pastries, stay for the great decorating and useful tips!
A Bungalow Transformation
I want this house. Seriously. And it's been so fascinating to watch it transform. Plus, I like to steal their ideas and post names. :)
Delano Bungalow
They may in fact own the heaviest door... and great tips for odd additions.
Oh, Bungalow
I love their patio. LOVE it! And their bathroom is just so full of character.
ThirteenEleven
What could be better than taking a nice walk? Walking through ThirteenEleven's neighborhood!
I read so many every day... I had a hard time coming up with just a few! I know I forgot some that I read, too. I'll try to do a blogroll post every once in a while so I can catch them all!
Thursday, February 28, 2008
Tuesday, February 26, 2008
Some Back Room Ideas
As I said previously, we are attempting to remodel our back room. Here is the original room: (20'x10', with a sloping ceiling)
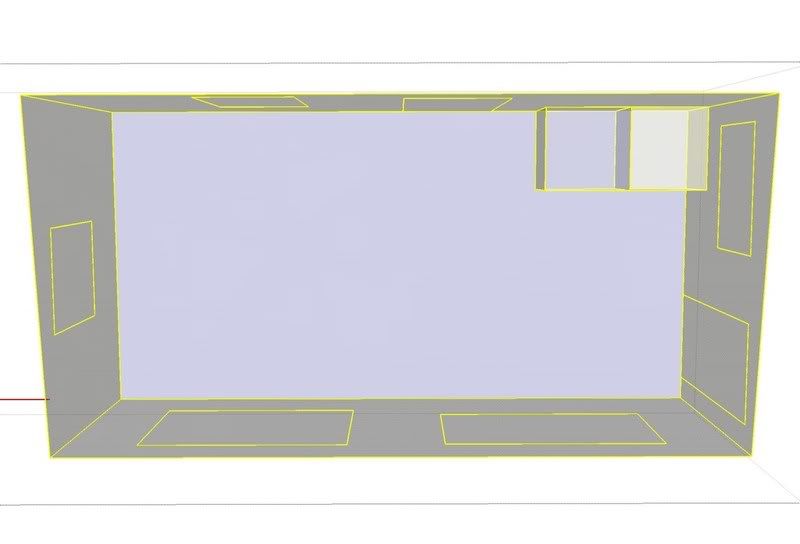
The door on the top leads into the main house. The door on the right side leads out to the driveway. We are removing both huge windows on the bottom as well as the window into the next room at the top.
Right now it functions as a bedroom, laundry room, and dog sleeping room (it's divided by a huge ugly armoire.) We need it to function as all or most of those things in the remodel. Sadly, the pups can not sleep WITH us, due to allergies... and they are too young to be trusted not to chew themselves to sleep.
The laundry area is currently storing our family filing cabinet, a cabinet of house tools/paint/etc, linens, and dog things.
The other bedrooms in the house are 8'x10 and 10'x12', each with a closet taken out of that floorspace... basically anything we do to this new space is bigger than either other bedroom.
Thanks to all of your suggestions on the previous post... here are three possibilities. I added French doors at the bottom of each, but didn't work on placement at all, so it's sort of awkward in all of them.
Here is the room in our first configuration, with completely separated areas:
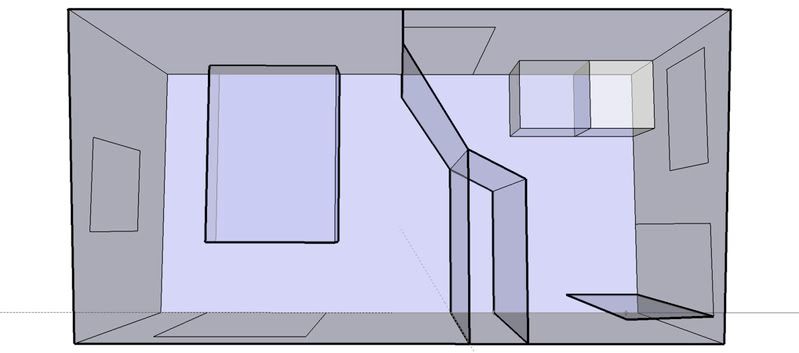
Pros:
Doggy space
Separate Laundry Area with room for cabinets and LOTS of storage
Direct access from the house to the driveway/trash can
Would be easy to build built in storage on either side of the bed (floor to ceiling)
Cons:
SMALL closet space (though bigger than what we are using now)
Smaller bedroom
Weird walls/dimensions
Here is the room with a walk in closet:
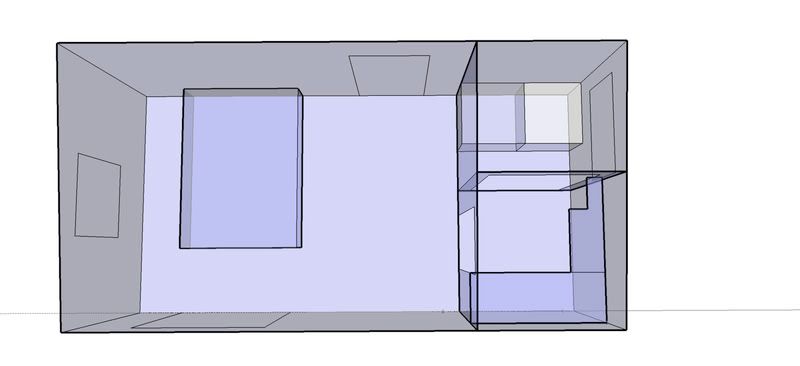
Pros:
Walk in closet
Larger (10x15) Bedroom
Logical floorplan and layout
Cons:
No doggy space
No paint/tool space
No direct access to driveway/trashcans
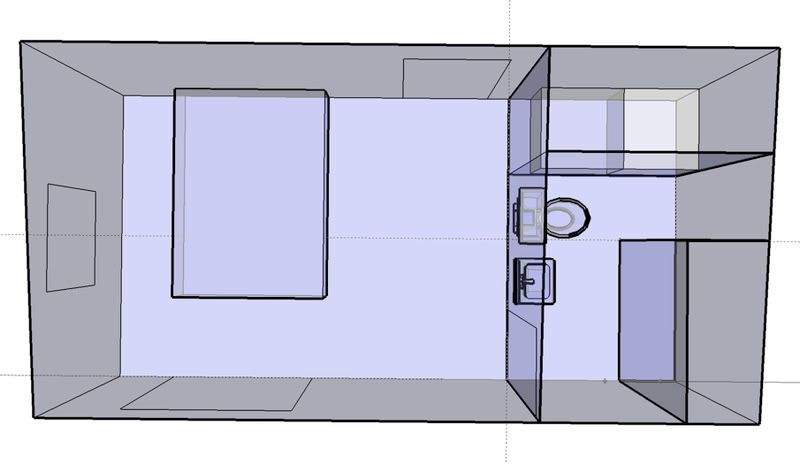
And here is the room with a 1/2 bath and non-walk in closet:

Right now it functions as a bedroom, laundry room, and dog sleeping room (it's divided by a huge ugly armoire.) We need it to function as all or most of those things in the remodel. Sadly, the pups can not sleep WITH us, due to allergies... and they are too young to be trusted not to chew themselves to sleep.
The laundry area is currently storing our family filing cabinet, a cabinet of house tools/paint/etc, linens, and dog things.
The other bedrooms in the house are 8'x10 and 10'x12', each with a closet taken out of that floorspace... basically anything we do to this new space is bigger than either other bedroom.
Thanks to all of your suggestions on the previous post... here are three possibilities. I added French doors at the bottom of each, but didn't work on placement at all, so it's sort of awkward in all of them.
Here is the room in our first configuration, with completely separated areas:

Pros:
Doggy space
Separate Laundry Area with room for cabinets and LOTS of storage
Direct access from the house to the driveway/trash can
Would be easy to build built in storage on either side of the bed (floor to ceiling)
Cons:
SMALL closet space (though bigger than what we are using now)
Smaller bedroom
Weird walls/dimensions
Here is the room with a walk in closet:

Walk in closet
Larger (10x15) Bedroom
Logical floorplan and layout
Cons:
No doggy space
No paint/tool space
No direct access to driveway/trashcans
And here is the room with a 1/2 bath and non-walk in closet:

After doing a little research, I though adding a half bath to the mix might not be a bad idea in our 1 bathroom house. Unfortunately, it would be a bit of work, as the wet wall is taken up by the laundry area right now. I don't think I have a good model for this, but I can't figure out how else to do it.
Pros:
Toilet in bedroom!
Larger (10x14) bedroom
Resale value from second bathroom
Cons:
No doggy space
No paint/tool storage
Small closet
Any ideas? Suggestions?
Pros:
Toilet in bedroom!
Larger (10x14) bedroom
Resale value from second bathroom
Cons:
No doggy space
No paint/tool storage
Small closet
Any ideas? Suggestions?
Friday, February 22, 2008
Second Verse, Same as the First... WAIT! WE DID IT!
Since our utter failure two weeks ago we been trying to reconcile ourselves to permanent life without a bathroom door. Sure it meant no visitors who weren't like family... but the thought of tackling the door was completely overwhelming.
Today I decided that I would try one more time. By myself.
It was very deja vu. I did the same things that we did last week as I attached yet another door jamb and chiseled new mortises. I won't bore you with the nitty gritty details, as they are already detailed in previous posts.
This time, though, I measured. I measured again. And, then... I measured one more time. I checked all of the plumb and squared lines.
I decided to leave the broken off screws in the studs and shift the door up the jamb a tiny bit to allow room for the new screw holes. I chose a bit 2 sizes bigger for my pilot holes to avoid the screws snapping off in installation... many thanks to The Handyguys for their diagnosis of the problem!
I carefully screwed the hinges into the stud and jamb, wedged a few shims under the extremely heavy door (...and no Karen, I still didn't get a weight on it. I'll have to forfeit on a technicality!) and slowly slid the door into position. This time, I managed to get the hinges in exactly the right place.
Here are a few pictures of the door. It's still missing the door stop, the knob, and is yet unfinished. (And don't mind the dirty laundry. I didn't see it until I looked at the pictures!)
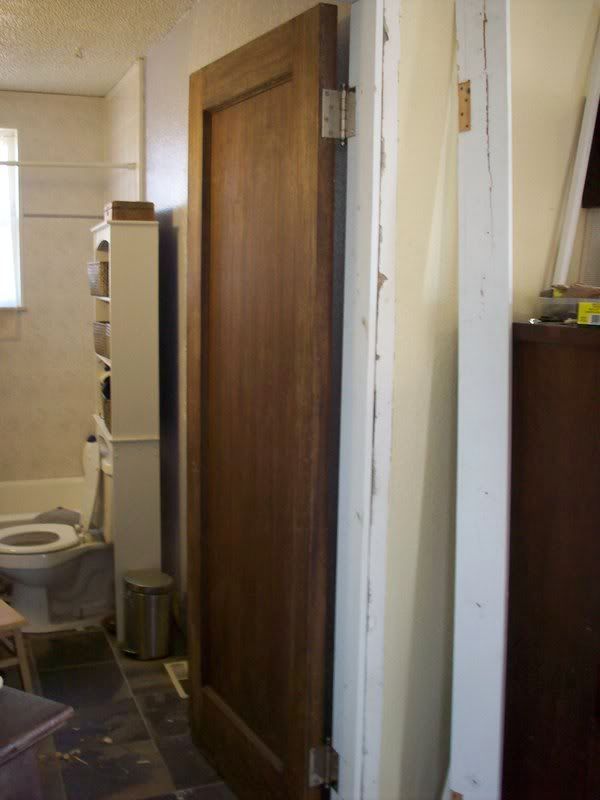
Looking in from the living room...
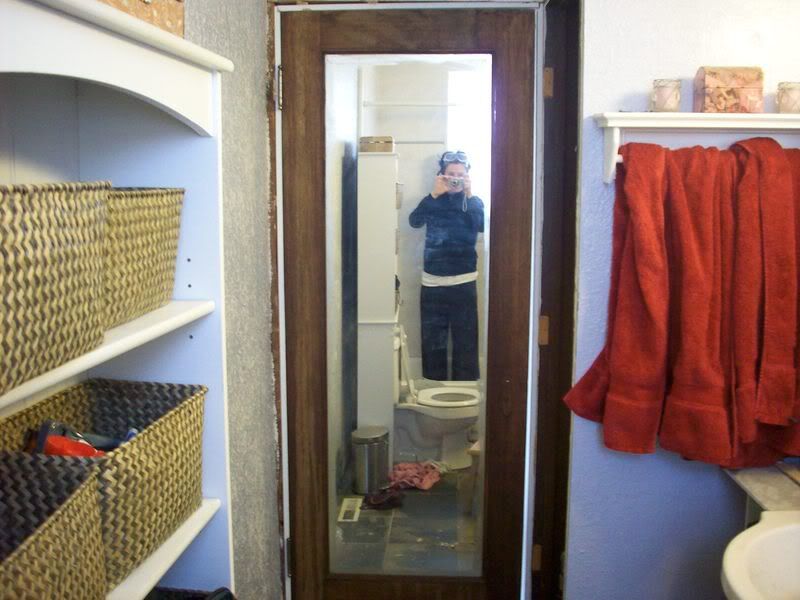
...and from inside the bathroom. Don't mind the dirty laundry!
I'll post finished pictures later!
For those of you who followed this, what a learning curve! I feel comfortable enough to tackle the rest of the doors in the house now. Don't be too afraid to tackle a non-prehung door... just measure. Over and over. And don't drill your pilot holes too small!
I'm Famous!
Ok, not really... but I've been interviewed! You can see the full interview here on One Project Closer. It's a pretty thorough synopsis of what our house IS and what we are hoping to do.
Thanks to Fred for giving me an opportunity to blabber even MORE about my house. I love my house. I could talk about it indefinitely.
House, house, house. House, house, house. Garden. House, house, house. Dogs, Dogs. House.
Also, take a moment to check out One Project Closer. You will find good observations from Fred, Ethan, and other commenters from a wide spectrum of DIYer's on various home improvement tools and materials, from CFL's to quality paints and used tools.
Now, off to scraping. Scraping, scraping, scraping along.
Wednesday, February 20, 2008
On Tulips and Buds
Yesterday was a glorious 57º outside. I grabbed the rake and set to work on the winter debris buried in our lawn. I was pleasantly surprised to see that our fall seeding worked! There were lots of little "grasslings" growing in the formerly bare spots.
I saw signs of spring everywhere...

Tulips emerging from the earth

Buds against a cold morning sky
Spring is coming!
I saw signs of spring everywhere...

Tulips emerging from the earth

Buds against a cold morning sky
Spring is coming!
Saturday, February 16, 2008
The Master Bed/Laundry Room Shell (AKA The Back Room)
I have been struggling with ideas for how to renovate our back room. It is a 10' by 20' room that was added on in the 1920's. It has a slanted roof, windows into the main house, and 2 HUGE windows. Oh, and peel and stick vinyl tiles.
When we moved in, we decided we would convert it into our master bedroom and laundry room. We moved the laundry out of the kitchen and into this room the first weekend. We moved a bed and a clothes rack in for the bedroom side.
And then we planned. And planned. And planned.
And three years later, we are still sleeping in the room. We added a freestanding closet to separate the laundry area and the sleeping area, but it is still open to the rest of the house.
I discovered Google SketchUp tonight, and drew a mock-up of our back room:
I added the washer and dryer (the two boxes), as they are likely NOT moving. The top of the picture is attached to the house, and the other walls are exterior.
We are definitely removing the two HUGE windows on the bottom of the pictures, along with the window into the guest room at the top left. We are putting in French doors on the bottom.
Nothing else is final.
The room is 20' by 10' and we need:
A bedroom
A closet
A laundry room
I'm trying some ideas out in SketchUp right now! Any ideas?
Friday, February 15, 2008
Wanton Waste and TV Home Improvement
No progress on the bathroom today; I am holed up in a hotel room on a business trip. We don't have TV at home, and I so am watching HGTV. I am watching people smash toilets, attack cabinets with sledgehammers, and otherwise destroy or trash perfectly usable items. It kind of makes me sick.
What have I seen destroyed in 1 hour of home improvement and decorating shows?
What have I seen destroyed in 1 hour of home improvement and decorating shows?
- A Yellow Toilet. Now, I know that yellow toilets are not the most popular decorating choice... but did they have to smash it? Surely someone could use it... even as a garden planter.
- A Blue Recliner. Perfectly usable, not stained. Admittedly very comfortable. Its only sin? Lack of fashion. Sentenced to the trashcan (instead of a local thrift store or freecycle). Hopefully someone rescued it.
- A HUGE Bathroom Mirror. Sure, small framed mirrors are the mainstay of modern decorating. Sure a big full wall mirror is outdated. However, it is so USEFUL. You could cut it down into smaller mirrors and frame those... or you could find a home for it with someone who needs a big mirror, like a musician, music school, or dancer. Why did you need to smash it with a sledgehammer?
- A Full Kitchen of 50's Wooden Cabinets. Again, again. Someone could use them, even if just as garage cabinets. I know I could! And, I'm sure there are lots of you LOOKING for a matching cabinet or two for your 50's ranch restoration. No need to smash them.
Wednesday, February 13, 2008
Scraping, Scraping, Scraping Along!
We have taken a break from door hanging and utter failure, as it takes two to move that door. We won't be in the house at the same time together until Monday. Look for an update on Tuesday on that.
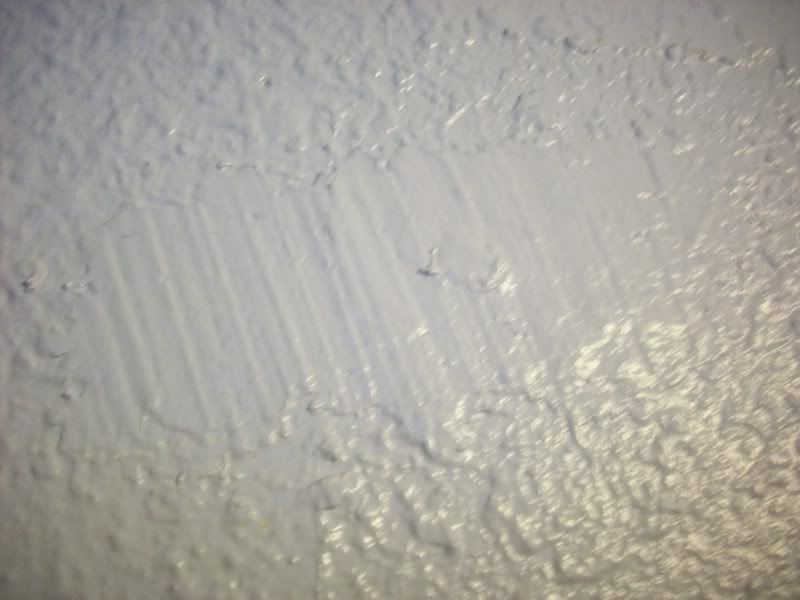
Today I worked on another part of the bathroom: the walls.
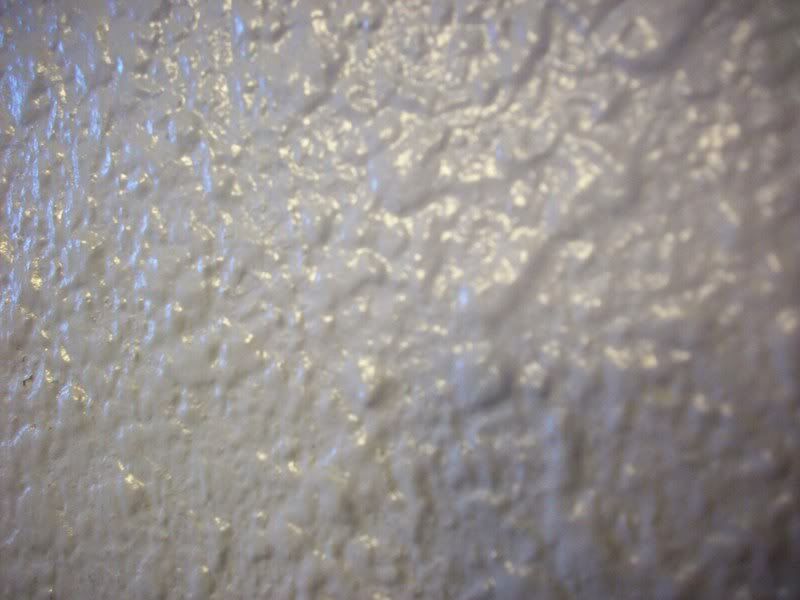
Here is the lovely textured and badly patched walls*:
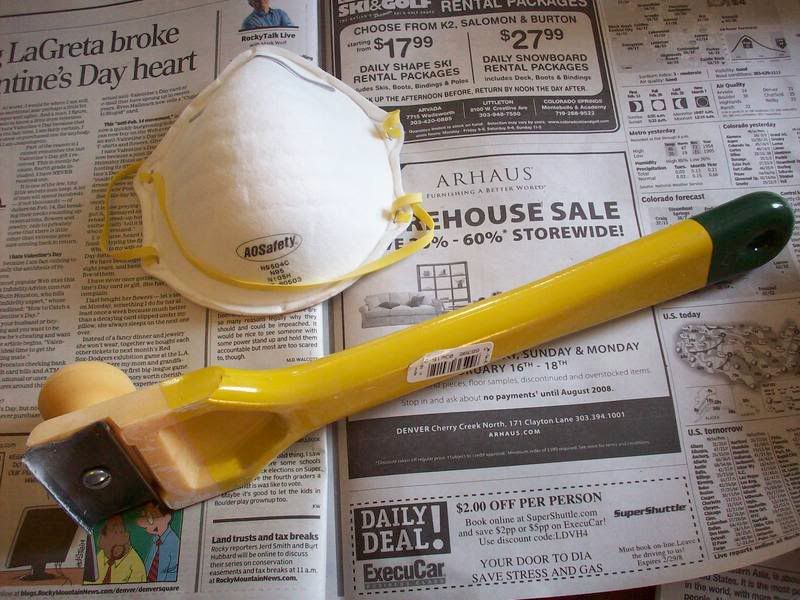
Using THESE...
Today I worked on another part of the bathroom: the walls.
Here is the lovely textured and badly patched walls*:


Using THESE...

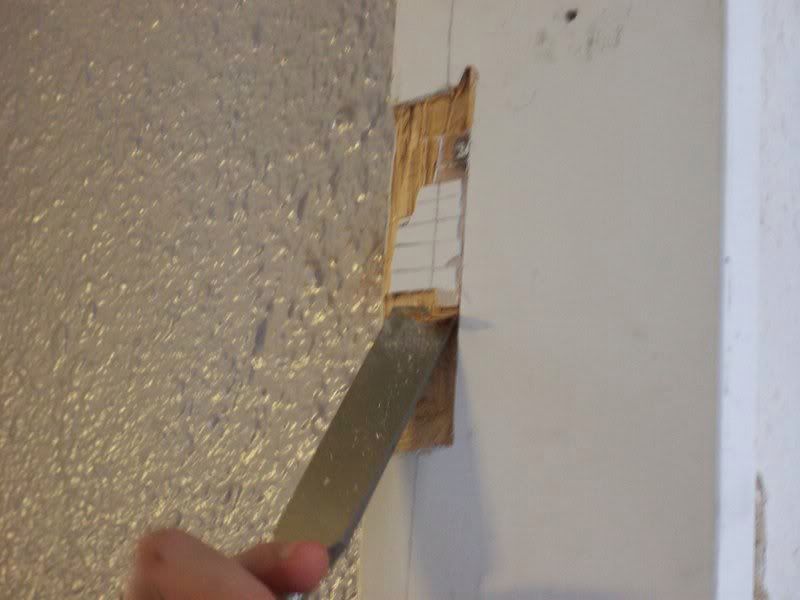
...a safety mask and a scraper (with a very sharp blade) that I got from Habitat for $1 (yeah Habitat), I started to scrape off most of the texture.
Scrape, scrape, scrape.
It's very messy and dusty work*. I lined the edges of my walls with newspapers to catch the droppings.
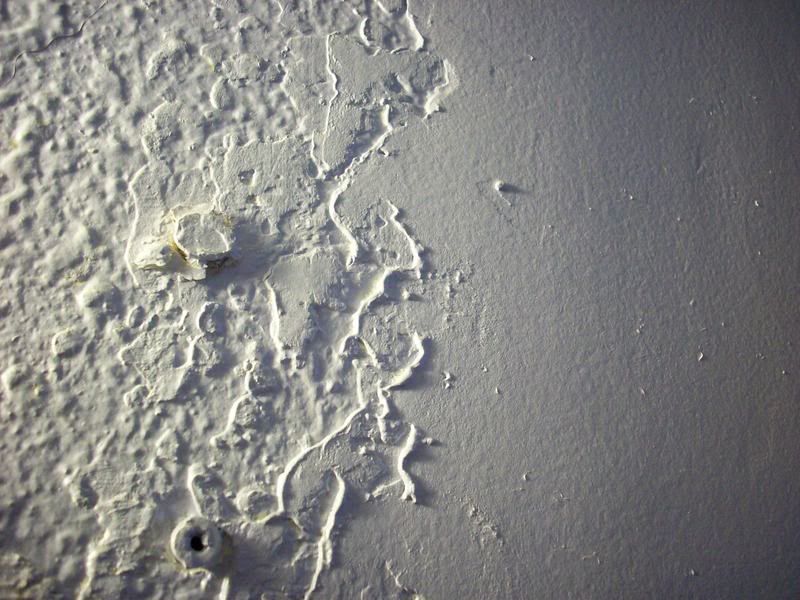
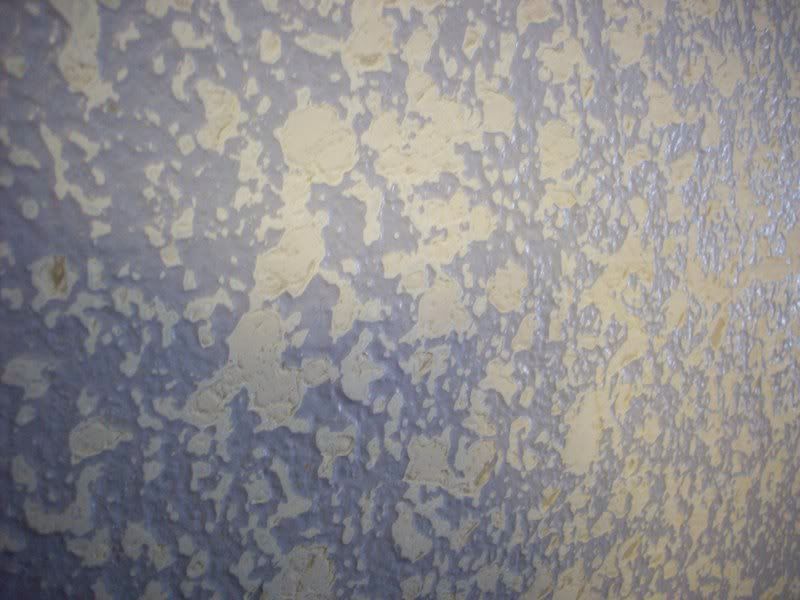
Here is how far I got today:
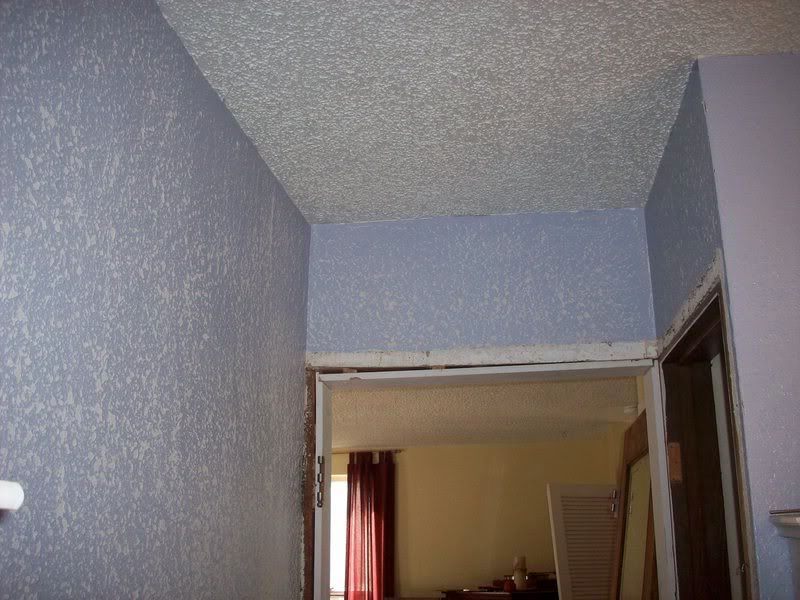
A closer look:
2 more walls to go, and then onto sanding, mudding, and repainting.
Maybe if I pretend it's normal to not have a door on a bathroom, I can avoid dealing with the utter failure, too. Think it will work?
* Note... this is new drywall installed 4 years ago with only two layers of new paint on it (plus the nasty texture). If I was doing this to one of the much older walls in my house (which I will likely do if this turns out well), I would use a ventilator to avoid breathing in lead dust from the lead paint.
Scrape, scrape, scrape.
It's very messy and dusty work*. I lined the edges of my walls with newspapers to catch the droppings.
Here is how far I got today:

A closer look:

2 more walls to go, and then onto sanding, mudding, and repainting.
Maybe if I pretend it's normal to not have a door on a bathroom, I can avoid dealing with the utter failure, too. Think it will work?
* Note... this is new drywall installed 4 years ago with only two layers of new paint on it (plus the nasty texture). If I was doing this to one of the much older walls in my house (which I will likely do if this turns out well), I would use a ventilator to avoid breathing in lead dust from the lead paint.
Saturday, February 9, 2008
Utter Failure (help?)
As I promised here and here, there was utter failure in door hanging at our house last weekend. Here's the nitty gritty, and what you can learn from us!
Level and plumb your jambs INCLUDING the header before you nail it into the wall. If you don't, your work is futile.
We didn't. Well, I thought I remembered doing it, but it was VERY obvious that we did NOT plumb or level the jamb. We hauled our 50 or 60 lb door (sorry Karen of Delano Bungalow... we don't know if it rivals yours as neither of us could hold it by ourselves!) into position, using shims to brace it up off the floor. Then, we noticed that the jamb was NO WHERE near square. Sigh.
We pried off the door jamb, and made sure it was square with itself and plumb. We discovered that the finish nails we used did not want to come out of our steel-like 100 year old wood studs, and came up with this ingenious solution:
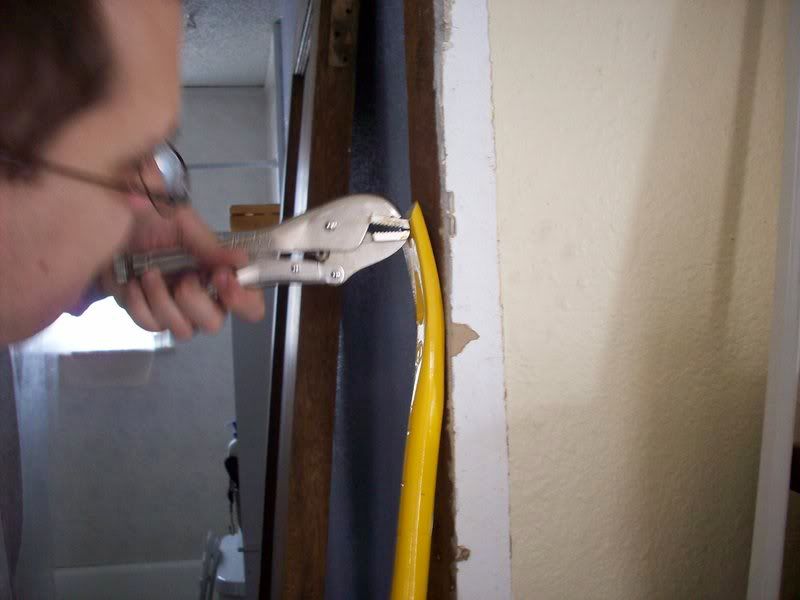
Vise grips holding the nail head, with a crowbar doing the prying using the vise grips as a de facto head.
We discovered that our wall is actually no where near plumb, which is what caused us to hang our jamb off of plumb. I would say it's about 5º off.
We used shims to set the jamb in a square and plumb fashion,
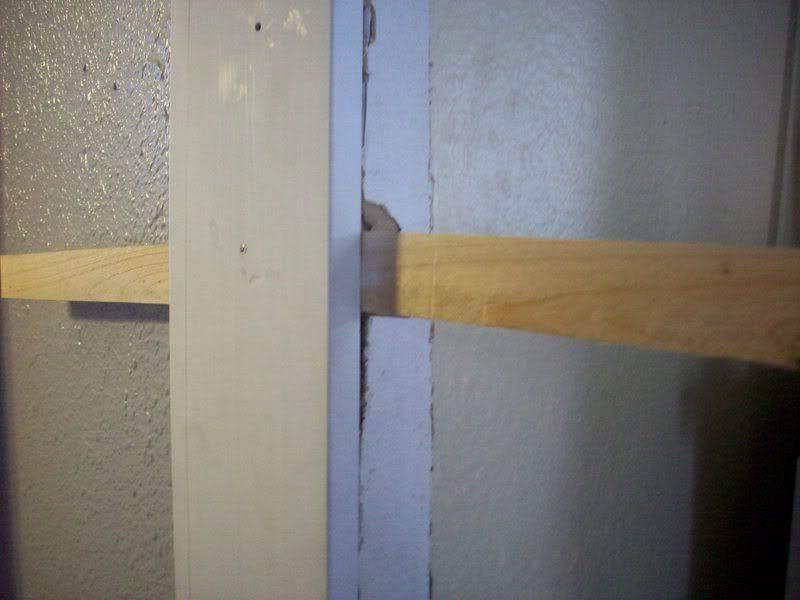
making sure to use two shims each time for stability.
The jamb is now square and plumb... but it sticks out over the drywall in places and doesn't cover the stud in others. It's essentially at a diagonal to the stud. I don't know if this is OK at all... but we decided to go ahead.
Measure twice, measure again, and THEN cut. Then, measure again. It might have moved.
We measured once. We are sorry excuses for home improvers. We measured the distances for our mortises onto the jambs once, and then set at it with chisels. We chipped out perfect mortises, screwed our jamb side hinges in, and proceeded to attempt door installation.
It didn't fit. The bottom hinge was approximately 1/8 inch too low. Back to the drawing (measuring) board.
Buy good screws... NOT the cheap zinc ones.
We used wood screws we had lying around. They were zinc screws, 2-1/2 inches long. They seemed perfect for screwing the hinges into the jamb and stud.
They were not.
We discovered the jamb hinges were too far apart after many attempts at sliding it in. We did rest the entire weight of the door on the bottom hinge at one point. When we gave up and started to remove the bottom hinge to move it, we were dismayed to find that the screws had snapped off. Only the heads and about 1/4 inch could be removed from the walls. Panic set in...
We went to a big box store and broke our pledge by buying a hole saw. The new plan is to remove the screws in 3/4 inch plugs, and then fill in the holes in the studs with 3/4 inch hardwood dowel. See any problems with this?
Can you help me?
1) Should we hang the door jamb as planned, 5º off of the rest of the wall?
2) Should we remove the 2 snapped off screws using the hole saw and plugged with dowel, or is there a better way?
3) What screws should we use that will support this huge heavy door? I don't trust the zinc wood screws since they already snapped off.
Friday, February 8, 2008
Cutting the Bottoms Off Doors (Postponement of Utter Failure)
I know I promised utter failure as my next post... it's coming. I forgot that I hadn't yet shown off my utter success in door trimming!
You say your door is too tall for your door space now that you have put down slate tile? Here's how to fix this in 15 minutes or less.
Needed:
Painter's Tape, 2 inches wide
Circular Saw with a sharp blade
Straight Edge
Tape Measure
First, measure the door jamb to determine the proper height. You want at least 1/4 inch of difference between the door and the frame/jamb heights... we went with 1/2 inch due to our uneven natural stone flooring.
Place tape around the door bottom where you want to trim it, covering both top and bottom as well as the sides. (Always trim a door up from the bottom). Measure, and use a straight edge to draw your cutting line.
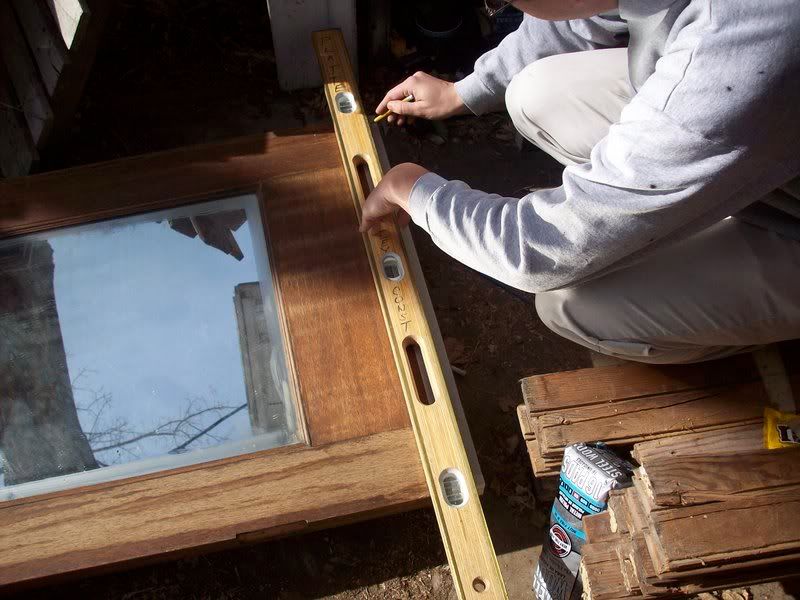
We always use our level as our straight edge. It's the straightest thing around!
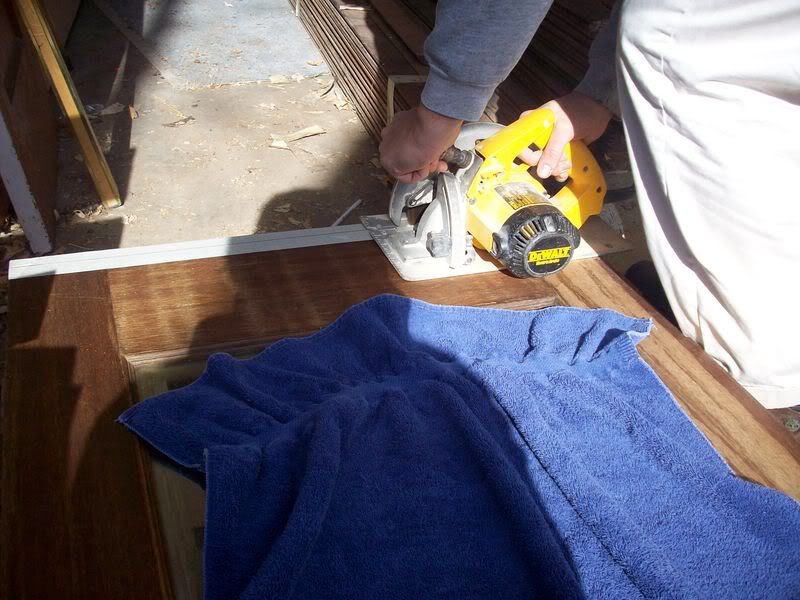
Carefully line up your circular saw on the cut line, with the blade going into the door about 55%. Cut along line (turn off saw) and flip the door. Carefully cut on the other side to complete the cut.
If you did not line your lines up perfectly on each side, there will be a small lip or ledge on the bottom at the juncture of the two cuts. Use a belt sander to even the bottom of the door. We managed to line it up perfectly, and did not need to sand it down.
After you have made your cuts, take sandpaper to the door bottom to smooth your work. Sand lightly on the edges of your cut to round them naturally and to help them blend in with the rest of the 70 year old door. You will want to do this BEFORE finishing the door, if it is not yet finished.
You say your door is too tall for your door space now that you have put down slate tile? Here's how to fix this in 15 minutes or less.
Needed:
Painter's Tape, 2 inches wide
Circular Saw with a sharp blade
Straight Edge
Tape Measure
First, measure the door jamb to determine the proper height. You want at least 1/4 inch of difference between the door and the frame/jamb heights... we went with 1/2 inch due to our uneven natural stone flooring.
Place tape around the door bottom where you want to trim it, covering both top and bottom as well as the sides. (Always trim a door up from the bottom). Measure, and use a straight edge to draw your cutting line.

We always use our level as our straight edge. It's the straightest thing around!
Carefully line up your circular saw on the cut line, with the blade going into the door about 55%. Cut along line (turn off saw) and flip the door. Carefully cut on the other side to complete the cut.

If you did not line your lines up perfectly on each side, there will be a small lip or ledge on the bottom at the juncture of the two cuts. Use a belt sander to even the bottom of the door. We managed to line it up perfectly, and did not need to sand it down.
- WHY? Why cut both sides separately, instead of just cutting through the whole door in one pass?
- Splinters. You might get away with that in a new door, or in a solid door, but ours is a laminated mahogany. The blade tearing through the veneer from the back would likely splinter and dislodge the mahogany... which is not something we wanted to happen.
After you have made your cuts, take sandpaper to the door bottom to smooth your work. Sand lightly on the edges of your cut to round them naturally and to help them blend in with the rest of the 70 year old door. You will want to do this BEFORE finishing the door, if it is not yet finished.
Thursday, February 7, 2008
Cutting Mortises in Door Jambs
We are going slightly out of order here... here is our experience in door jamb mortise cutting.
To cut the mortises you will need a few things:
A Hammer
A Chisel the same width as your hinge
Remember... measure twice, cut once. Oh, yes... and measure again... and throw something at the wall because your hinges moved on you after you cut the mortise. That MUST be it.
First, score the edges of your mortise:
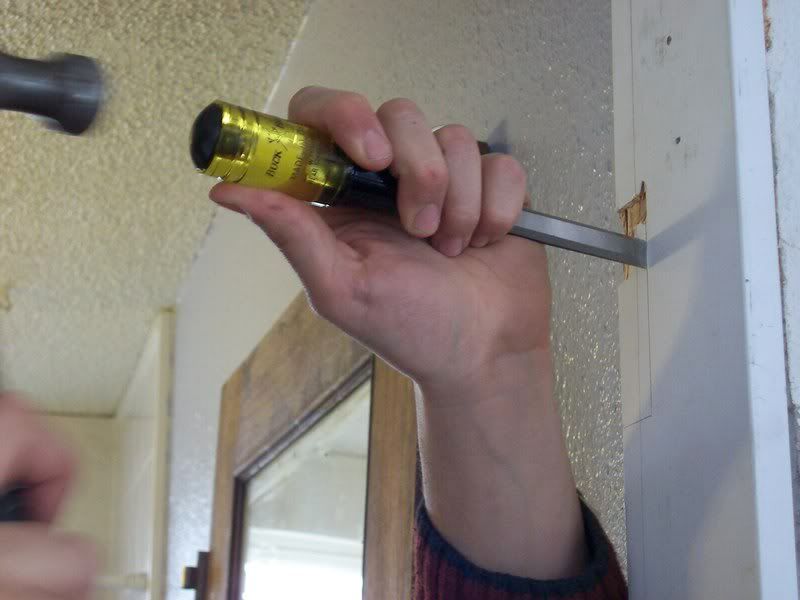
Then, chisel lines across the mortise using a chisel the same width as the mortise. Make the lines about 1/8 inch apart.
Finally, take the chisel, bevel side down, and gently tap up through your lines. They should come up quite easily.
As you can see from the picture, this was NOT what we tried first... we don't recommend simply whacking at the jamb with the hammer and chisel. (The chip at the top of the mortise is from THAT method.) The method we depicted DOES work, however, and gives you nice flat and smooth mortises.
Next.... UTTER FAILURE in door hanging. Stay tuned.
To cut the mortises you will need a few things:
A Hammer
A Chisel the same width as your hinge
Remember... measure twice, cut once. Oh, yes... and measure again... and throw something at the wall because your hinges moved on you after you cut the mortise. That MUST be it.
First, score the edges of your mortise:

Then, chisel lines across the mortise using a chisel the same width as the mortise. Make the lines about 1/8 inch apart.

Finally, take the chisel, bevel side down, and gently tap up through your lines. They should come up quite easily.
As you can see from the picture, this was NOT what we tried first... we don't recommend simply whacking at the jamb with the hammer and chisel. (The chip at the top of the mortise is from THAT method.) The method we depicted DOES work, however, and gives you nice flat and smooth mortises.
Next.... UTTER FAILURE in door hanging. Stay tuned.
Monday, February 4, 2008
Sparkly Door Hinges and Steel Wool
This is a hinge from my mahogany doors:
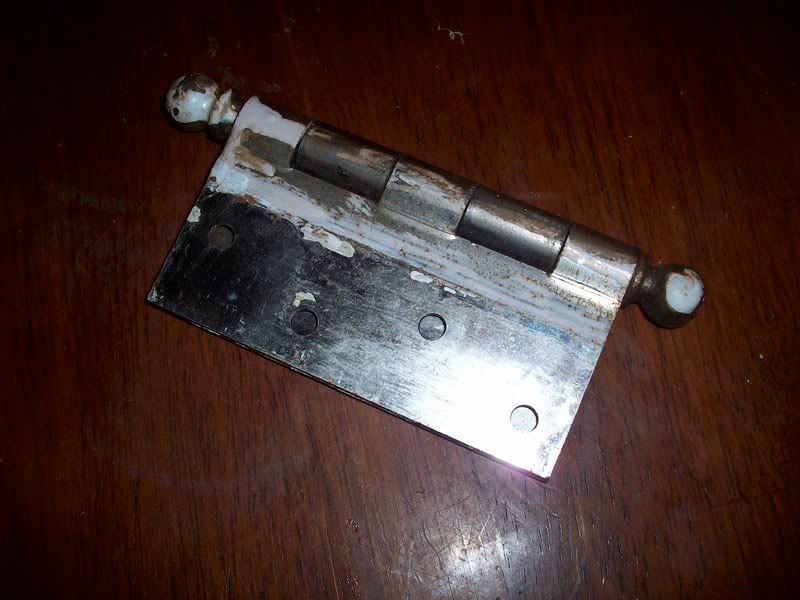
It has a small amount of white paint on it, and is lightly rusted on the exposed parts due to its brief stay out in the elements at the salvage store.
These are the hinges after chipping the paint off with a screwdriver and thoroughly polishing them with WD-40 and 00 steel wool:
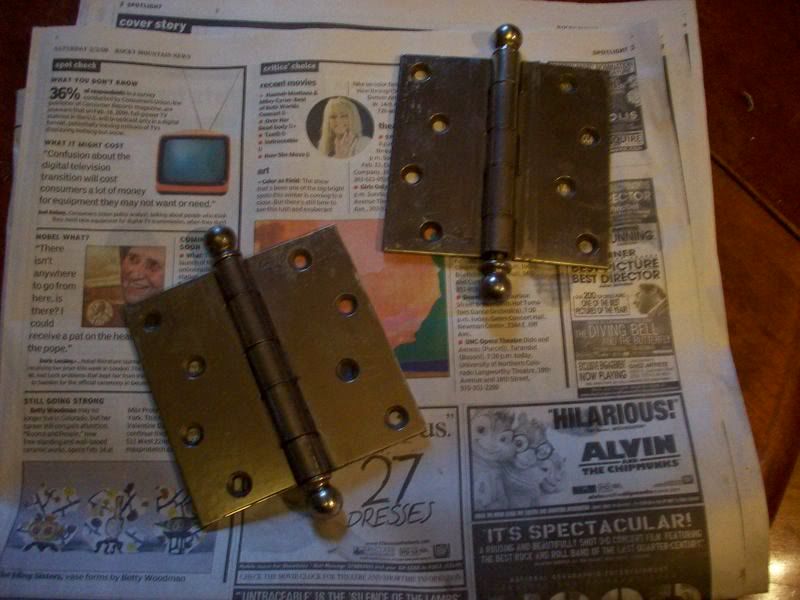
The WD-40 and steel wool did a marvelous job of gently removing the surface rust. It took about 5 minutes of careful polishing and scrubbing on each hinge to remove the rust.
Next up: An attempted door installation
Sunday, February 3, 2008
A Fence Gate
Last summer, we put up a fence. Today, we installed the thing that holds the double wide gate closed. It takes us a while to finish projects around here- it took us 6 months to complete a task that took us 10 minutes when we actually sat down to do it.
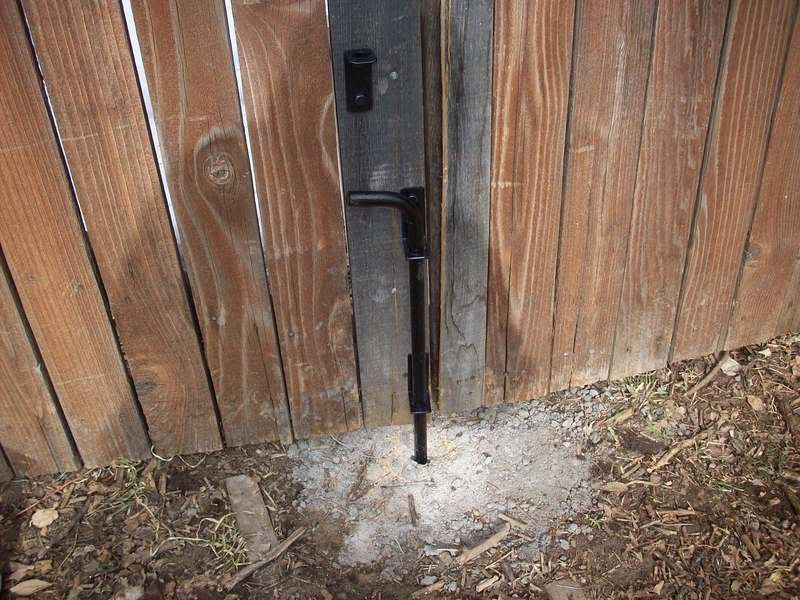

We had previously drilled the hole in the cement with a hammer drill and a 1 inch masonry drill bit. Today, we installed the post and brackets. First, we installed the top bracket, which is what will hold the post up to allow the gate to swing. Then, we carefully balanced the post on the top bracket, lined it up with the hole, and slid the other two brackets into place to mark their position.
Cost: $12 (6 months ago... this doesn't count in my February challenge)
Cost: $12 (6 months ago... this doesn't count in my February challenge)
Subscribe to:
Comments (Atom)