First, I had to uninstall EVERYTHING. Everything includes the sink and toilet and baseboard. This is the ONLY bathroom in the house... what was I THINKING?

Our new kitchen chair
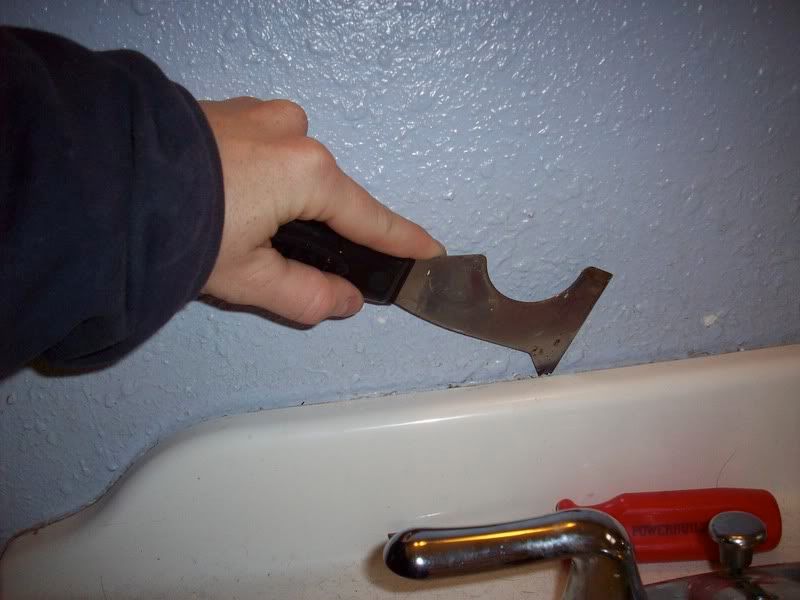
Removing the sink
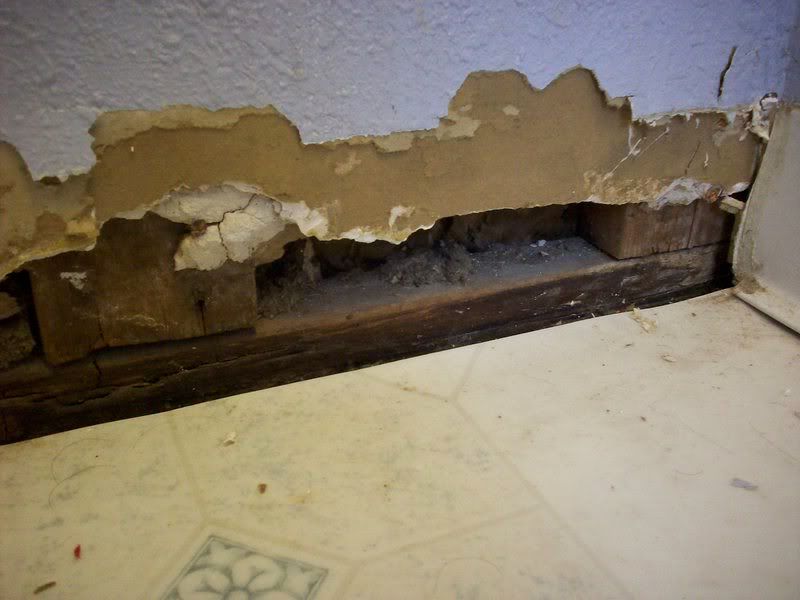
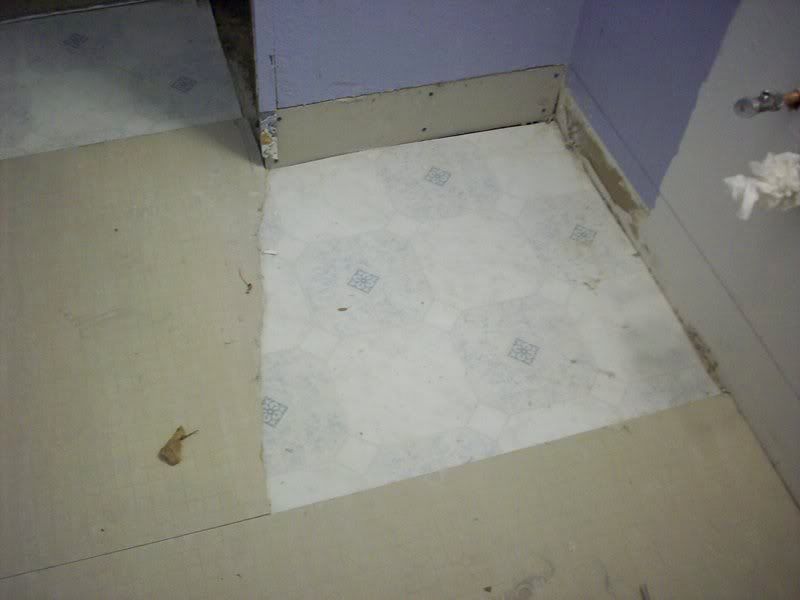
This is what the walls look like underneath the baseboards.
First, we cut out the drywall six inches from the floor to accommodate the new cement board. I discovered an old mouse nest, complete with book order forms from the 1980's, a business card for a plumber, and the original floor to the next room, hidden under plywood and carpet.
Then, we cut the HardieBacker into 6 inch strips.
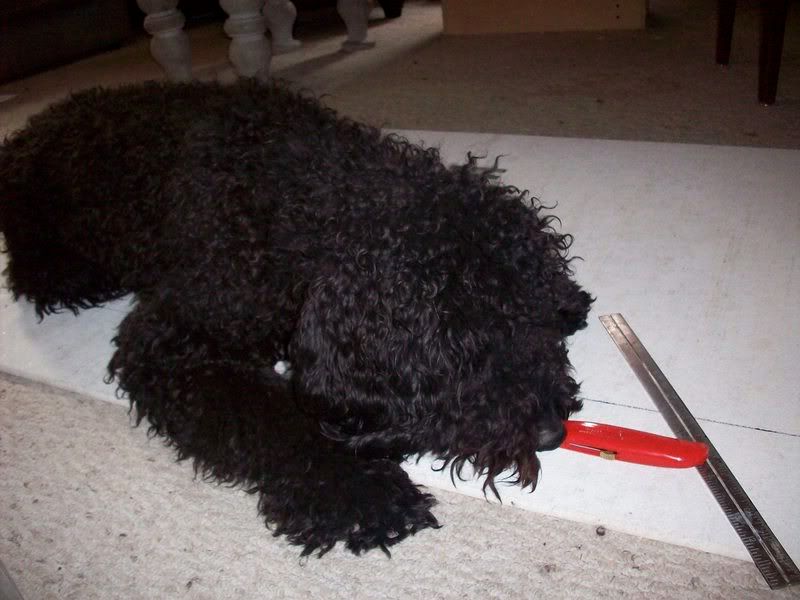
Kirby helped cut with the utility knife
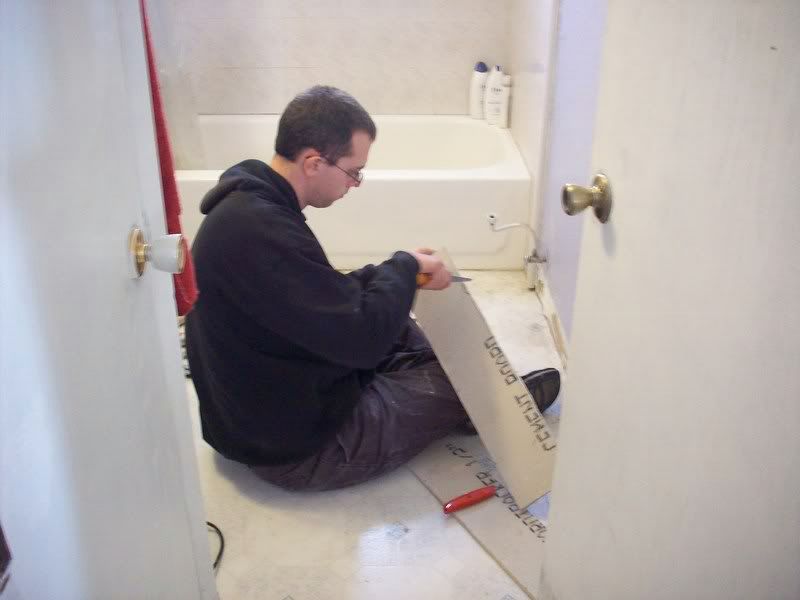
After cutting and dry-laying everything, we spread thinset with a 1/4 trowel, laid the HardieBacker on top, and then screwed it down every 4 inches or so, according to the directions. I'm reading directions more carefully these days.
We then replaced the toilet, flushed it, and... WAIT! There's water EVERYWHERE!
After a quick last minute trip to Home Depot 5 minutes before closing for a new wax ring, we have a working toilet!
The (somewhat) finished product...

Tips and Hints:
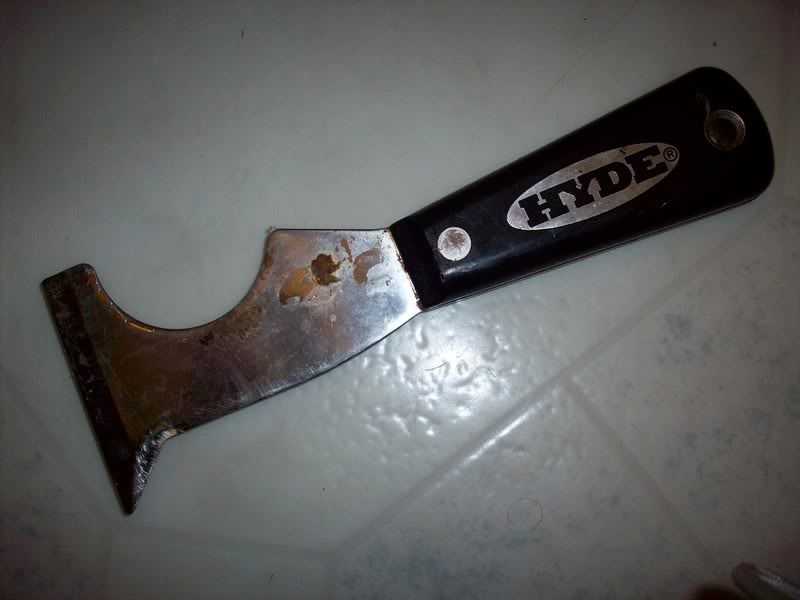 This is the best tool. It does EVERYTHING! I used it to scrape caulk.
- Don't cut the hardiebacker inside. The dust is caustic. It HURTS!
- When a screw doesn't "screw", don't keep trying and strip the ONLY drill bit you have that fits those screws, forcing yet another trip to Home Depot.
 Don't force the HardieBacker into any tight spots. It will break. You will cry, since it is $10 a sheet. Then, you will pretend you never broke it, and lay it down anyway.
- Always replace the wax ring on a toilet whenever you mess with the floor height. Even if it is only 1/4 inch!
- Hardibacker- Freecycle and Lowes
- Thinset- All About Floors (a local tile shop)
- Diamond blade- Lowes
- Wax toilet ring and drill bits- Home Depot
- HardiBacker- $20
- Thinset- $18
- Diamond Blade- $5
- Wax Ring- $5
- Drill Bits- $2
4 comments:
at least you tested the toilet before using it...
i had a neighbor call me over because the toilet leaked after re-installing it. they hadn't done a test flush, before utilizing it for all it's worth.
one look at the mess and i walked out, glad it wasn't in my home : )
your house is coming along great! i can't wait to replace the peeling 80s vinyl flooring in our bathroom and kitchen...
True... I'm a worst-case scenario waiting to happen, so I ALWAYS test my work! I'm always afraid to turn the power back on after work, too... :)
We are truly enjoying wiping out the characterless builder's special vinyl the previous owners installed! Give me character of any sort!
Great job!!
We discovered the need for a new wax ring the hard way too.. acutally I think there was another flange that we needed to raise it up even more because we put down a floating floor in our downstairs half bath.
I'm sure hoping we can get away without a different flange... the measurements say we can, but I'm not holding my breath! The slate is pretty thick.
Post a Comment